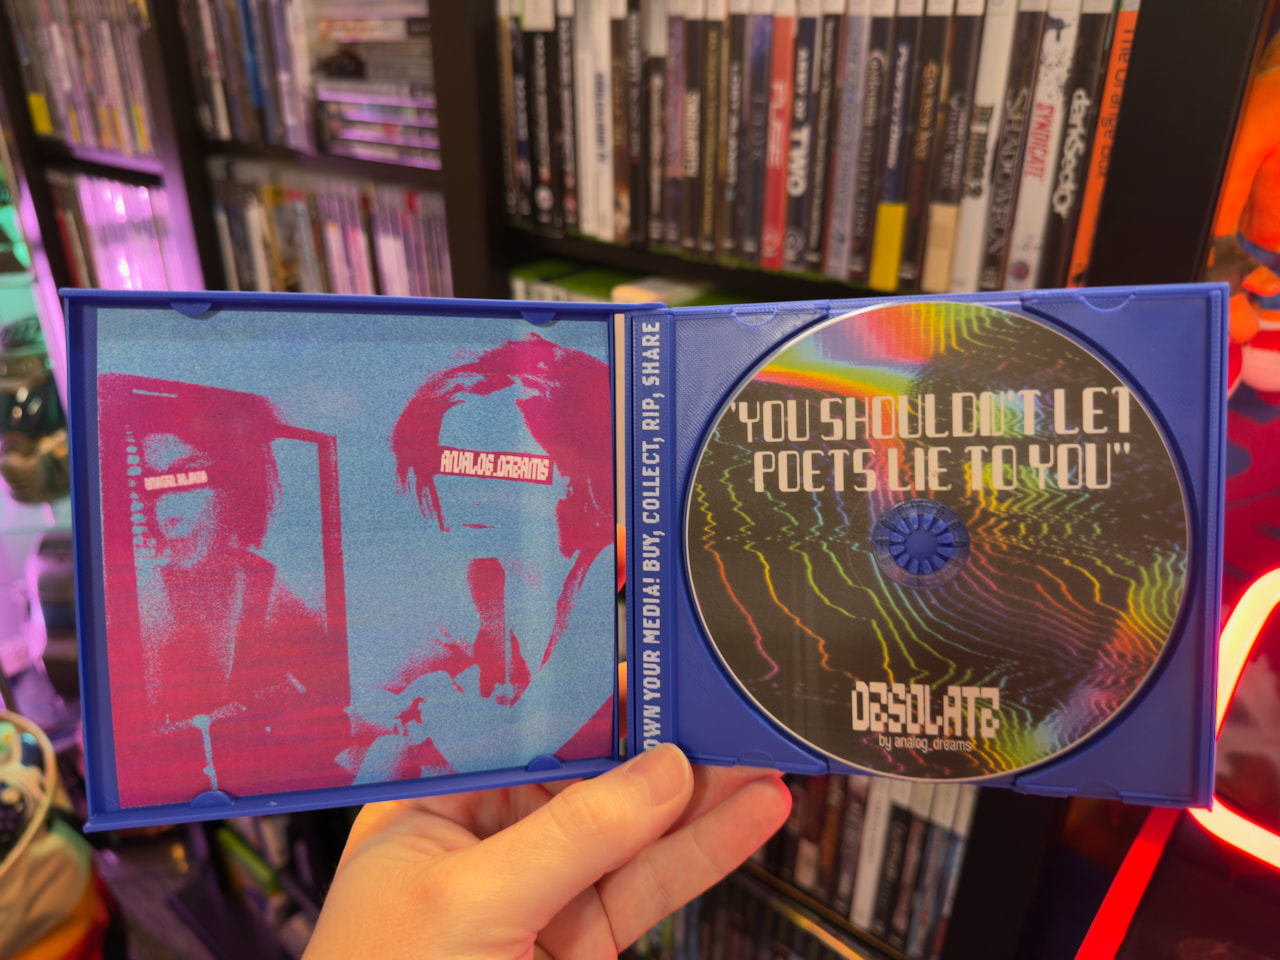
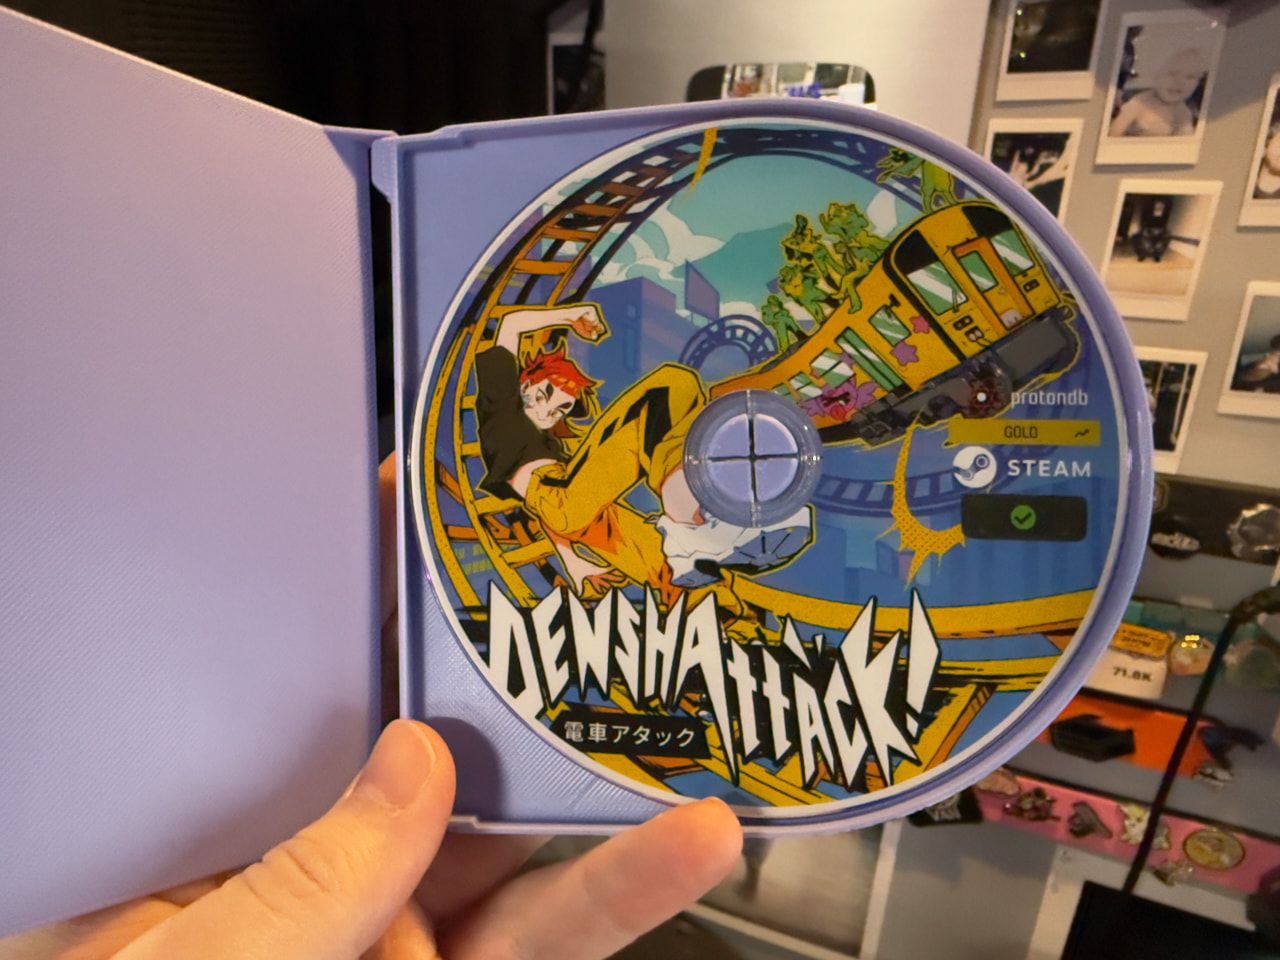
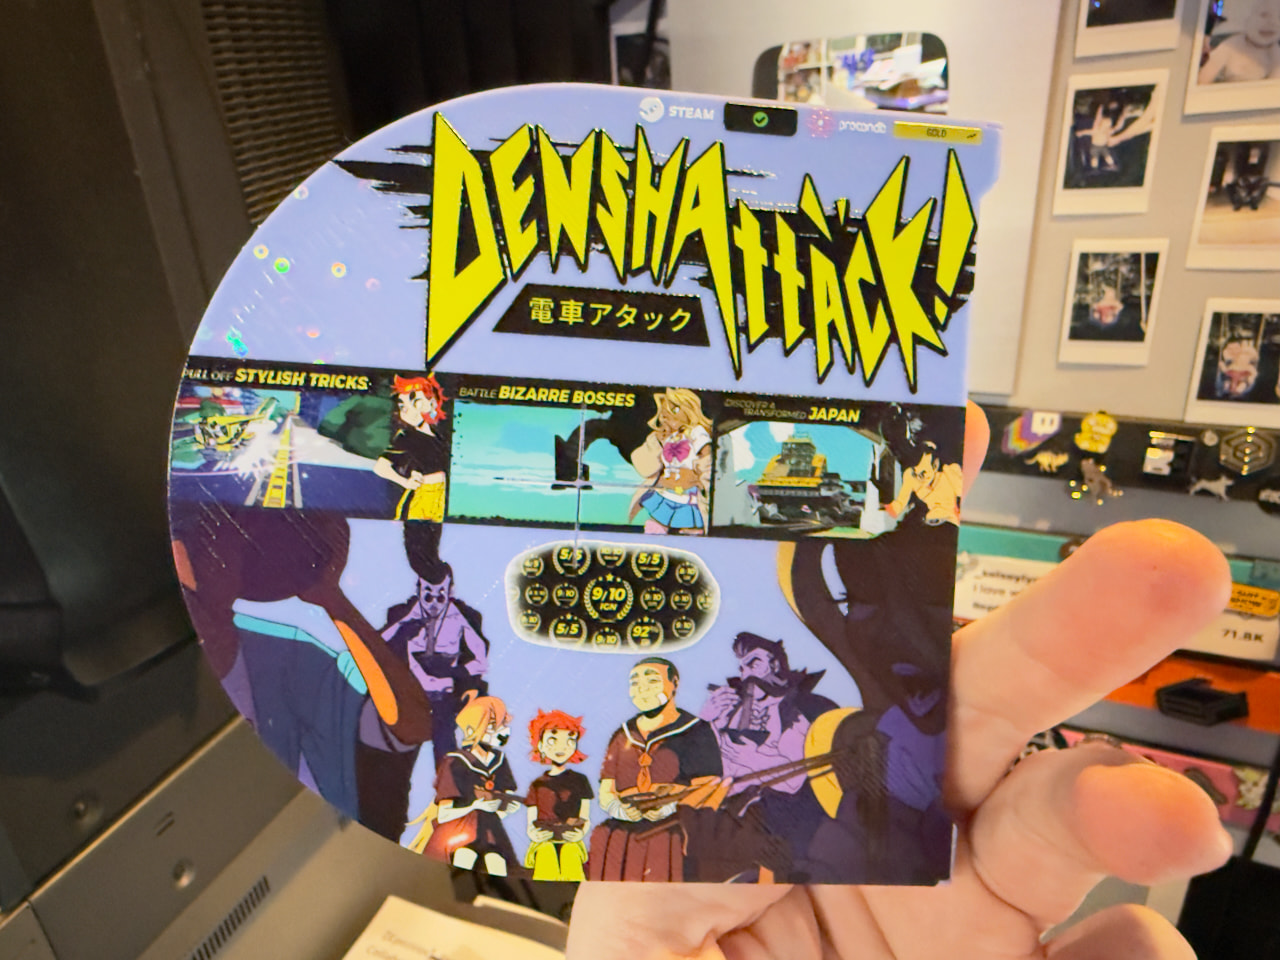
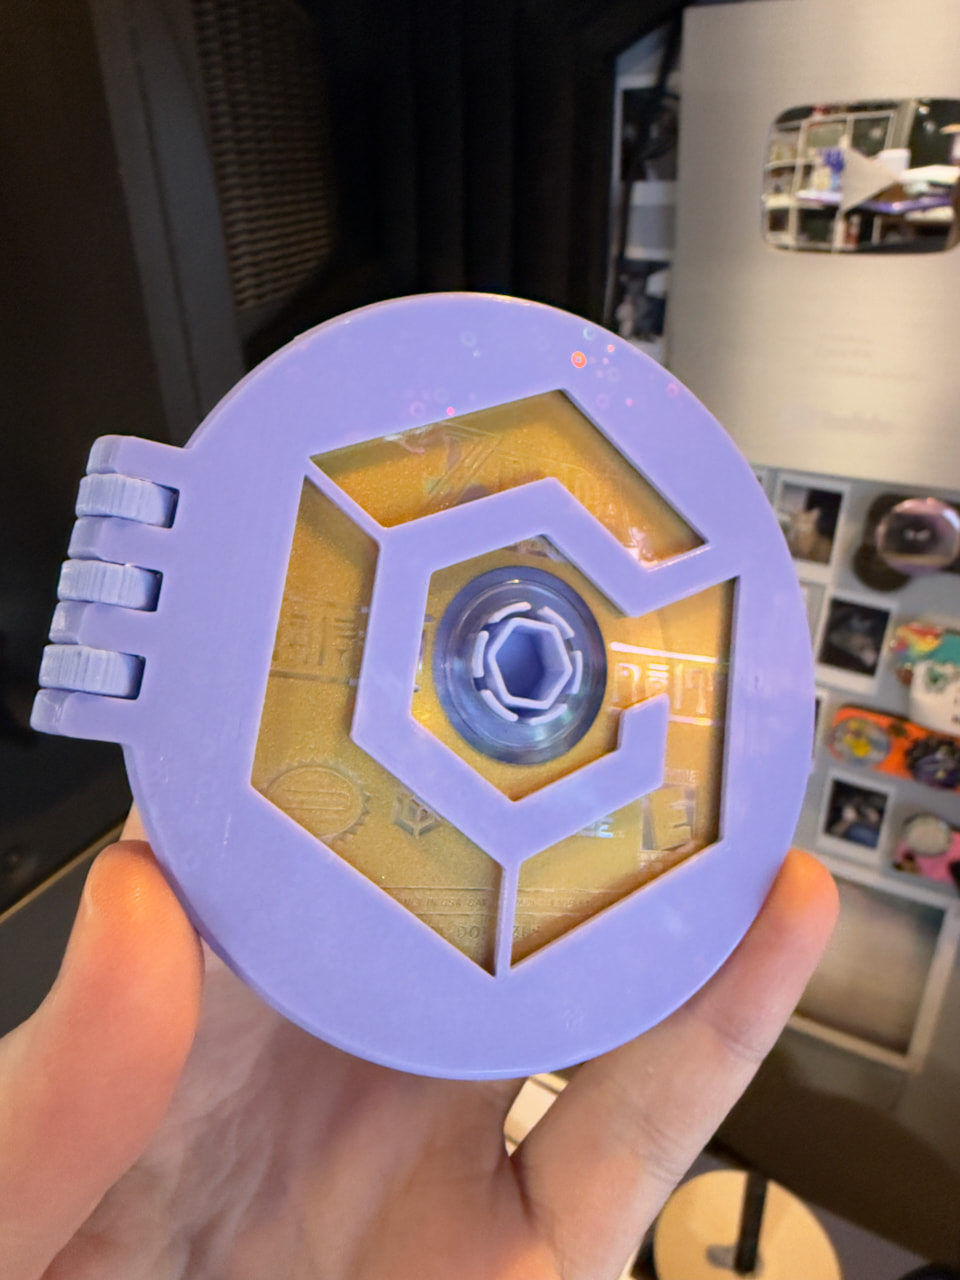
DIY Physical Media Guide - Make Your OWN Copies of Games!

Table of Contents

TABLE OF CONTENTS

It’s time, time at last!

INTRODUCTION

[This is going to turn into a video, but I felt it needed to be a written guide first, as the video will not be able to contain every tiny detail… As always you can support me by purchasing from my shop or subscribing on Floatplane or Patreon.]

I love physical media. I always have. Whether I was recording songs off the radio to cassette, trading mix CDs with my friends, recording TV shows to VHS, or burning bootleg copies of games to save on precious hard drive space – it’s just always been a big deal for me.

But sadly, most of the games I want to play don’t come on any sort of physical media most the time. My favorite games I’ve played so far this year include Don’t Stop, Girlypop!, The Lord of the Rings: War in the North Legacy Edition, Denshattack!, Anode Heart, CICADAMATA and VHOLUME – and not a single one of those has a physical release. With Luna Abyss, I could at least buy the PlayStation 5 version if I wanted to have a physical release – but on PC, we haven’t had actual game discs shipping even in physical copies of games for a decade now.

There are many ways to build a deeper connection with digital-only games that don’t require pulling a case off your shelf – I’ll talk about them more in future videos and we’ve been discussing them on the forums – but it’s hard to argue with the inherently easy path to that connection by having a curated set of games on your shelf. I just purged about half of my game collection of stuff that I’m simply not playing and don’t want anymore, and that leaves me room to start showcasing games I do love.

Beyond manifesting digital-only works, making your own games can serve as backups to preserve the things you paid for, tidy up your older broken cases, and help you save money over more expensive releases that people tend to scalp these days.

Plus, it’s just important to me to keep physical media alive. The more we keep up demand for discs and burners and so on, the more we can ensure keep getting made for us to use in the future. If we stop using them, factories stop making them!

Here I’m going to cover some ways I make my own physical media. This will sort of be a guide, sort of be just a project detail, and sort of just be a showcase of the work I can do both for myself and any indie devs who might want to do some smaller-run physical releases of their games for fans and can’t swing for the big publishers.

I say it’s only going to sort of be a guide, because the exact steps and tools you use will depend entirely on what you have available to you. The principles here also apply outside of gaming, as I frequently make physical media for music, movies, or print works, too – but for the sake of this post (and for the lost saves video accompanying it) I’ll focus on just making games.

To walk you through my processes, I’ll show you the steps I took as I create three different physical copies of digital-only games, using different games, mediums, and tools. As a note: I will be showcasing some pretty fancy, high-end tools that I use in some cases – things I’ve just kind of acquired or prioritized as an artist and maker – but you do not need the fanciest tools here. I will have notes for alternatives and why I go the path that I do as we go. As much as this is a guide, it’s also just something to help you generate ideas. If you see something you want to do, instead of being mad about the tool used by me, think about ways you can do it with different tools! That’s creativity, baby.

Also, this isn’t going to be a fast or free process. These things involve a lot of waiting, and materials aren’t free. But you can save costs by using a library or print shop printer instead of buying one, among other things I’ll discuss as we go.

[Disclosure: Some links to things will include Amazon affiliate links that give a small kickback to me at no additional cost to you. Please shop anywhere else other than Amazon if you can, however.]

Hire Me (No, really)

Before I get to the educational stuff, I want to self-promo for a minute. This is all on the back of me spending a few years diving deep into the weeds of making physical media. Zines, pins, prints, discs, and just generally making things.

You might have heard that I recently launched a physical-only gaming magazine. Part of the initiative I want to push with it is getting a recurring demo disc with the magazine. But that’s not enough.

There’s countless indie games out there that will never see a physical release, despite deserving to be in players’ hands. There’s something so valuable in the real, tangible, physical object in your hands. I personally think we need a punk media scene to come back with everyone passing around flash drives and Sharpie’d DVDs of their favorite game demos and such, but DRM makes that difficult and oppressive copyright law makes people afraid to talk about it online.

Your game deserves to be in someone’s hands. Whether it’s just a Sharpie’d CD in a sleeve, a quick flash drive in a box, or a polished physical production like I demonstrate in this thread, it deserves to happen. And you don’t need a big marketing budget to make that happen.

It’s cool to see indie games that eventually get a physical release via Lost In Cult or LimitedRunGames – and Lost In Cult’s “EDITIONS” are truly incredible stuff, like the Criteria Collection for games – but not every developer can have that. Let’s partner up to get something out there appropriate to the scale of your game.

For this, I’m launching a spinoff of the JAMPACK’d Magazine brand, PACK’d-IN Publishing. I can work with you to get some limited physical releases done for your game – either DIY directly from me for super small runs or occasional orders, or through bulk suppliers for bigger expected runs.

Every indie game I’ve played this year could fit on a DVD and most of them could fit on a CD. Itch.io “demo disc” scene: Let’s make it an actual demo disc! Heck, we could probably get a game jam going to fit games on floppy disks, but that’s a whole separate idea…

I had a special page for this initiative put up here:

But you can just reach out to me at jampackd@proton.me and get the conversation going! I’d love to include your games or demos on the recurring PACK’d-IN disc with future issues of JAMPACK’d Magazine, too!

As usual, I cannot just do anything and keep it to myself. There’s no gatekeeping here. So while I’d like to help indie devs get their physical games out there (leveraging my tools and skills) I also believe in open information, so I’m just spilling all the secrets here in this guide!

[As a side note, if you wanted to just hire me to make your physical copy of the game as a one-off for you, that could be arranged as well. I cannot burn the game to disc for you, as that’s a legal nightmare, but it’s slightly more permissible for me to print everything and you burn your own personal copy to the disc/drive after the fact!]

1 Like

Requirements

Here’s a general list of tools and materials you might need, though you can certainly sub out some of these:
• Disc Binder, Sleeve, or Empty Case
• Disc Labels (or printable disc)
• Disc (CD, DVD, Blu-Ray – depends on the size of your game)
• Paper
• Printer (Optional, can possibly use your library or local print shop)
• Design Software
• Disc Menu Software (optional)
• Disc Burning Software
• Disc Drive – capable of burning the specific kind of media you intend to burn
• Template Files (optional; linked below as we go)
• Image Files (relevant to the games you’re using)
• Design Skills (optional)
• Scissors or Paper Cutter

Considerations

For any given game you want to make a release for, you need to consider how you want to make it before you jump in. Do you want a disc? A flash drive? Or maybe it’s better to just make some art, a craft, get a standee or toy or something as decoration instead.
Disc Choice
• CD-R – 750MB
• Mini CD-R – 215MB
• DVD-R – 4.7GB
• Mini DVD-R – 1.4GB
• DVD-R DL – 8.5GB
• BD-R – 25GB
• BD-R DL – 50GB
• BDXL – 100GB
As far as discs go, you’ll need the right disc and burner for the size of game you’re burning. CDs only hold up to 750MB which is not much by today’s standards – though there are some good games I’ve played recently that fit on CD. DVDs hold around 4.7GB of data, with Dual Layer DVDs holding around 8.5GB. Blu-Ray Discs can hold 25GB, with Dual Layer BDs holding 50GB. There’s even 100GB Blu-Rays, but those are very expensive and not always compatible with all drives. You will need a drive that burns the newest media you have. A DVD drive will not burn a Blu-Ray and there’s no hack or trick to get around that. Different lasers and hardware and everything. However, newer-format drives are almost always backwards compatible with older media (HD DVD excluded) so Blu-Ray drives will burn DVDs and CDs, as well. If you are planning on doing Blu-Rays, do make sure you get a burner and not just a drive capable of reading Blu-Rays.
You also have the option of using the mini CD-R/DVD-R discs (GameCube Style) for a fun creative project that possibly takes up less space, but they hold less data than standard-sized discs.
Rewriteable CD-RW and DVD-RW discs are available, and might be a good choice if you think the game might see updates or additional content added that you’d want to include. But these tend to be less reliable in the long-run, so you’ll have to decide if it’s worth the risk.

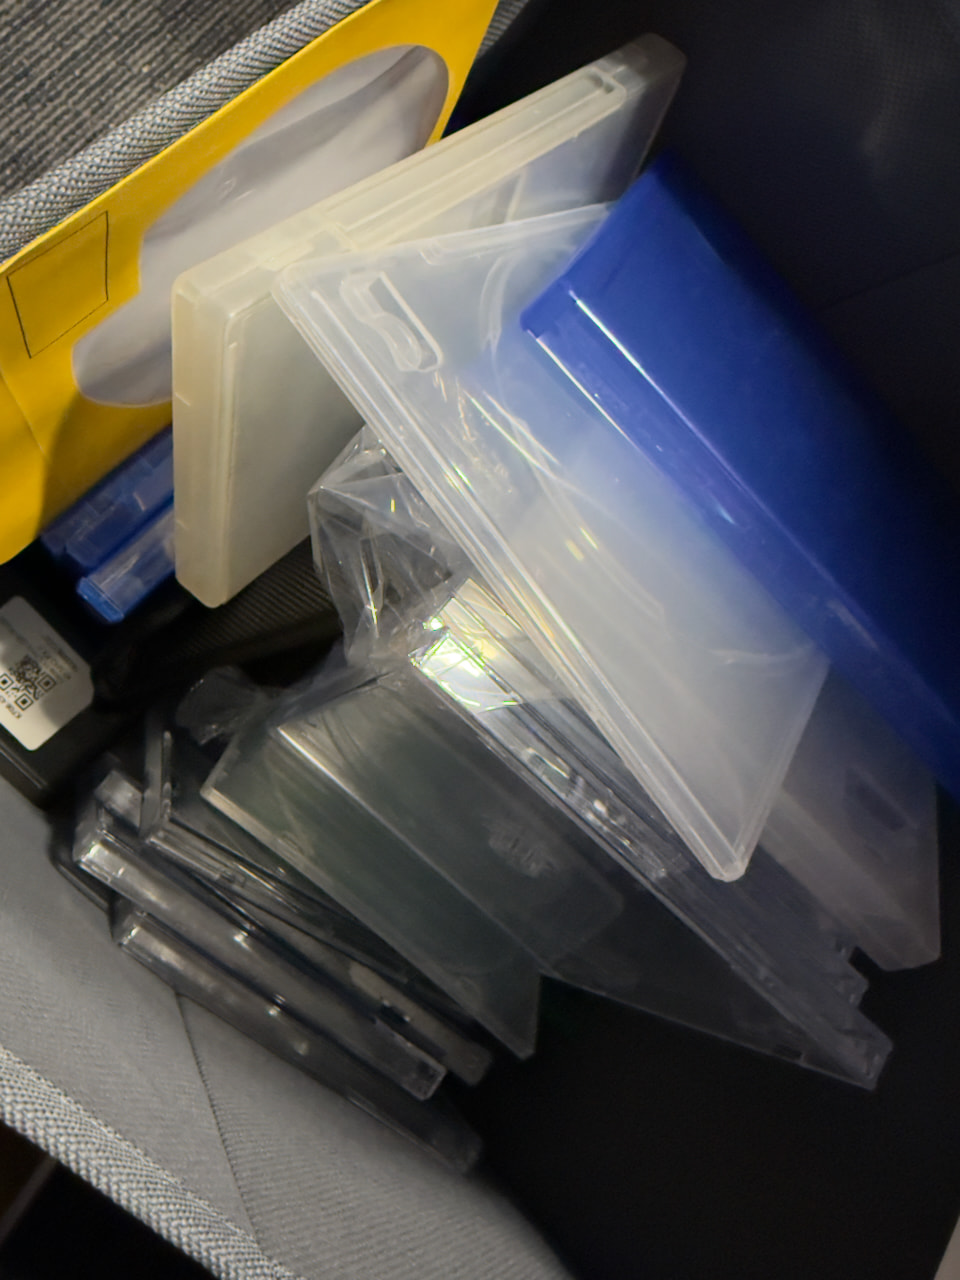
Next, consider how you want to store or display these burns. Do you want a case? If so, a jewel case like a CD or PS1 game, or a DVD case? Maybe a slim DVD case to save on space at the cost of not being able to read the spine as easily? Or maybe a Blu-Ray style case like PS3 games? Or perhaps you just want these for backup and usage and a cool disc binder would suit you just fine.
Hell, you can even design and 3D print your own cases! The possibilities are literally endless.
These are choices you have to make, I cannot make them for you. But I will walk you through my choices and decision-making for my examples here.

The Lord of the Rings: War in the North Legacy Edition

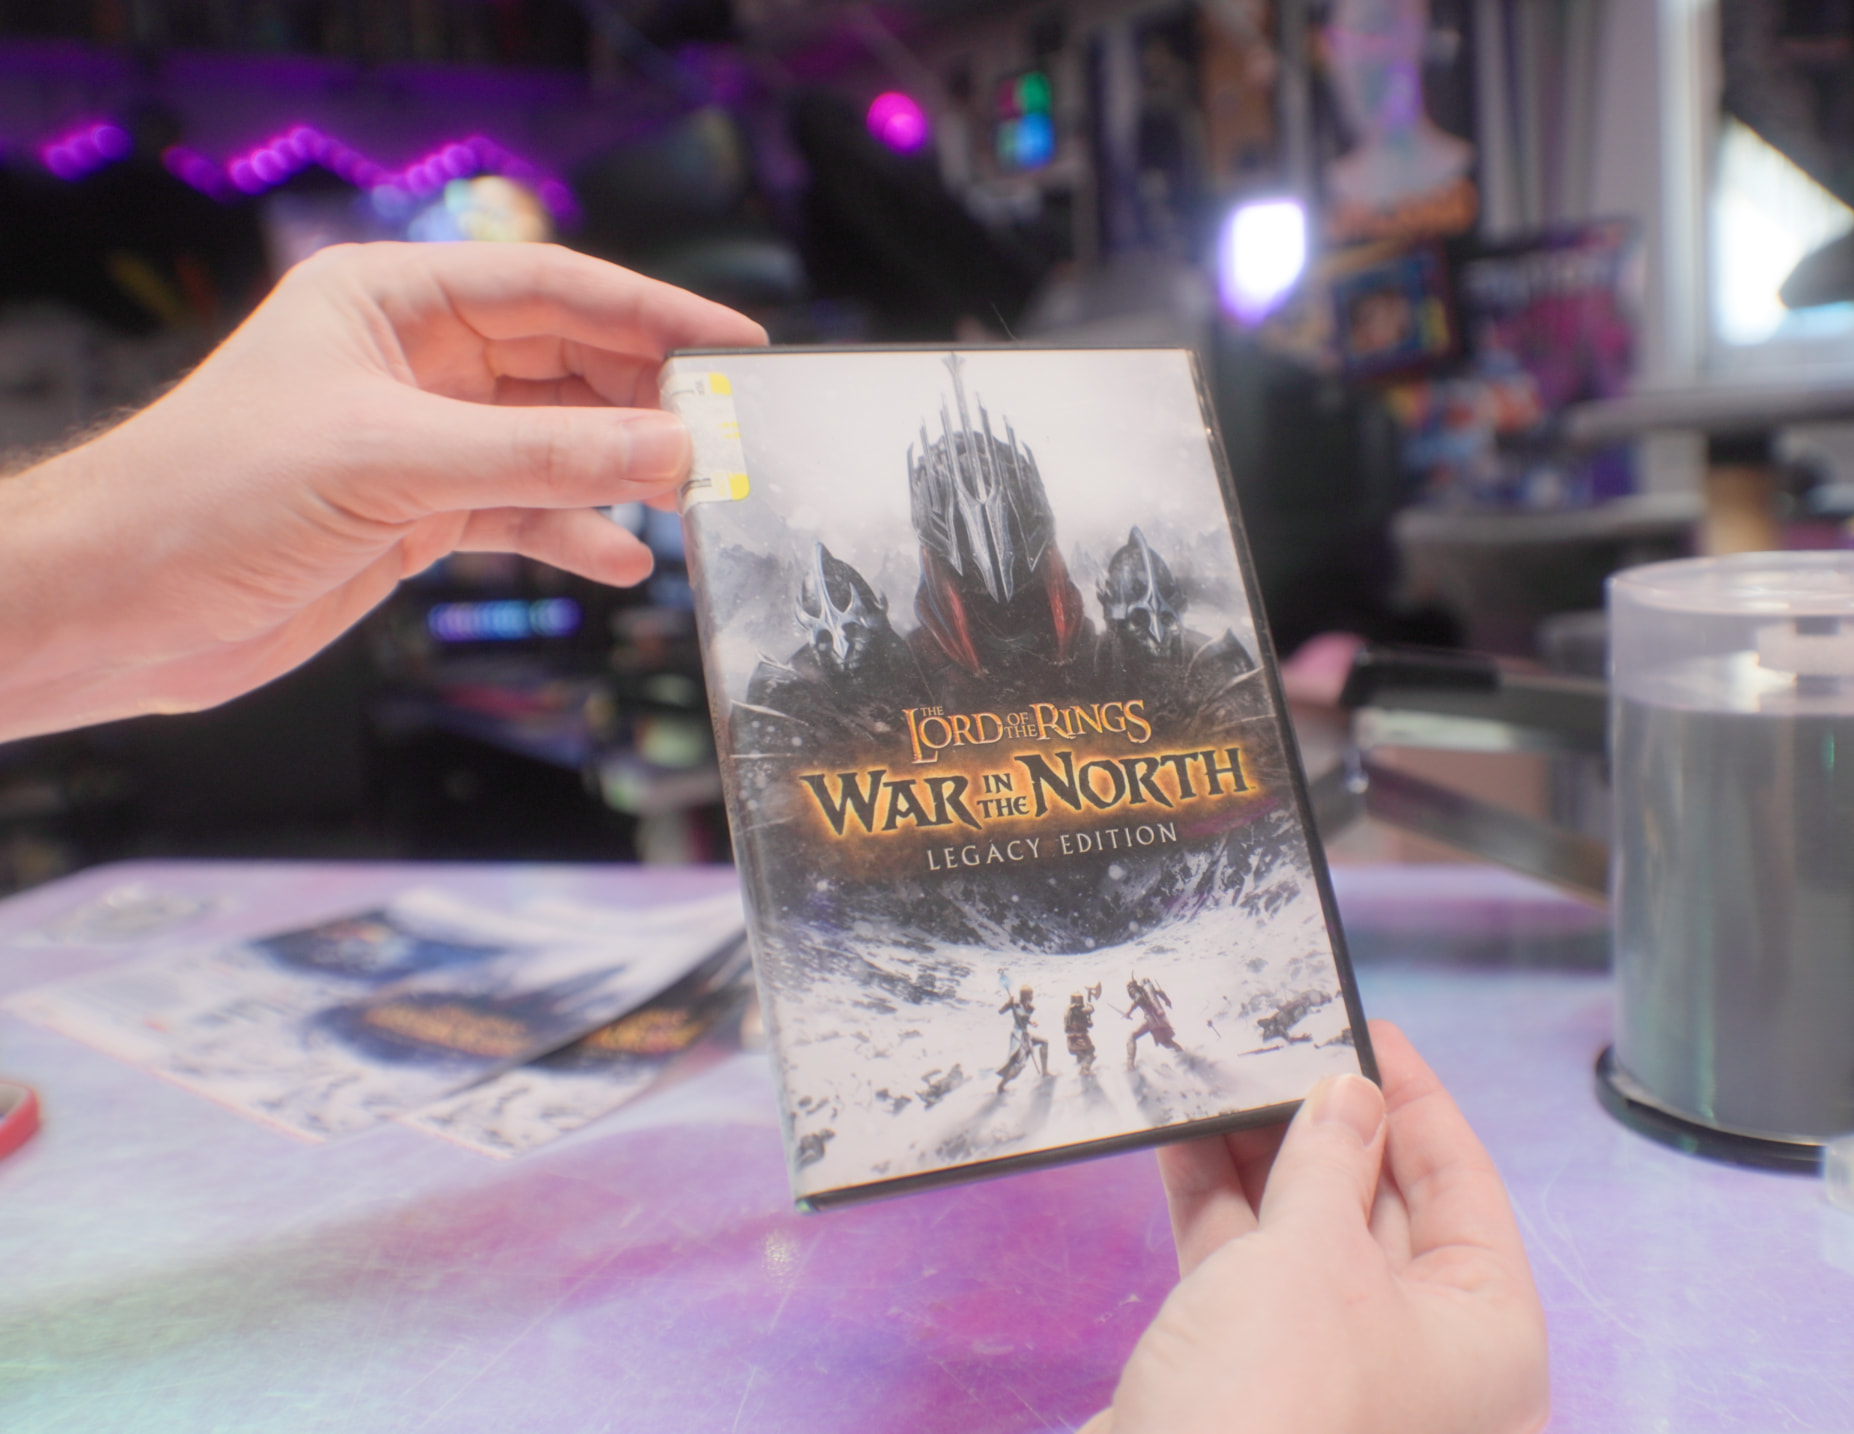
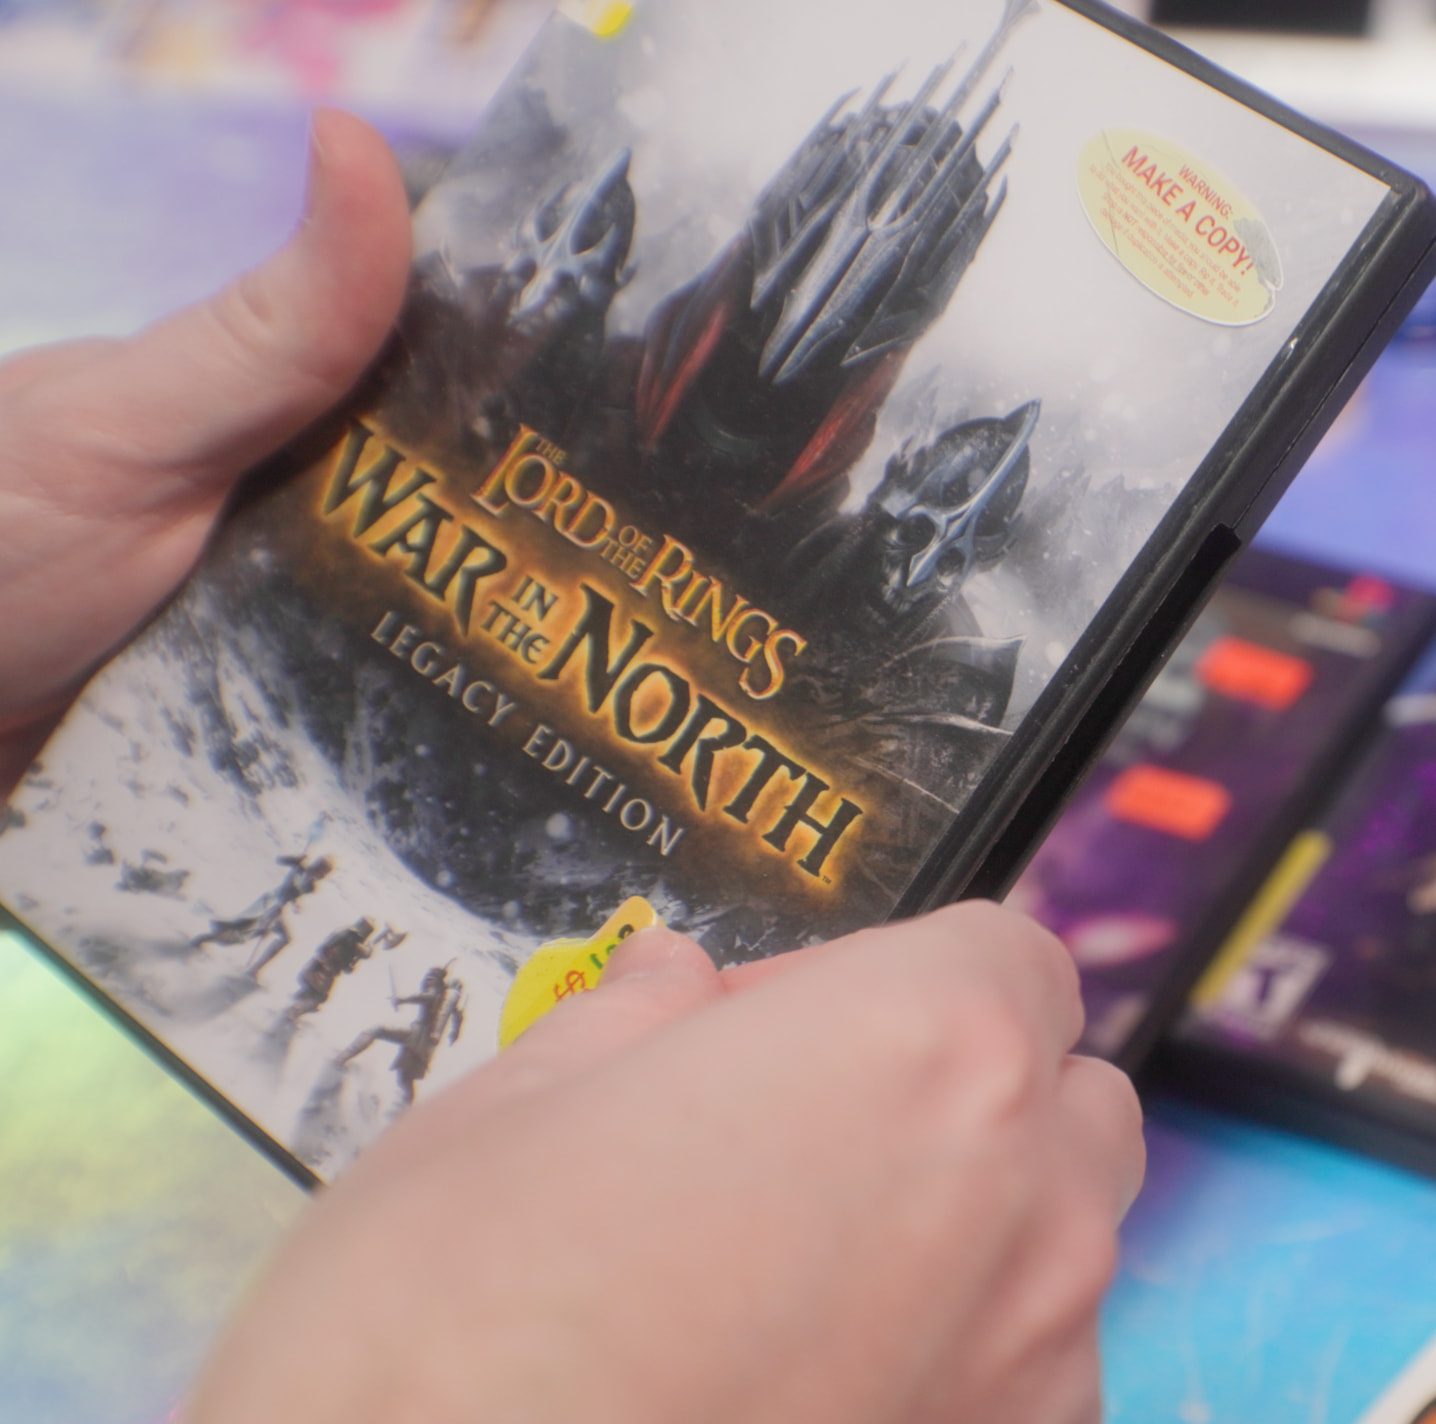
First, let’s make a physical copy of The Lord of the Rings: War in the North Legacy Edition . This is a re-release of a game I loved from the Xbox 360 days, with some small updates. I kept around an Xbox 360 copy of this game I never played, just in case I lost my Steam copy since the game was delisted in 2019. But since it’s available again, and available DRM-free on GOG, I want to make my own physical release from that and trade out the Xbox 360 copy I’m never going to use.

I’m going to use a DVD-style case for this – the same size also used for PlayStation 2, Xbox, Xbox 360, Wii and Wii U games. I have a couple old empty ones I can use for this.

Case Sleeve

First, I want to make the wraparound sleeve for the outside of the DVD case.

Design

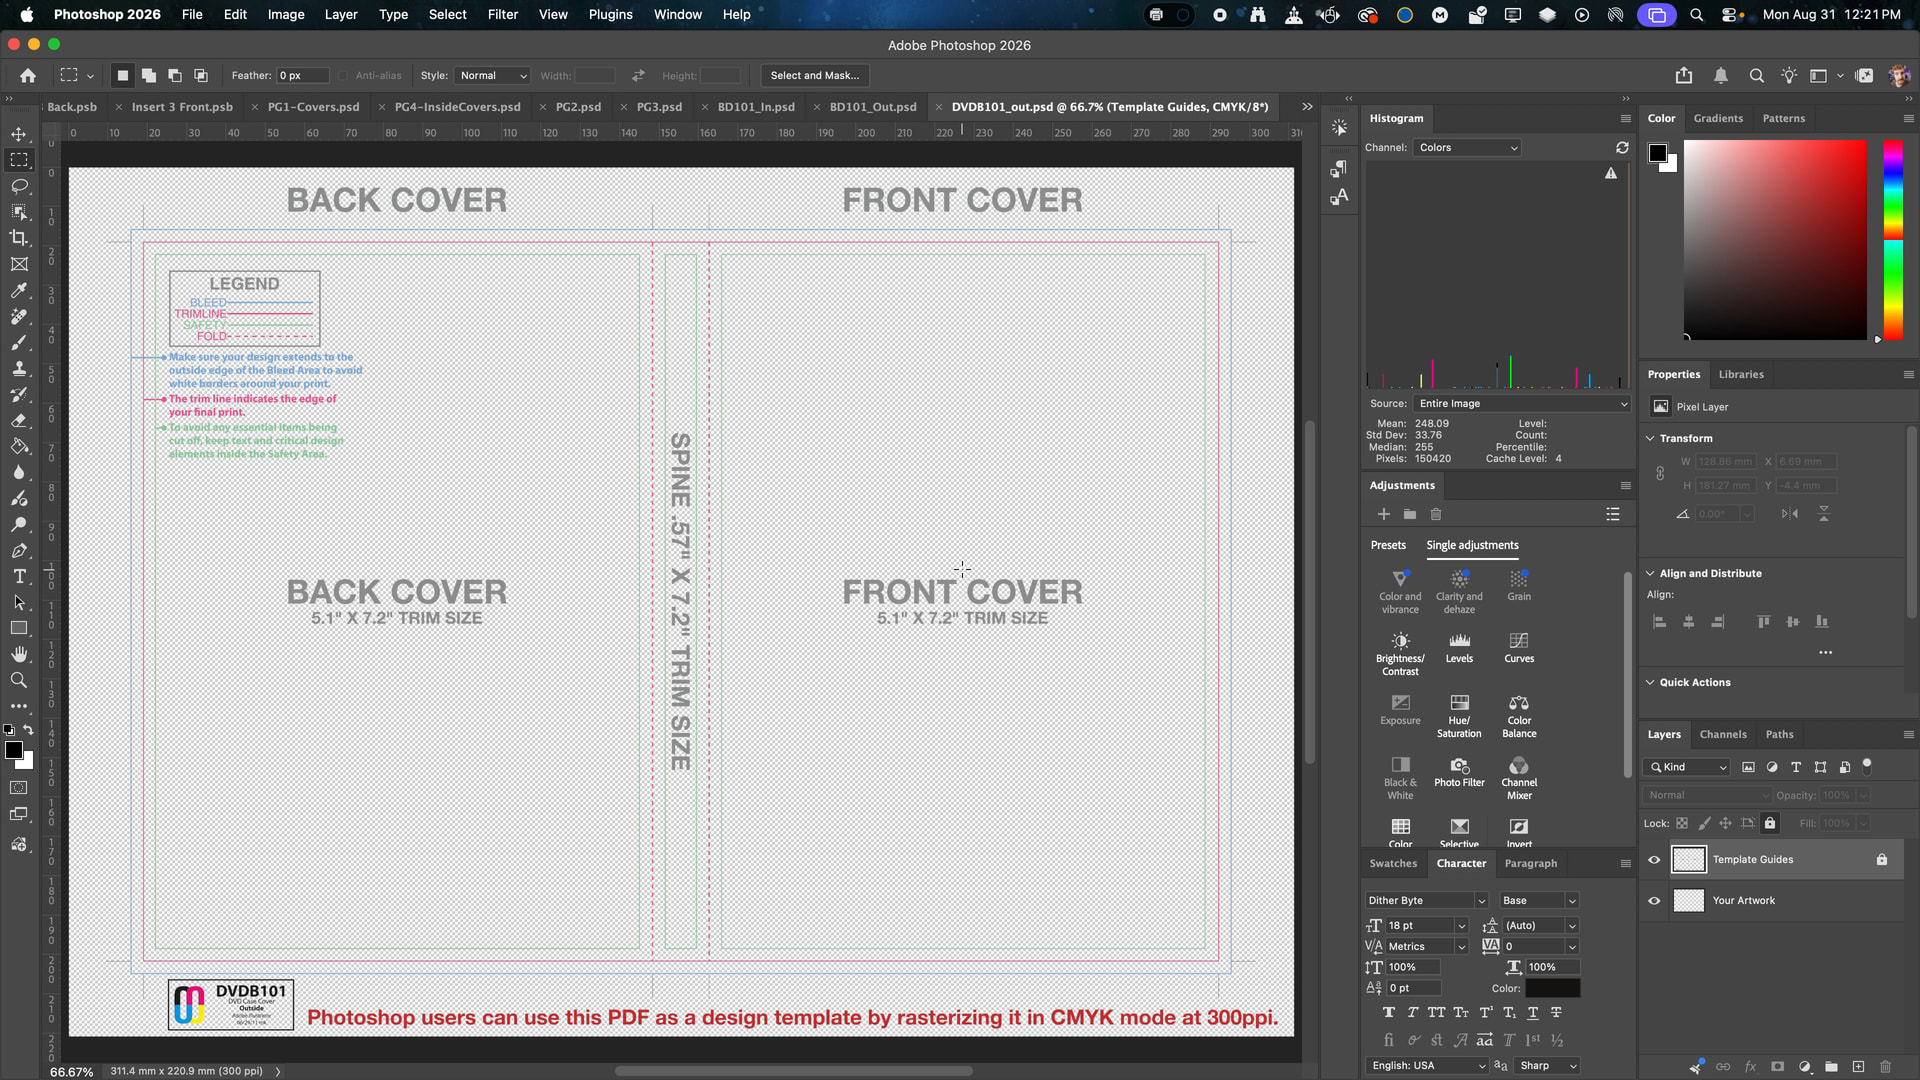
You could take measurements and guess, or you can save a LOT of time with design templates. There’s a manufacturer called Disc Makers that provides templates for many, many kinds of physical media printing on their website. These are intended for customers to generate the needed artwork for ordering bulk jobs through Disc Makers, but we can use them for our needs, too!

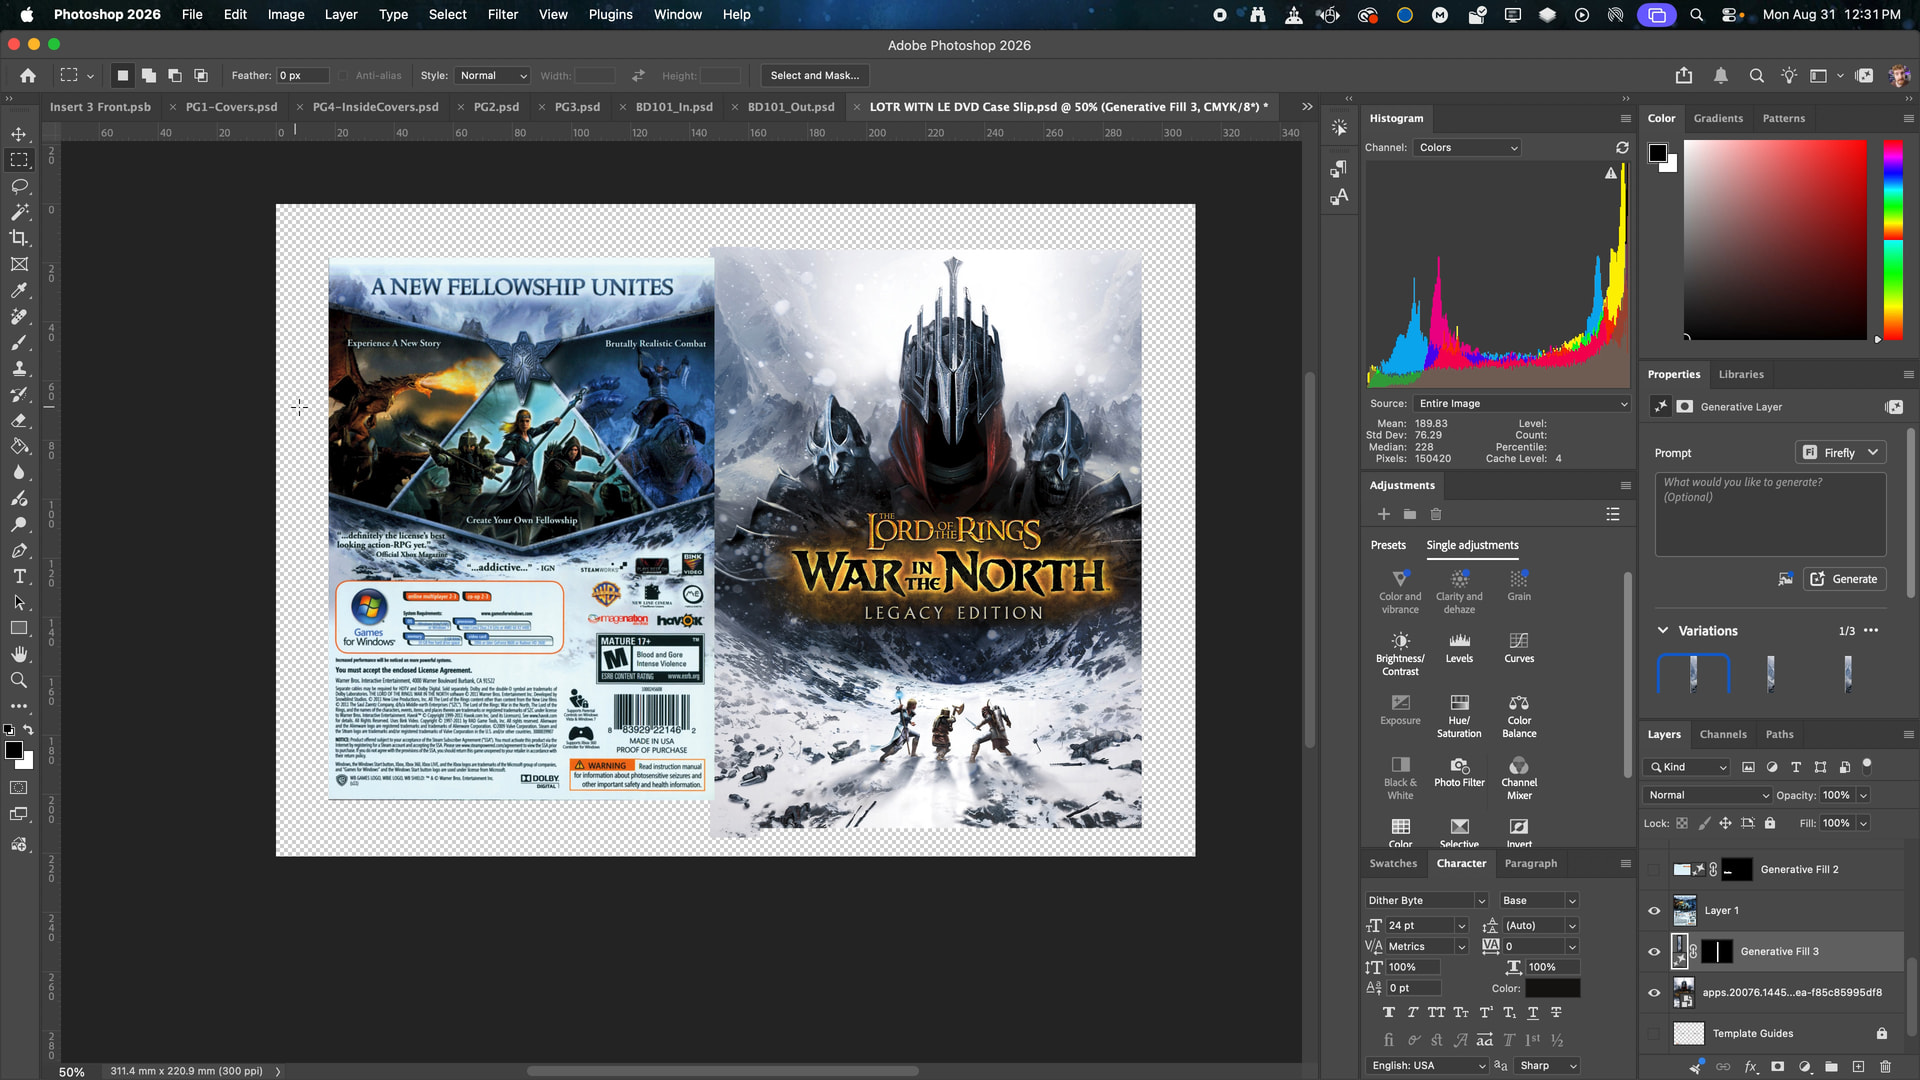
I grabbed the “DVD Case” template and opened it up in PhotoShop. AND BEFORE you leave an angry comment, I have reasons that will soon become clear for using PhotoShop here. The next example we will use Affinity. I’m just showing different options and different tools. Using the right tool for the job and so on.

This design for the whole game is going to be a lot easier because it’s a major publisher-released game with lots of big key art available, and it already had a physical edition released some 15 years ago. Unfortunately there aren’t really any good scans of the covers for that readily available, so I’m adding scanning my Xbox 360 cover to my to-do list to contribute to TheCoverProject before I trade it out.

TheCoverProject is an awesome website that serves as a giant community database of game cover and label scans, including custom-made ones. I highly recommend keeping it in mind during your design process, along with SteamGridDB. That’s another site dedicated to custom graphics for Steam entries, which is great on its own – but also a great resource for logos and art for any game.

Opening the template file in PhotoShop, we are presented with some template guides and registration marks. The guides show you where to align your art so that it fits properly and gets cut and folded in the right places. The outer border is for bleed – bleed is when the print extends beyond the intended size so that any inconsistencies in cutting don’t just show white. I used bleed in these examples, but I’d actually recommend using PhotoShop guides to hard-lock your visuals to the cut points to make it easier to trim later.

The registration marks are just marks outside of the art for cutting. These are helpful. After you build your artwork, you hide the Template Guides layer and leave the Registration Marks layer on to aid in cutting your print.

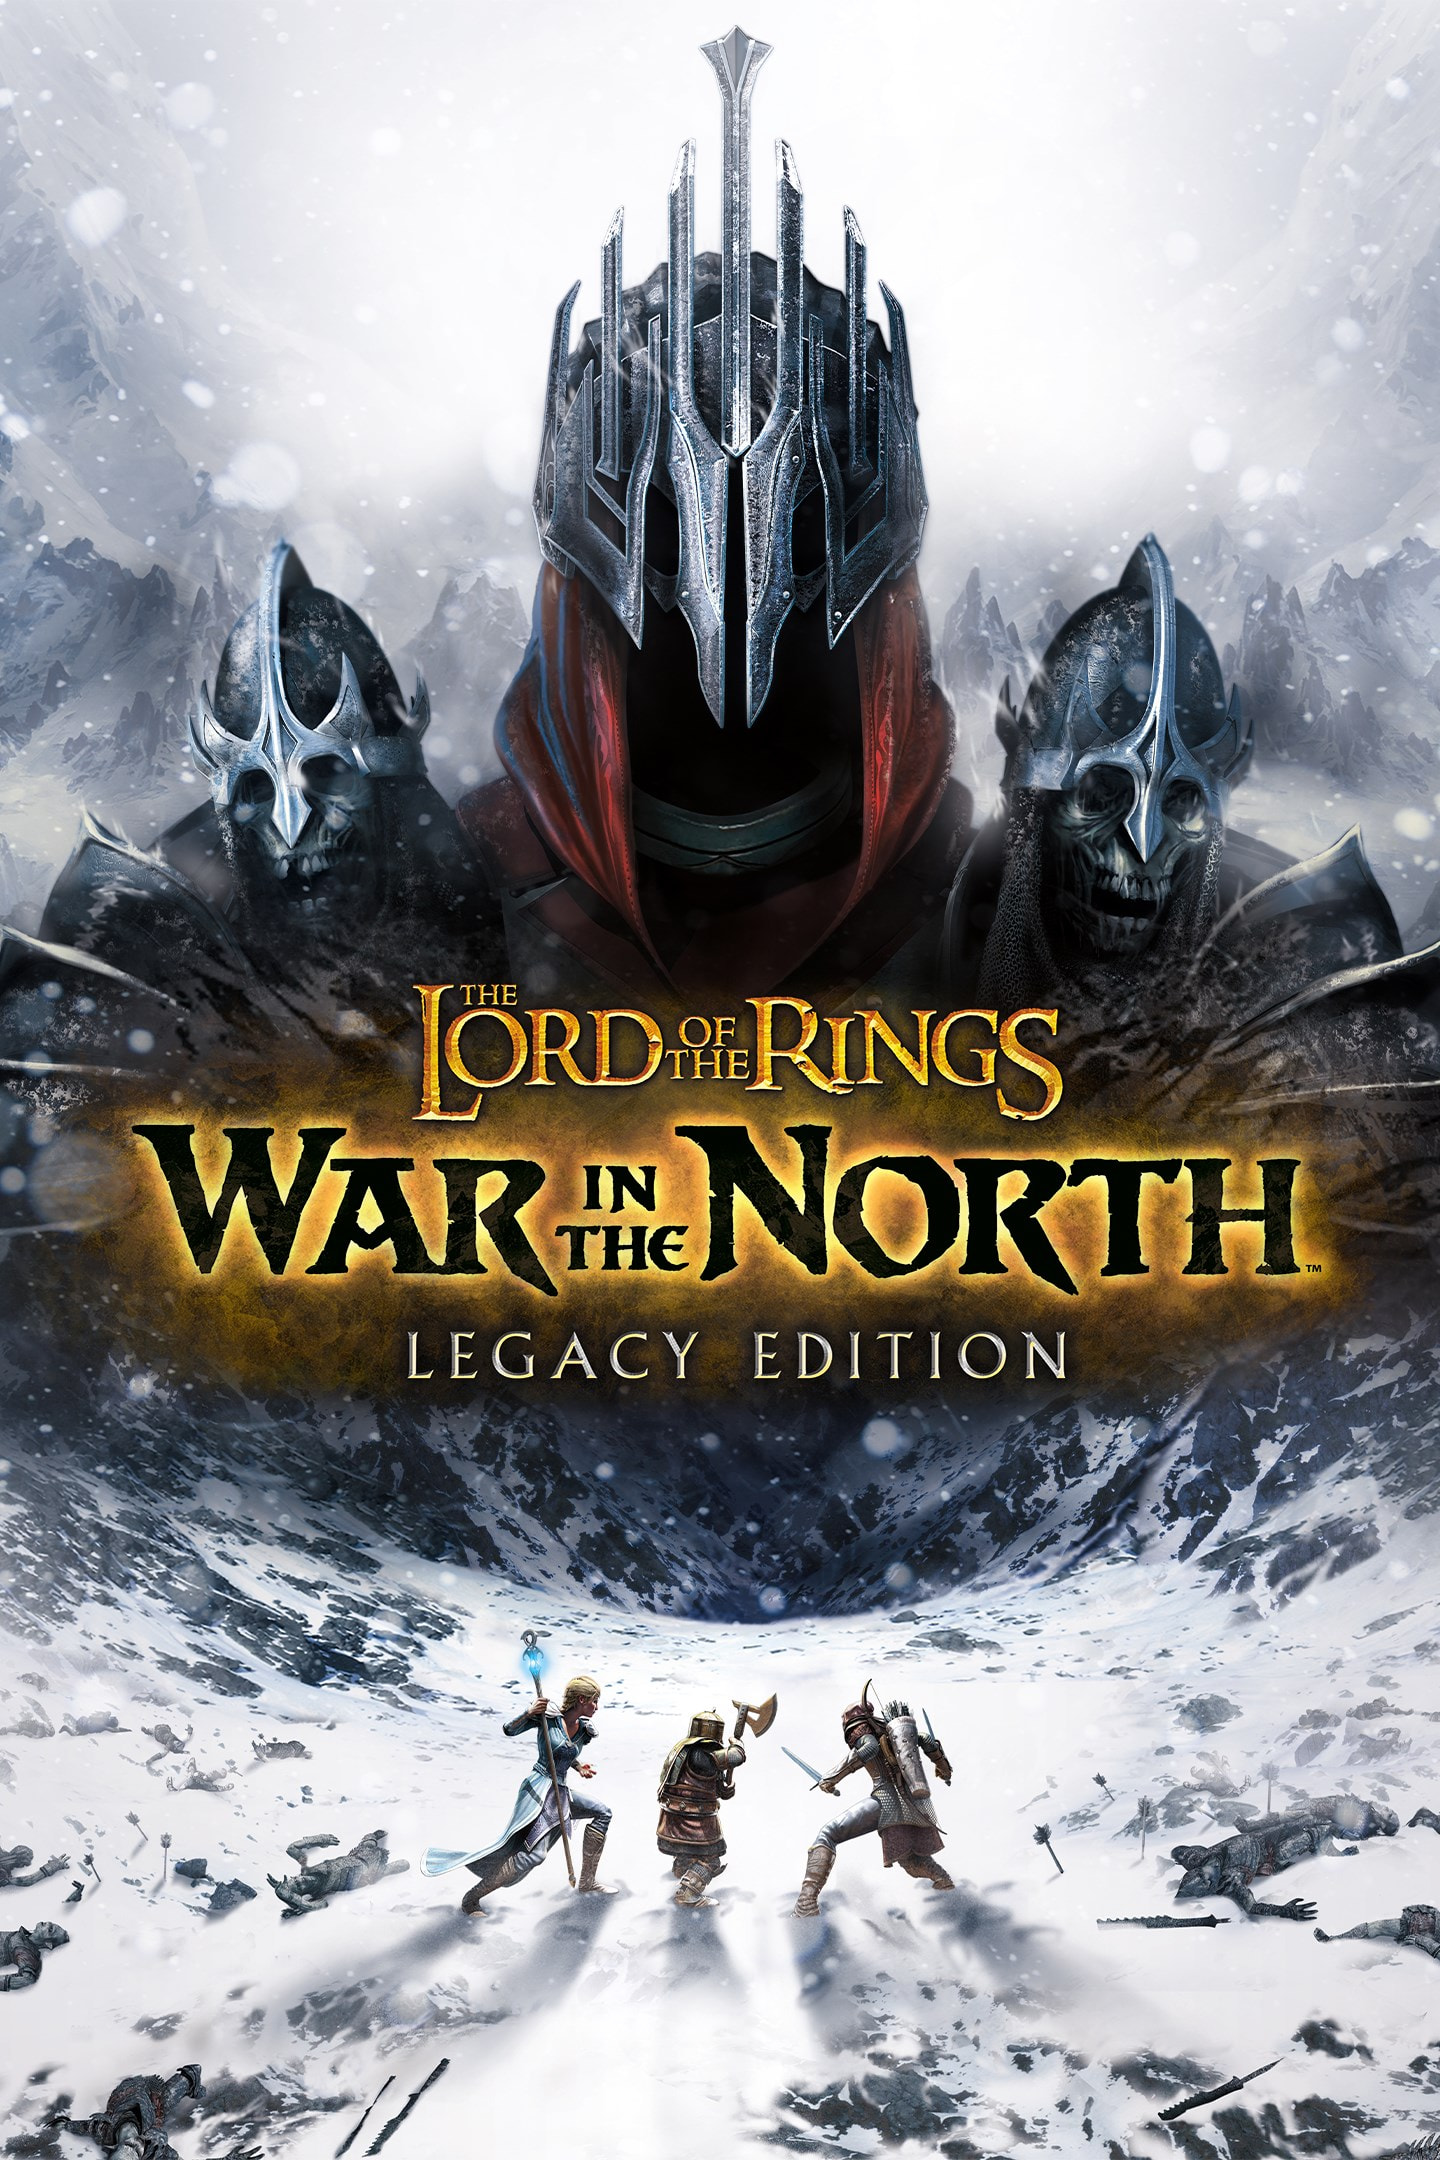
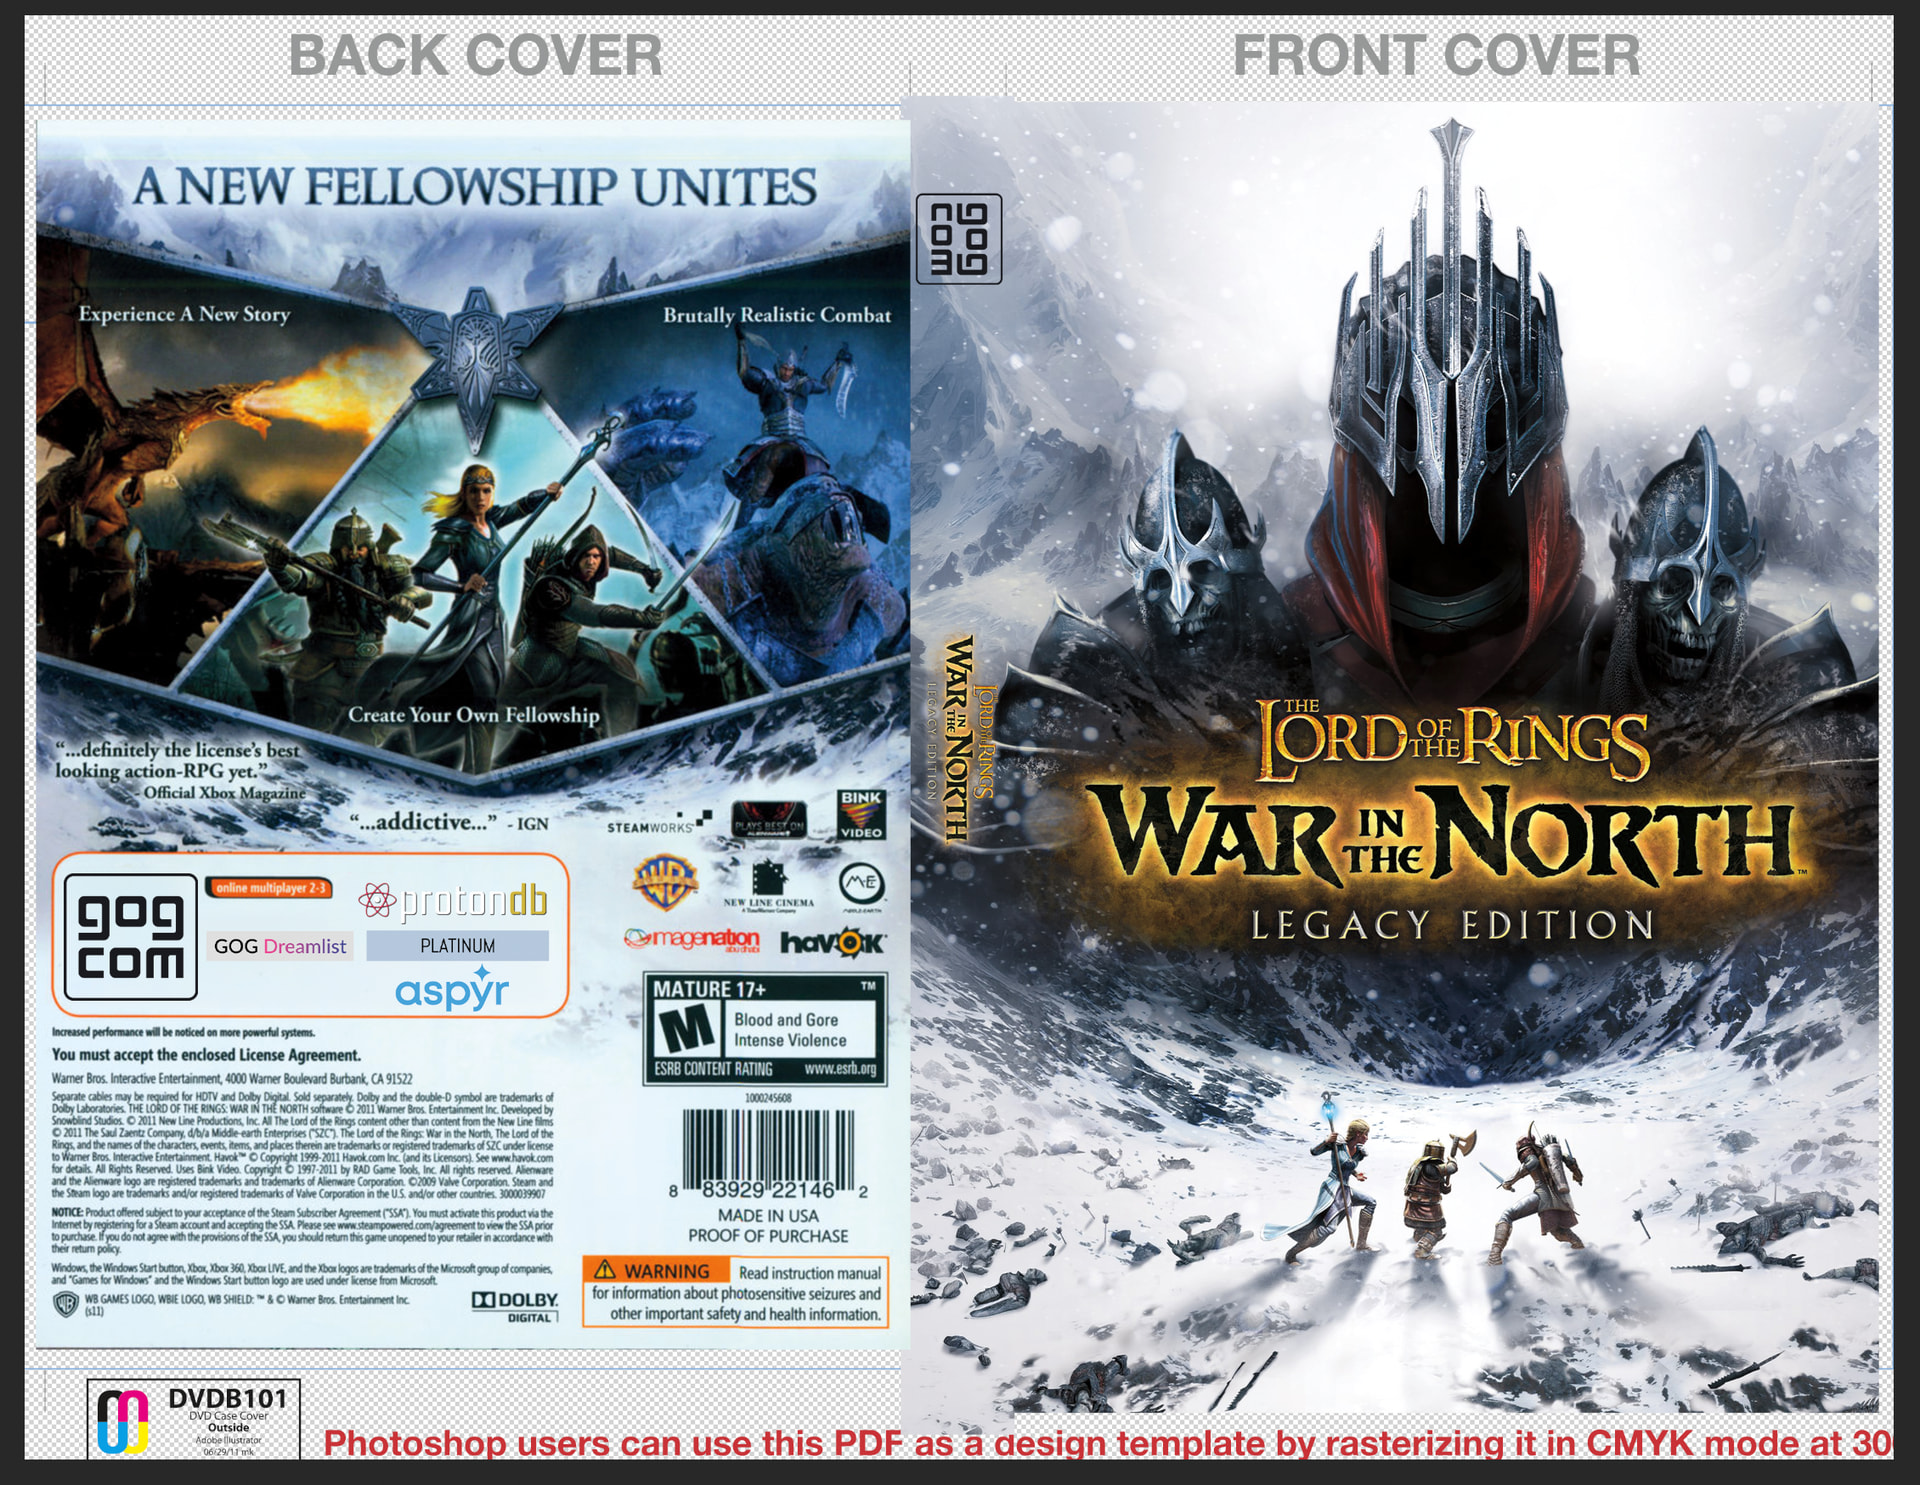
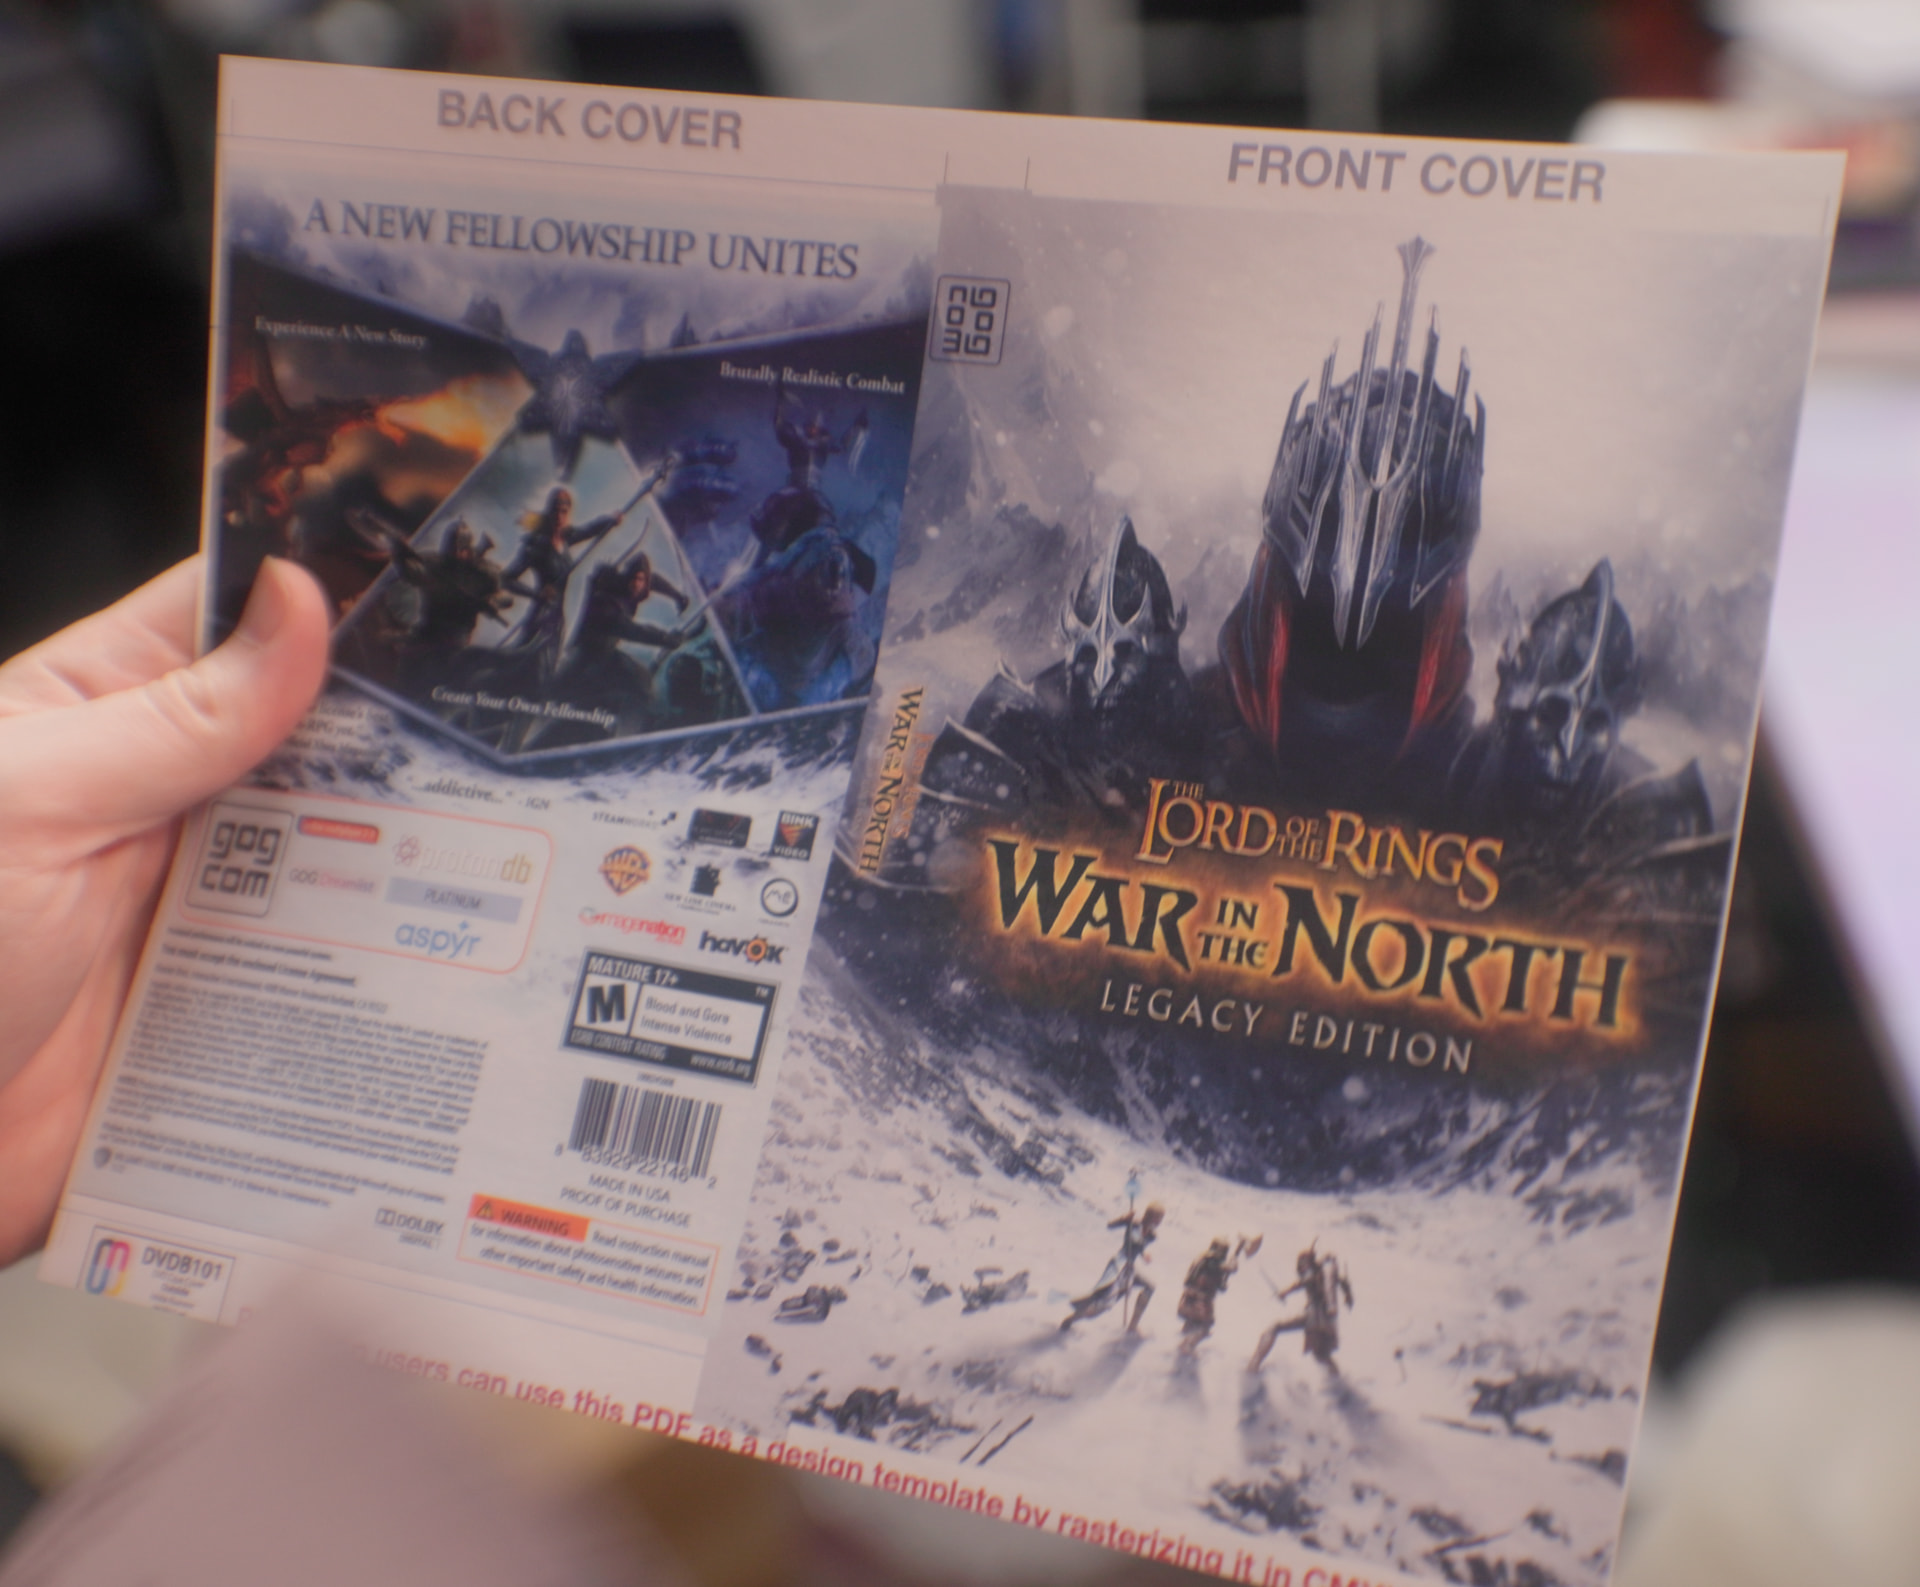
For the front cover, I found the highest-resolution key art poster for the game I could, and brought it in. This one is unusually tall since it’s basically for a poster and thus eliminated a Blu-Ray style case for this game, as I had originally intended. Bringing it into the DVD template and it mostly fits in the right spot just fine. This is the front cover already complete with official art and no real tweaking on my part, but the rest of the case will require work.

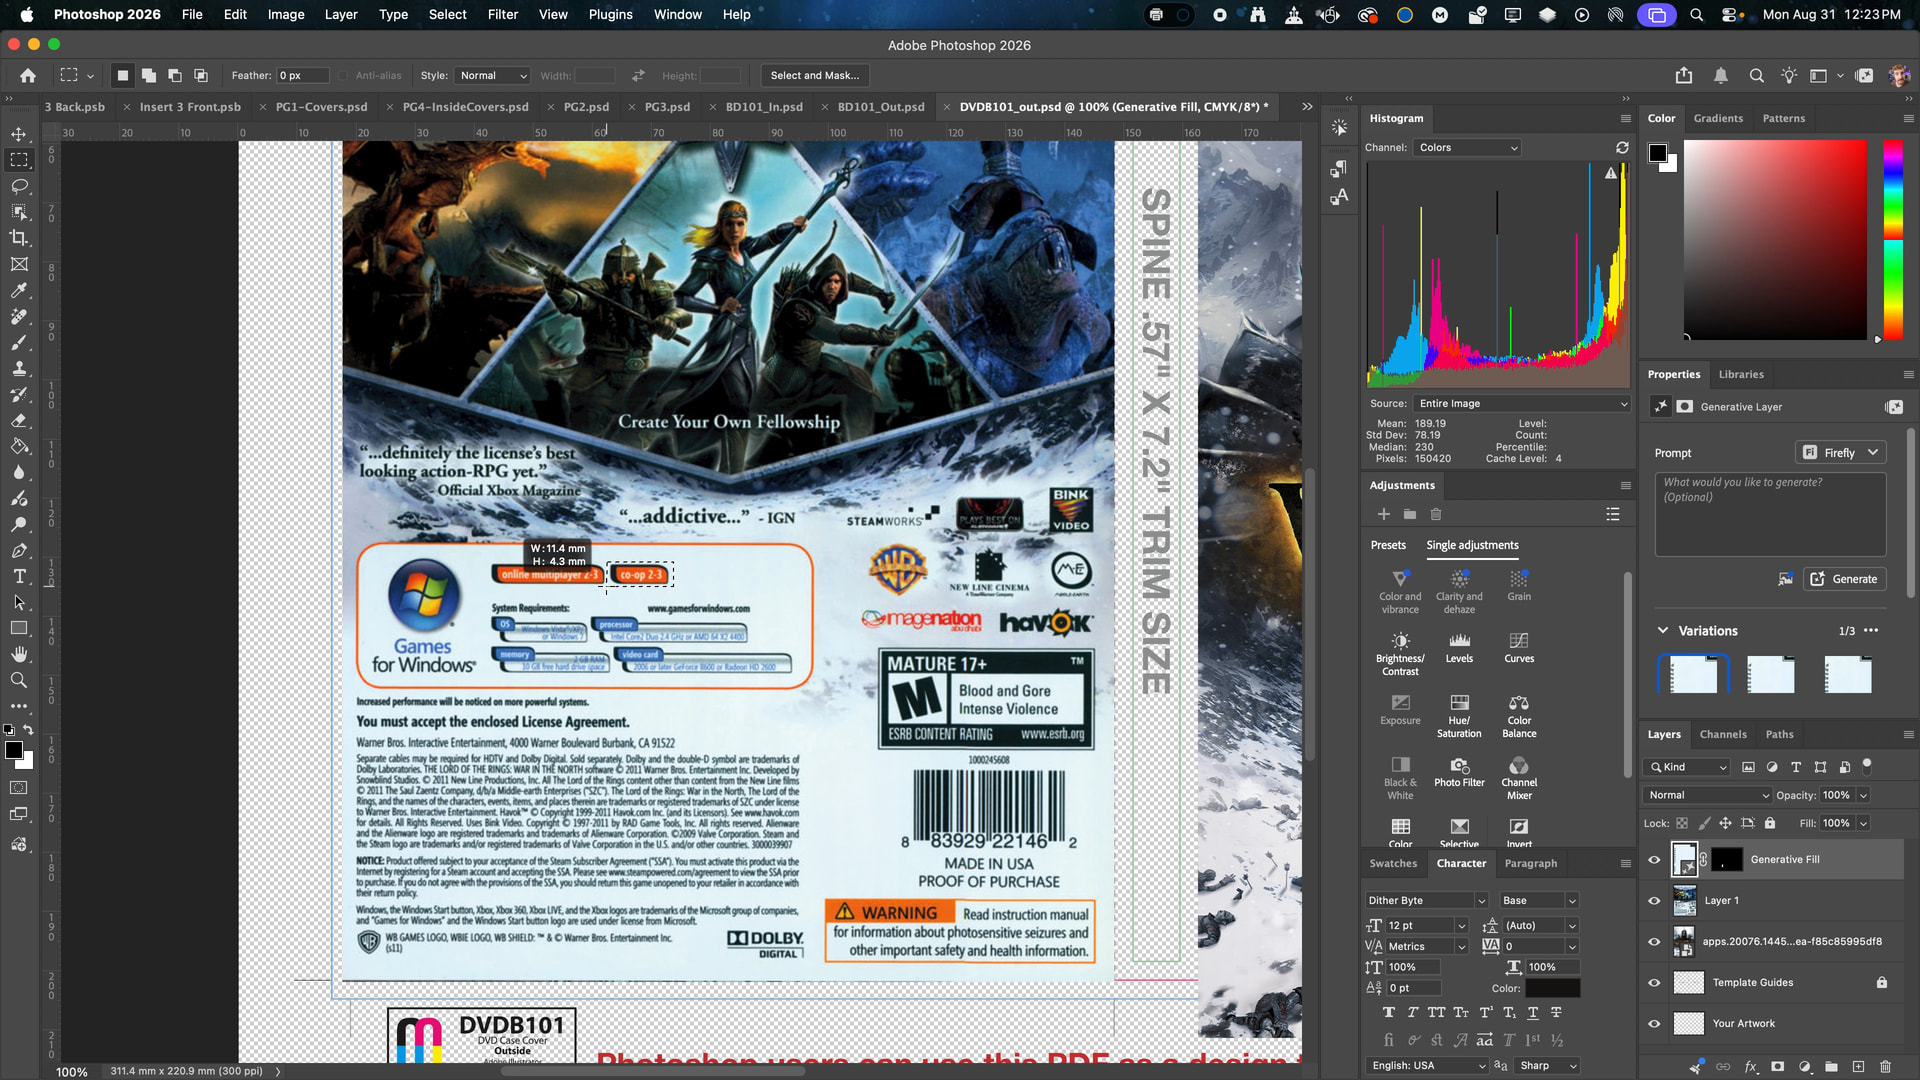
Then I needed to work on the back side. This could be the most tedious part – and one that requires the most design work if you wanted. For this specific instance, I chose to just re-use the existing PC copy’s rear cover from the original 2011 release of the game and modify it. This isn’t ideal, but for a quick-and-dirty (and arguably more authentic) route, it’s fine.

I did want to hide the silly “Games for Windows” badges and replace them with newer information I care about, so I used PhotoShop’s Generative Fill feature to cover it up. More on that in a bit.

Once I had a canvas to mess with, I grabbed the GOG logo – since this is a GOG copy of the game – the aspyr logo (even though this isn’t where it should go), and pulled the ProtonDB logo and rating badges I already had saved. To fill in the rest of the space, I zoomed in and screenshotted the GOG Dreamlist logo – since this is a game that was high on GOG’s Dreamlist for a long time.

Next up is the spine. These usually are a continuation of the front cover – if not a full, seamless image across all three sides. This is why I went with PhotoShop for this one, as I’m able to just select a little bit of my cover here and the space that occupies the spine and use PhotoShop’s Generative Fill feature to fake having an extended image here. Generative Fill is the only form of generative AI I ever use, both because it’s trained more ethically and runs locally on my machine – but I understand if you don’t want to. We all have our lines to draw. For the design work I do online, Generative Fill has been a lifesaver many times.

You could simply make it black or white with the game name, whatever. I just liked how this looked.

Grab a transparent PNG copy of the game logo, rotate it and center it, add a GOG logo at the top, and we have a case sleeve!

Print

Now comes the fun part: Printing!

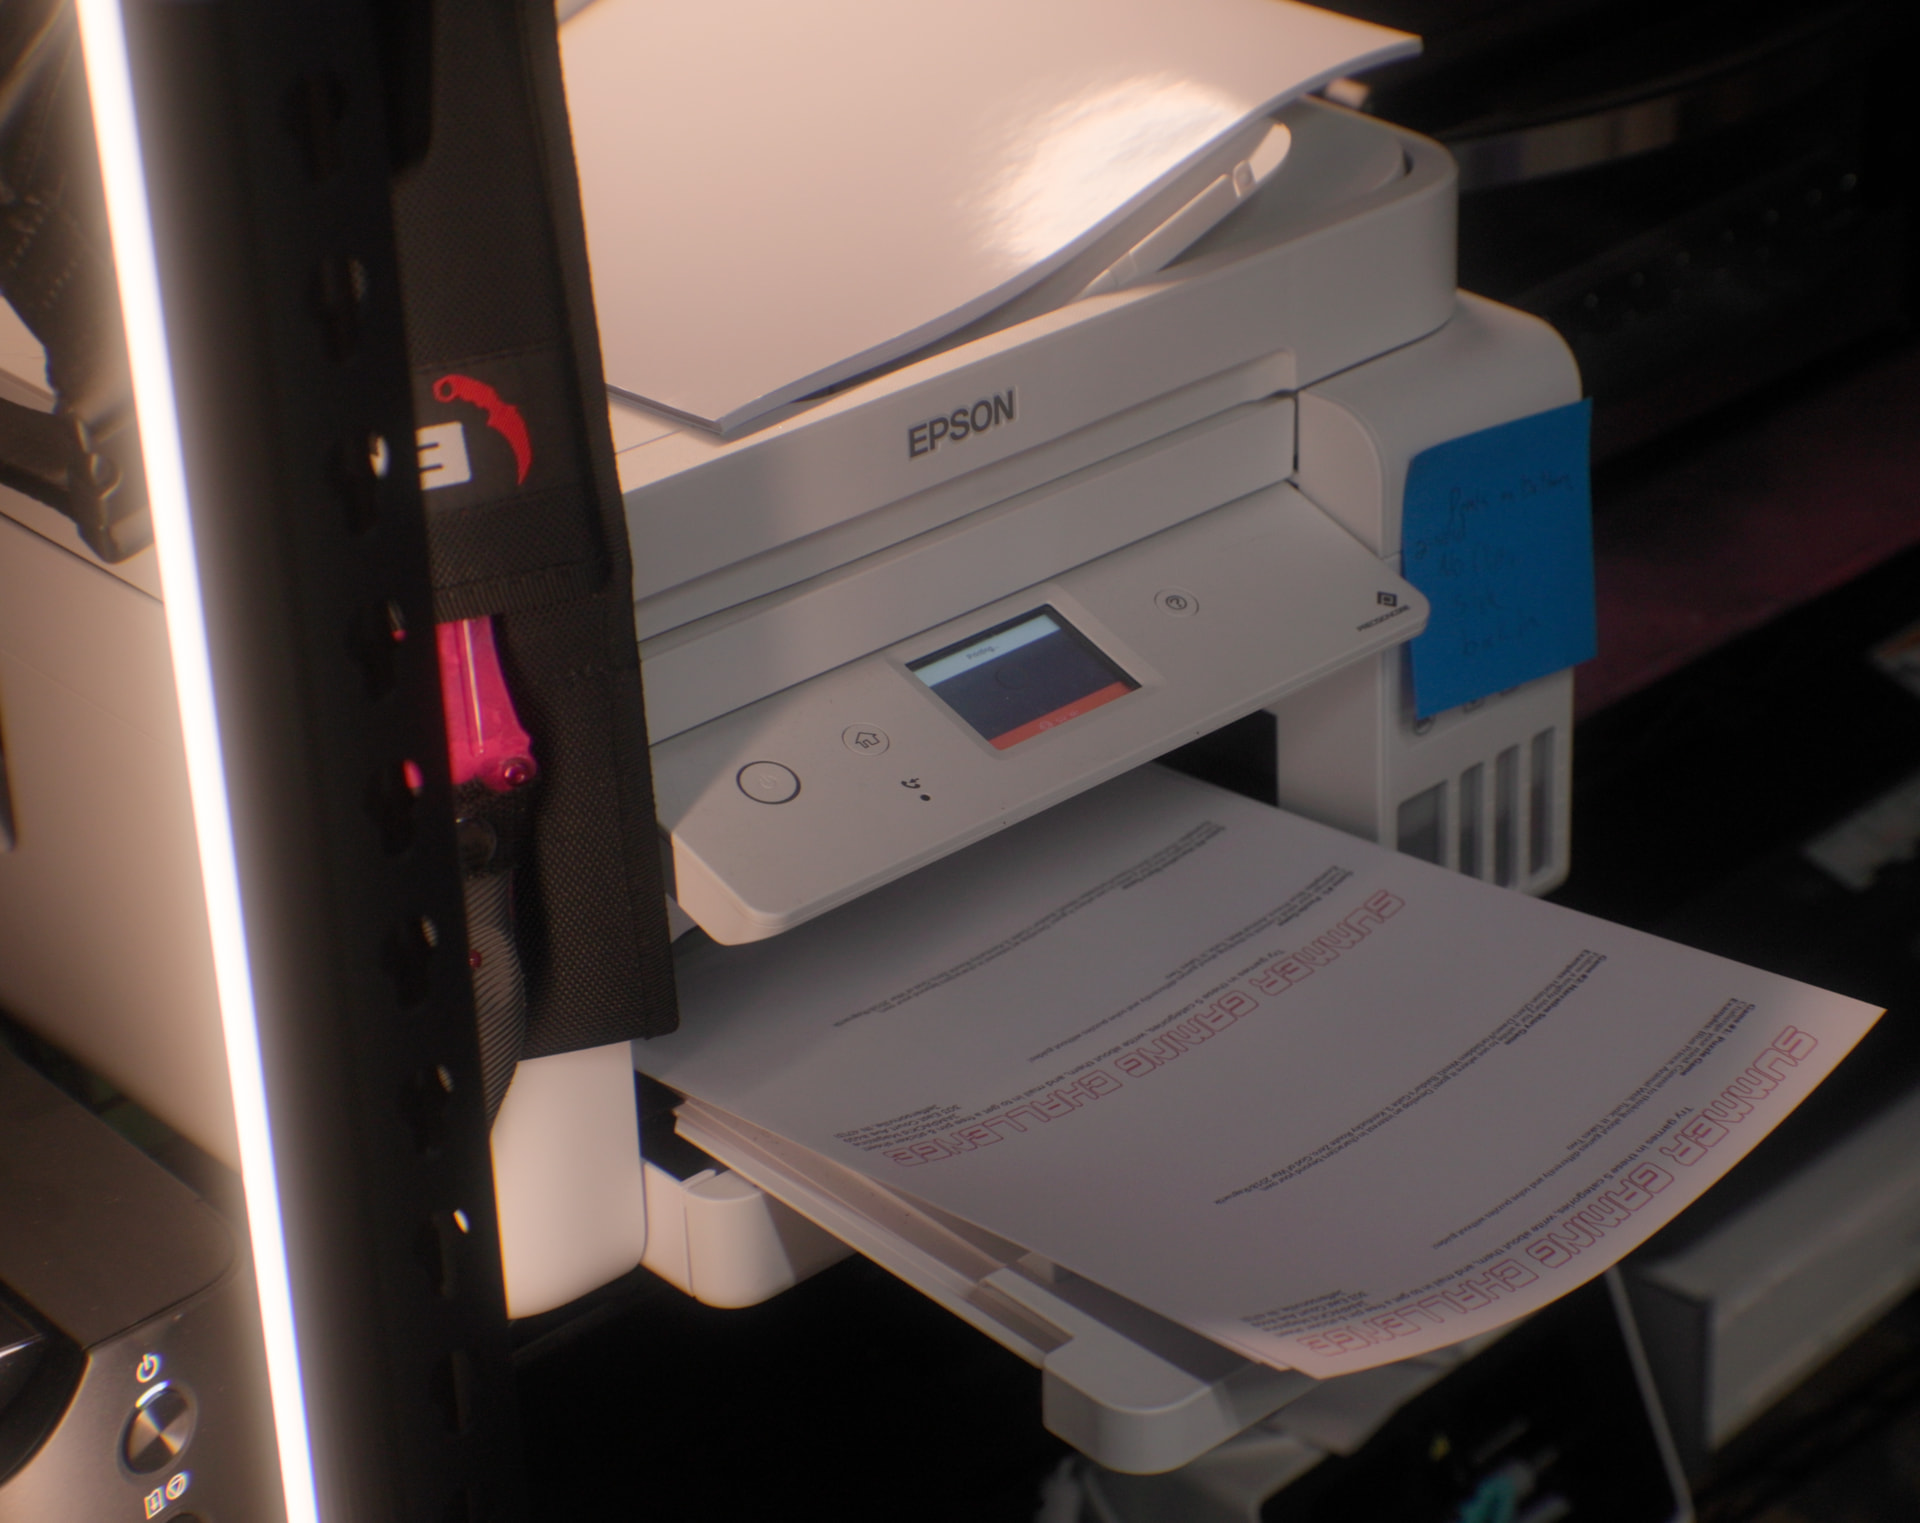
I printed this on an EPSON EcoTank 4760. I’m not the biggest fan of this printer. It’s both slower and produces lower quality prints than my bigger Canon photo printer, but it’s much more efficient on ink, and the ink is just in refillable tubs with no vendor lock-in – which is a MASSIVE deal – and I got it mainly to be able to bulk-print zines or side projects like this without eating up the more valuable resources for my nicer printer or keeping me from using it. I call it the “Zine Machine.”

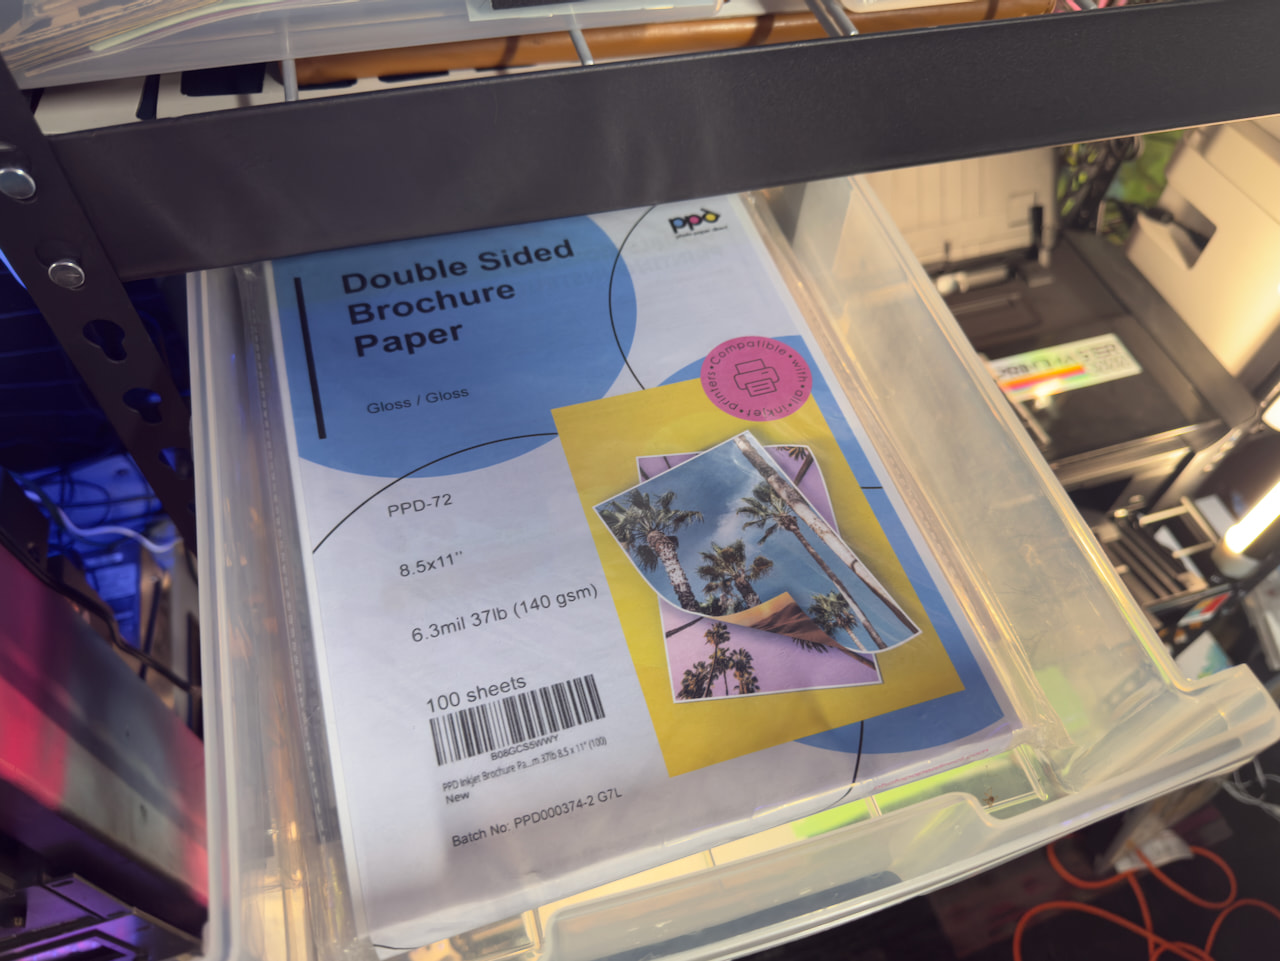
Paper-wise, I have struggled to find paper that matched game cover paper from real 2000s video games. PS2 games had this really thick, rigid paper that wasn’t glossy but still had a bit of a sheen to it rather than being purely matte. I’ve yet to find a replacement. But what I have found is this double-sided glossy brochure paper. It’s a pretty close match and produces very nice game covers, zines, and so on. You could, obviously just use regular copy paper for this – but the colors won’t pop as much, it’ll look a lot more homebrew.

This printer is a borderless printer, which is good, as we run into a snag here: This template file is set up for A4 paper, which is bigger than the US standard letter paper. I don’t have any A4 paper – though at this point I need to start stocking it instead, I think. So when we go to print, the sides will get cut off. Thankfully, a DVD case cover is still smaller than 8.5 by 11 inches, so despite the cut off bits, we will be able to make this work.

Unfortunately, in my hurry to record this for the video, I made a critical beginner’s error that I want to call out to you, should you not have much experience with borderless prints. You see, printers don’t really trust humans. They don’t think humans know what they want. So in every instance of printing borderless 8.5 by 11 prints (but for some reason not bigger ones) printer drivers apply an “expansion” scale. Even if your file is perfectly 8.5 by 11 inches in size, it’s going to zoom it in a bit and cut some off by default. This is dumb, this is annoying, this should not be a thing. But here we are with two incorrectly-sized prints.

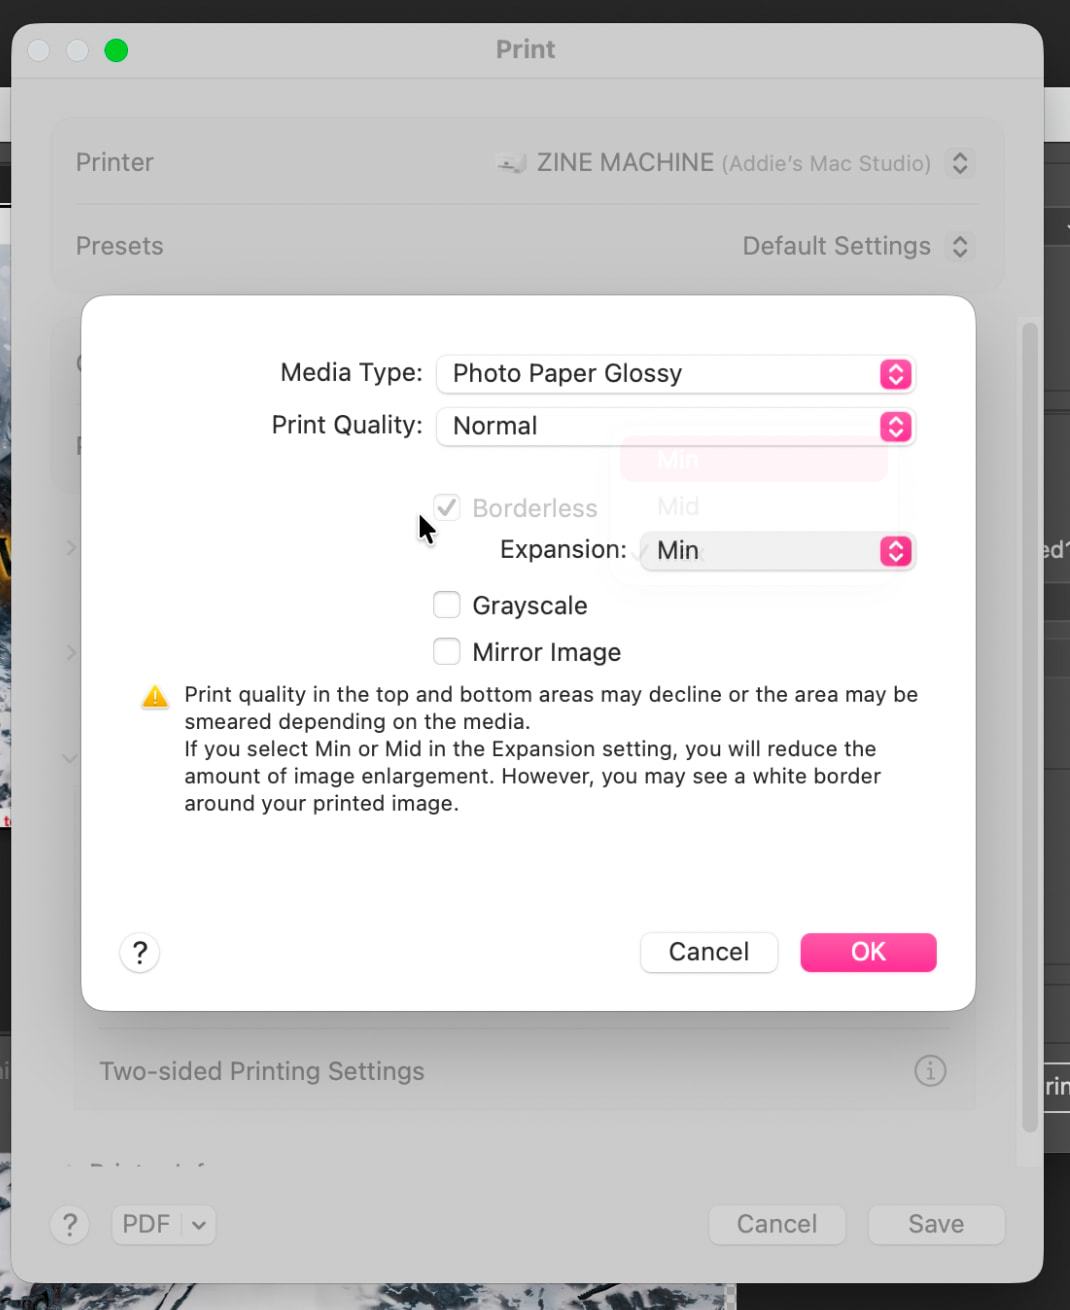
Once I realized my settings had gotten reset without me realizing, I was able to fix it. In your Print Settings, somewhere will be a “borderless” setting. For my Canon printer, it’s its own category. For my Epson printer, it’s under a secondary “Print Settings” menu. From there you’ll find an “Expansion” slider and slide it all the way to the left to “Min.” All better.

Now the printer goes BRRRRRR.

Once done, allow the print to dry for ten minutes to an hour – especially if it’s on glossy paper.

After giving it some drying time, it’s time to trim it. This can be super annoying without a fancy jig that’s sized perfectly and so on. This is why I recommended not utilizing bleed with your template, because you’re not going to be able to see the registration lines once you start cutting and it’ll be guesswork. But if you work smart and set up guides in your design software and just mask your work to fit the exact cut point, then you just cut off the white and you’re good to go.
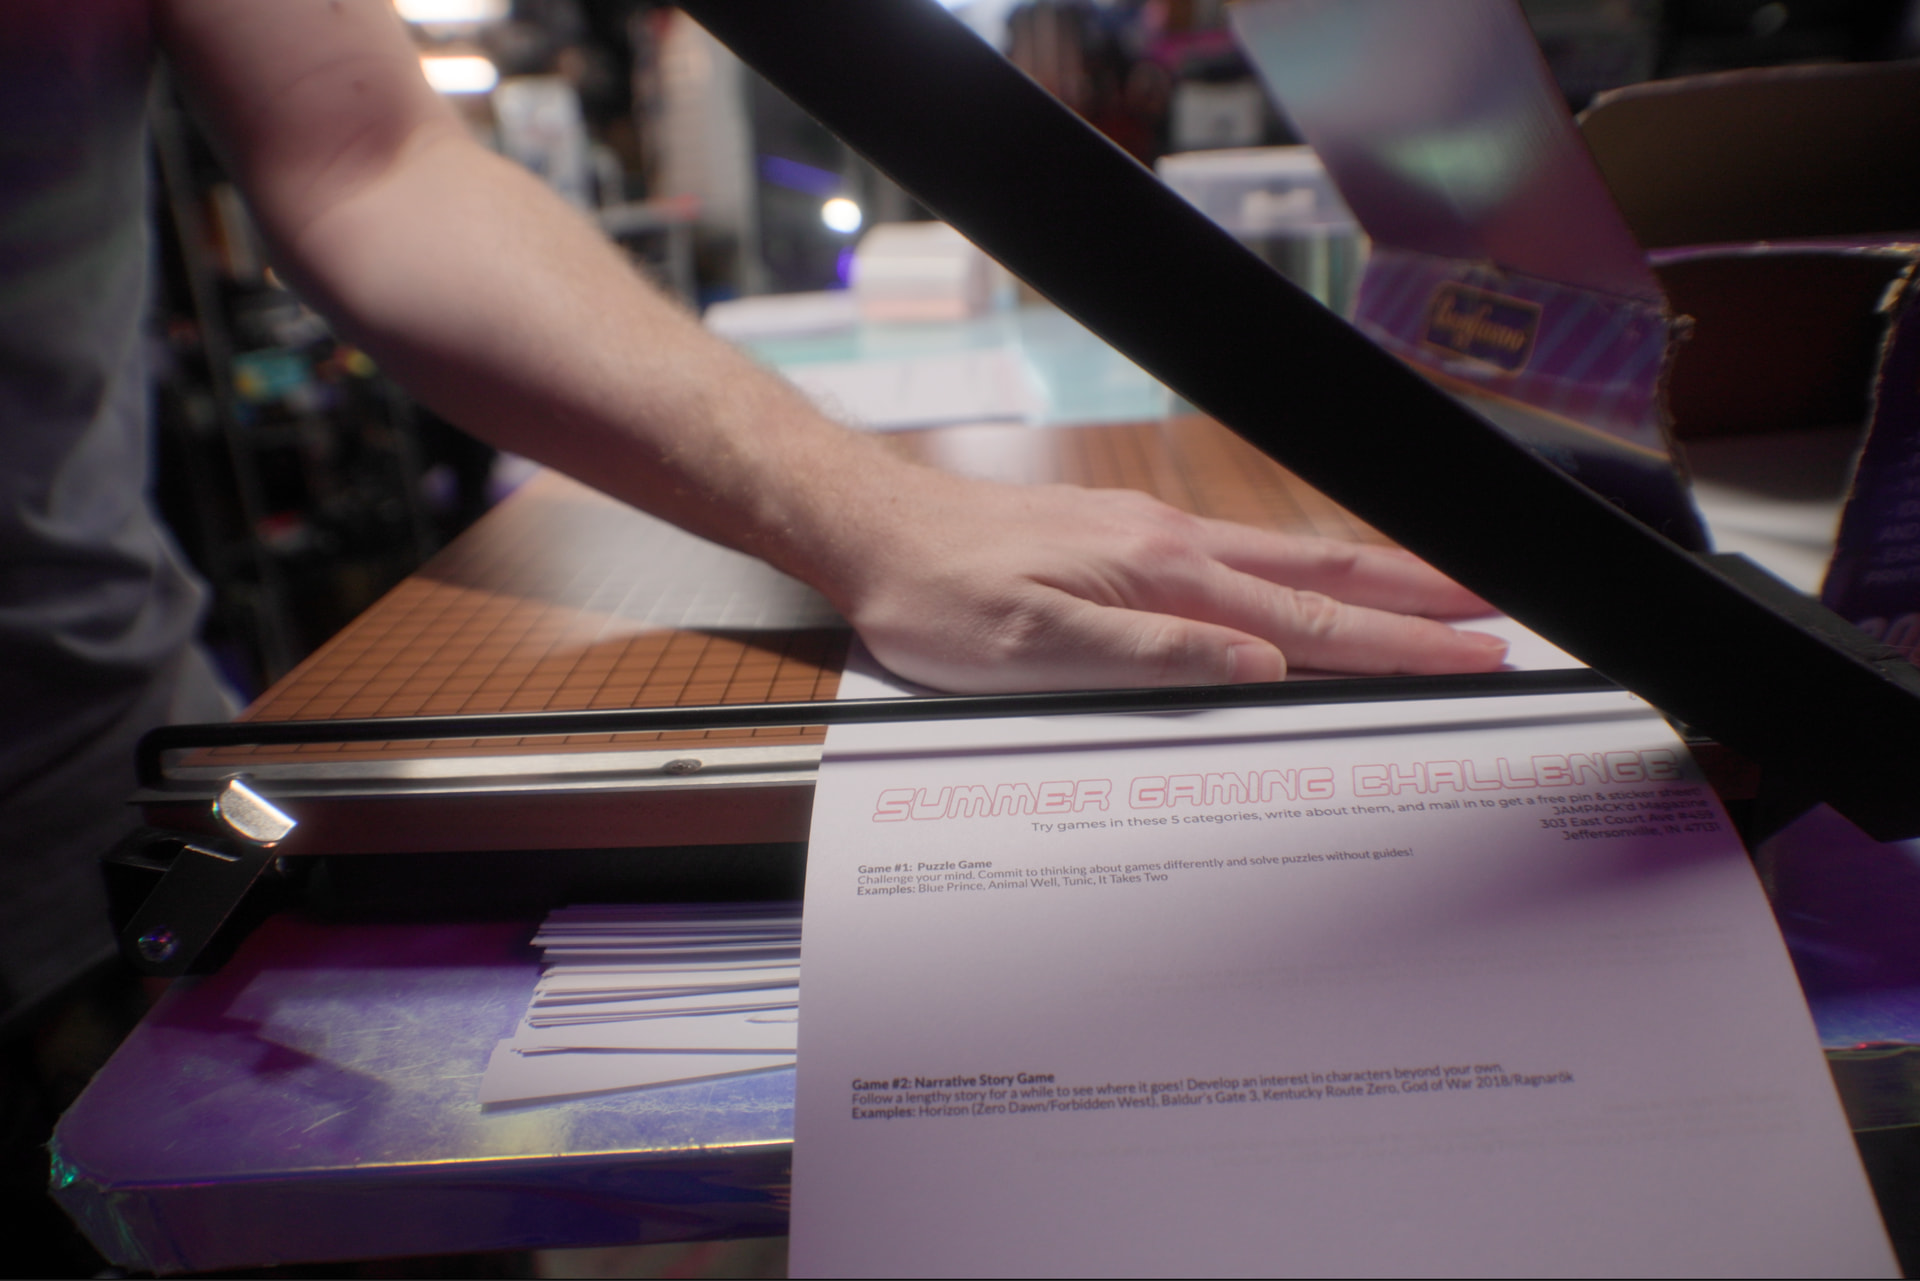
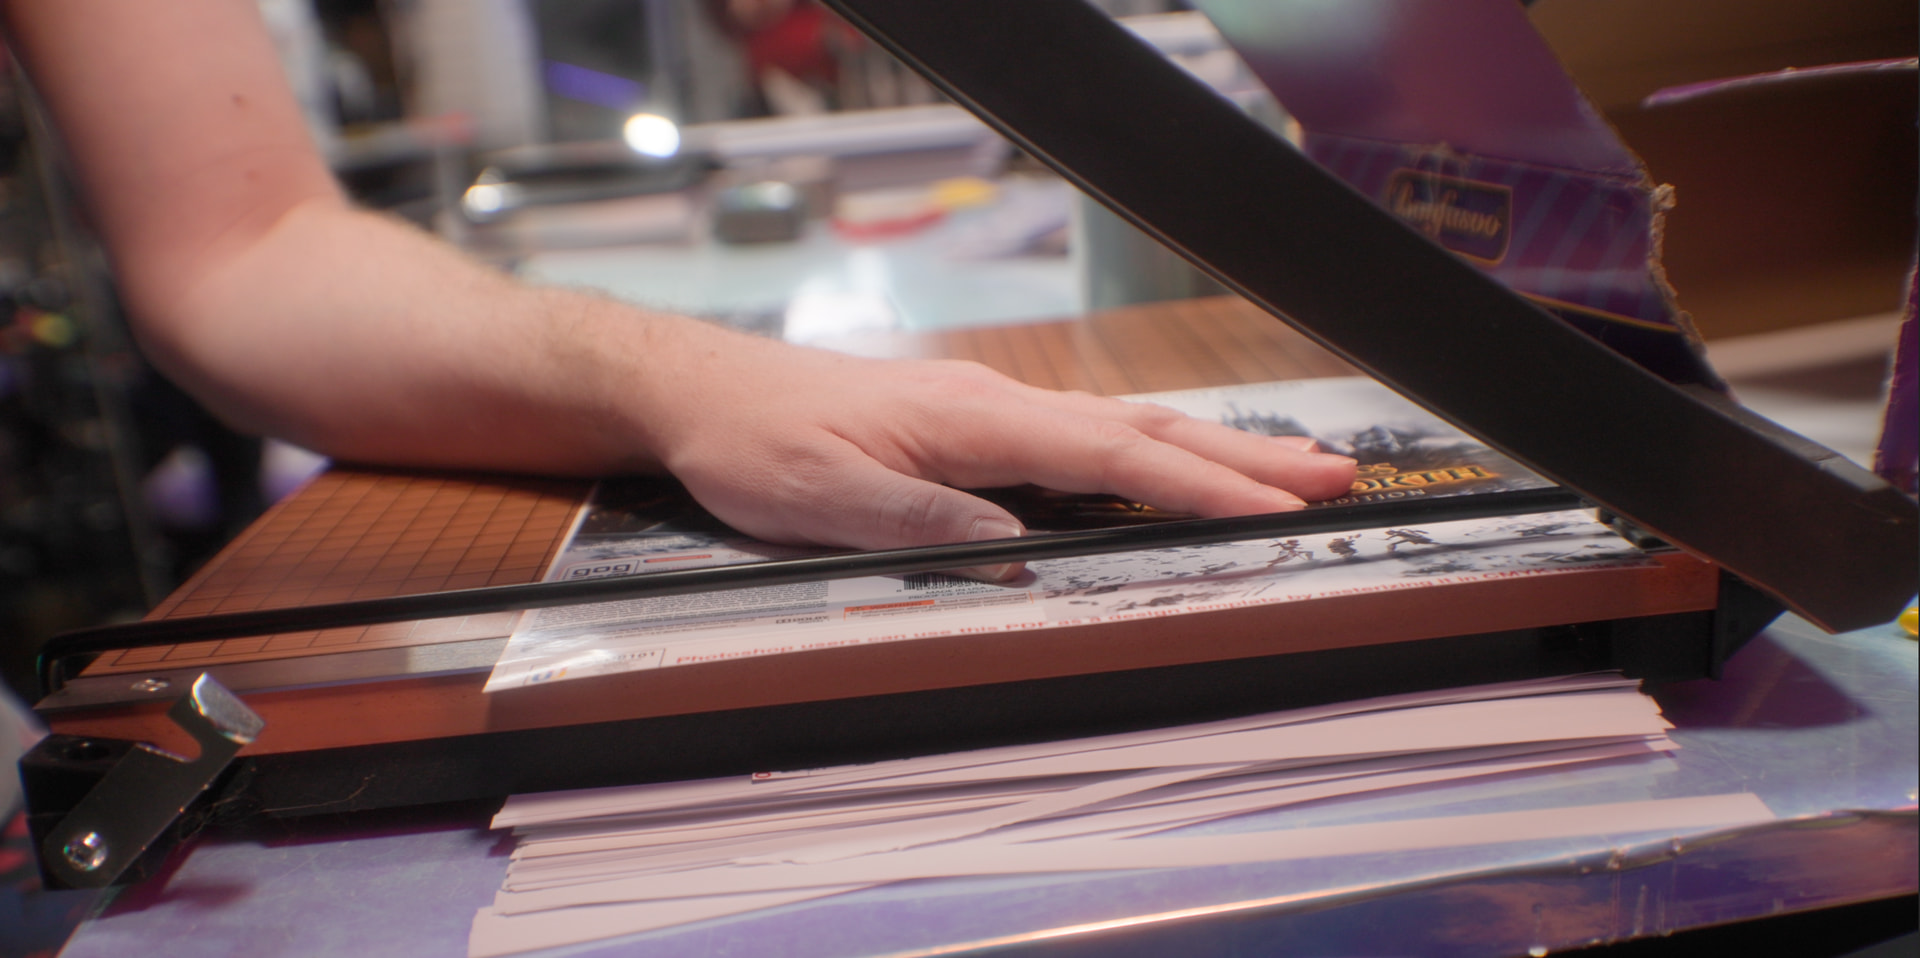
You can cut this with scissors if you don’t have shaky hands like me, one of those drag-down paper cutters, or a paper guillotine like I have. I can’t cut a straight line with scissors to save my life, so I love this little guillotine. I spot check with a PS2 game cover to make sure I’m not over-sized, and then slide it into the case. We’re already looking good!

CD Label

Now that we’ve got a case sleeve, it’s time to work on the disc. This step is entirely optional. There is nothing wrong with just using a sharpie to label a normal disc and moving on with your life. We need to normalize that more. But if you wanna be extra (which is the whole point of this exercise, after all) we need to design a cover for the disc itself.

Design

Again, for this specific game I took the fast-and-easy approach to demonstrate how quick it can be. In my second example I make the label entirely from scratch to show what that looks like.

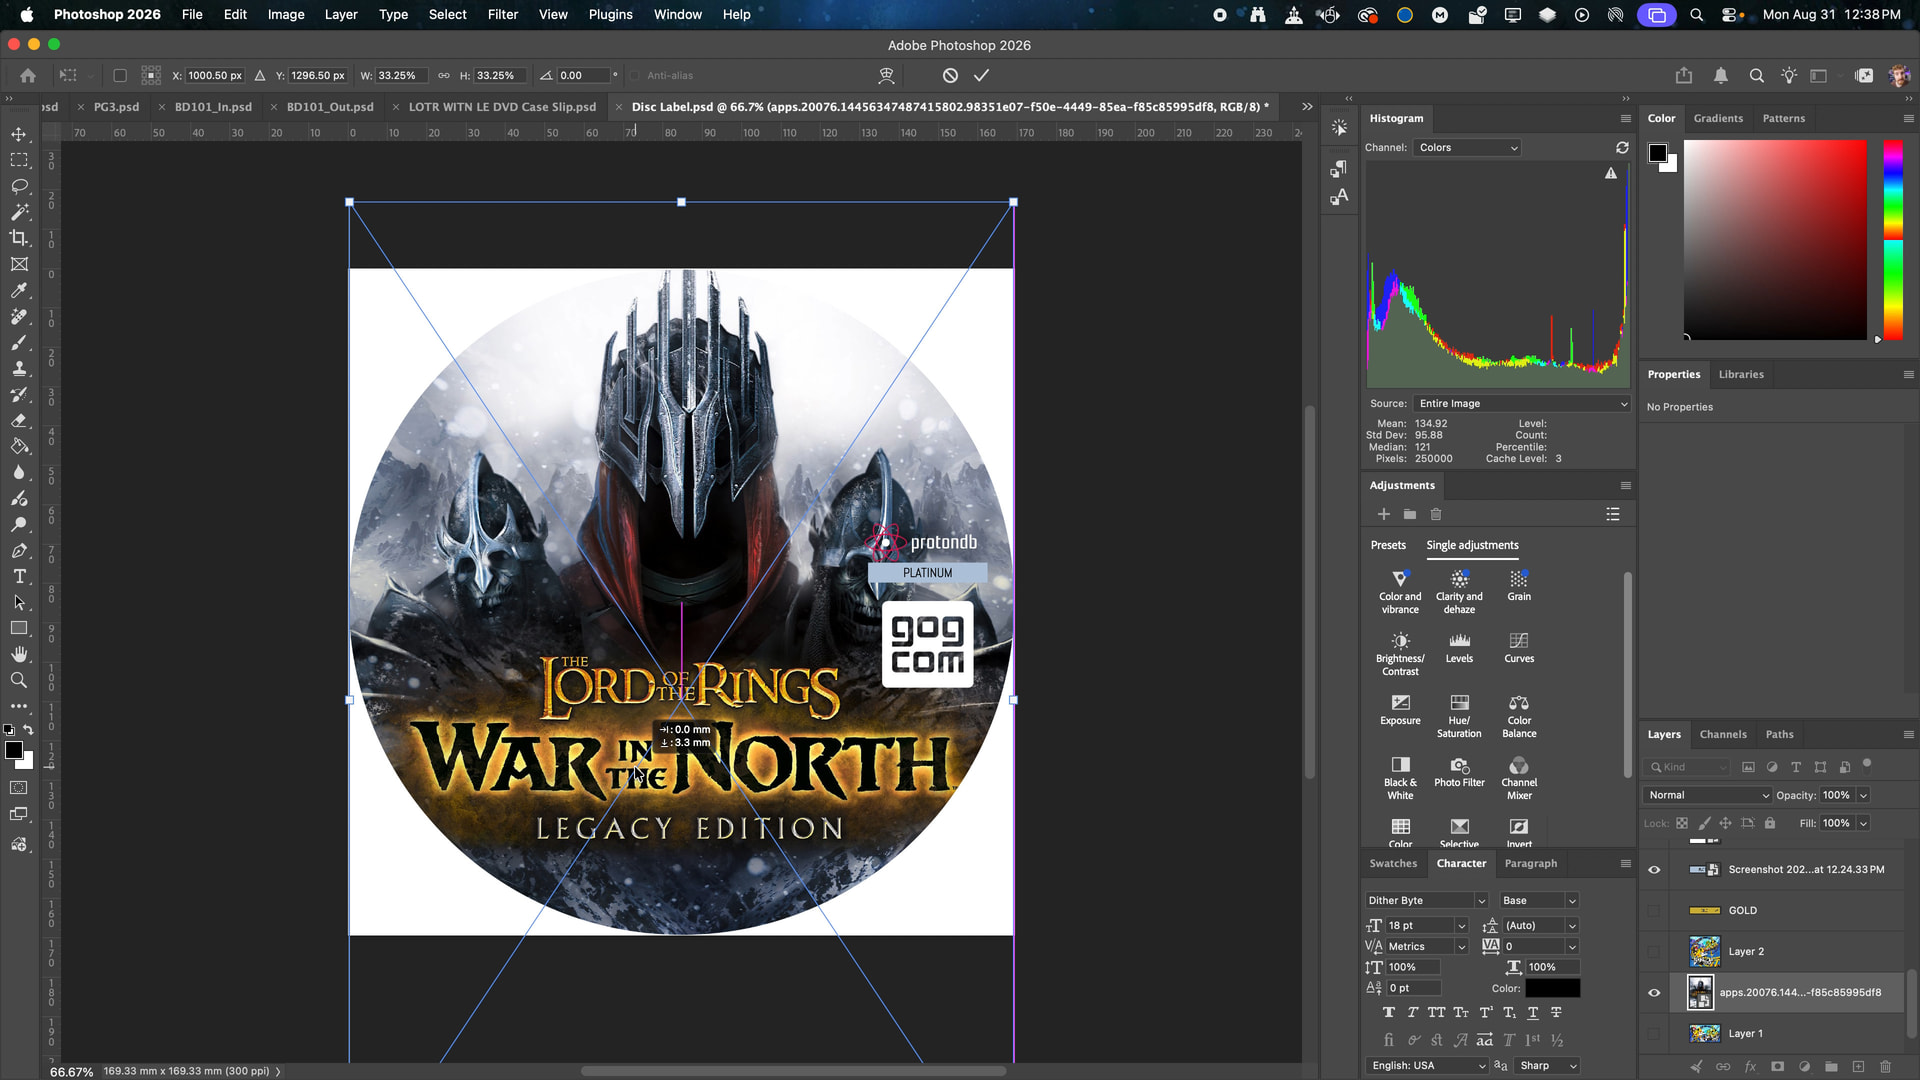
For this one, I have a 7 by 7 inch square canvas set up in PhotoShop, with a big circle mask in the center to hide the corners. You don’t actually have to hide the corners here, but it makes it a lot easier for me to know where my safe areas are this way.

I have downloadable templates for this here. Disc Makers do provide a template, but this is not super usable as it will not be compatible with either way we can print a disc at home.

Again, I just grabbed the big main key art for the game, scaled it up how I like in my mask, and brought in my ProtonDB rating and GOG logos.

It was only when I brought it into my print software that I became cursed with the knowledge that this key art is NOT centered, so I had to come back to PhotoShop to re-center it and use Generative Fill again to fill in the like 8 pixels of white required to do so. Sigh.

Lots of games either already have disc label scans or easy art that will work just fine for CD labels like this. Check TheCoverProject and SteamGridDB before spending too much time re-inventing the wheel – or disc, as it were – unless you just want to. (Nothing wrong with that!)

Print

You actually have a few options for labeling your disc, depending on what discs and tools you have available to you.

  • Permanent Marker Labeling: Standard discs are designed to just be written on with a marker. It doesn’t look the prettiest, but it’s certainly authentic for homemade media! You could get creative with marker art or even paint it across the top of it! Just don’t go too thick.
  • Printable Disc Labels: You can buy any number of printable disc labels for inkjet and laser printers. The reputable ones provide templates for word processors, design software, etc. that you can use to line up your art. There are two different sizes, some cover the clear “hub” in the center of the disc, some do not.
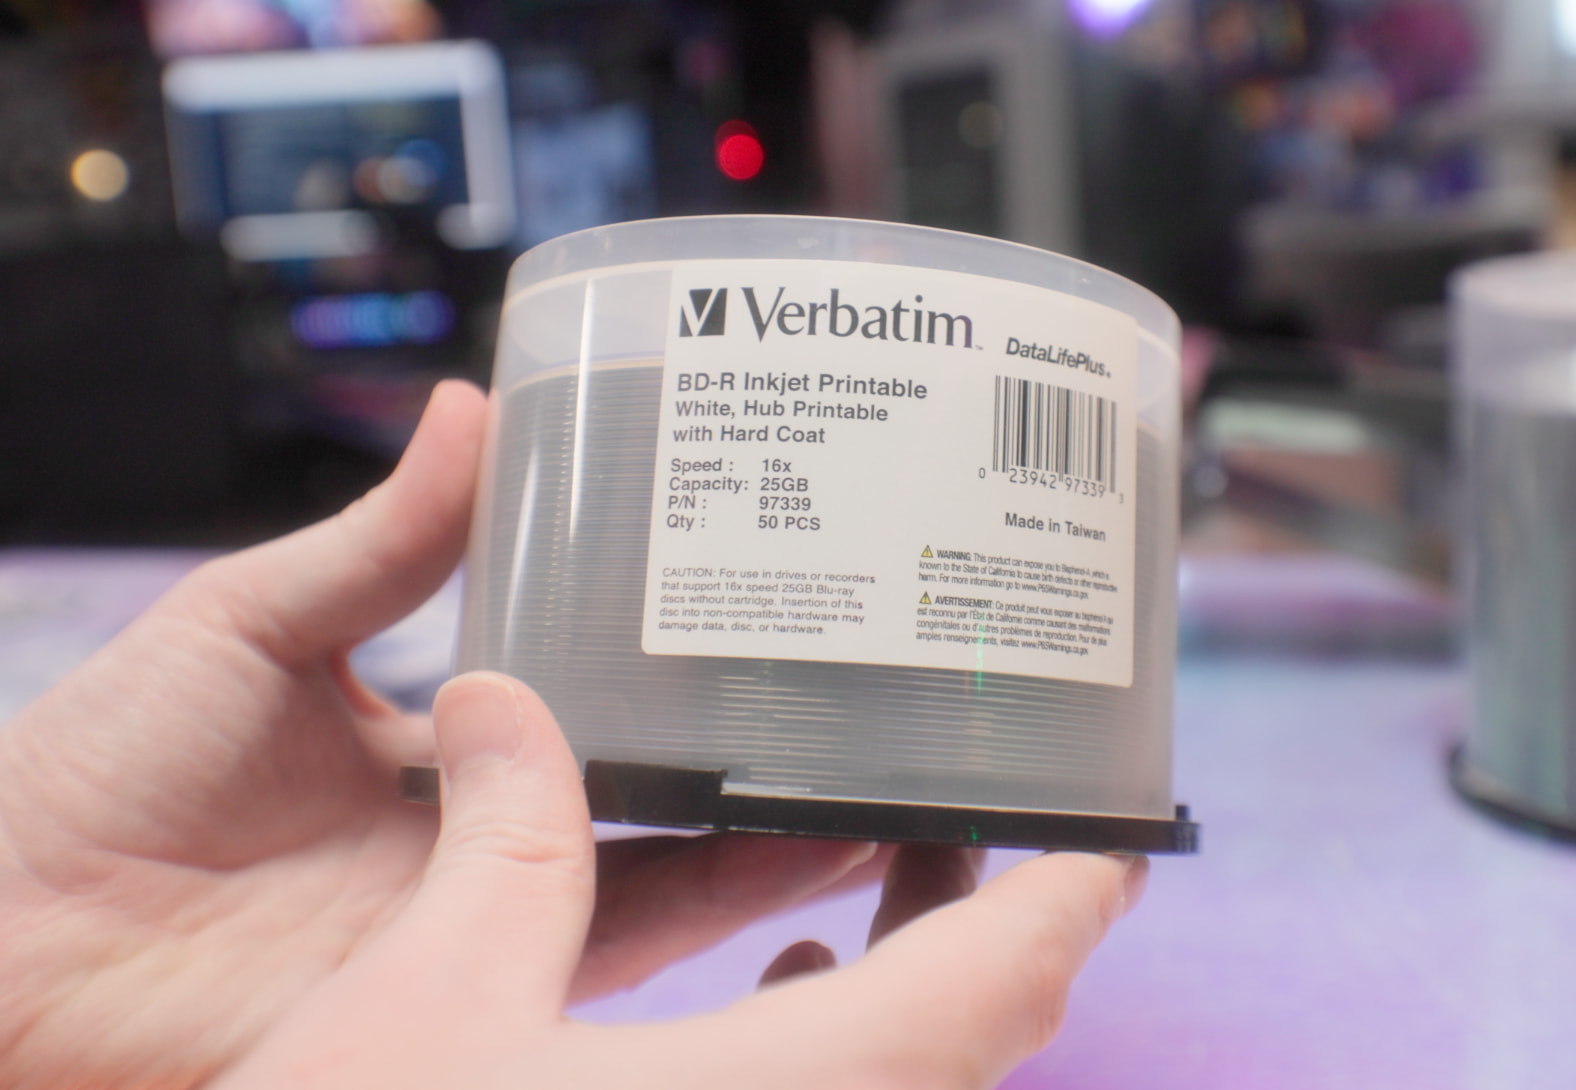
  • Printable Discs: Verbatim sells inkjet printable discs for all formats! These produce far better quality but requires a printer with a dedicated disc tray capable of printing on discs. You can’t just put a disc in a normal printer without a disc tray. Similar to the printable labels, you can get discs with and without printable hubs in the center.
  • Thermal Printable Discs: If you have a fancy thermal disc printer, you can get thermal printable discs to go with it! The printers for these are specialized equipment and expensive.
  • LightScribe Discs: For a brief period of time, LightScribe drives had a huge marketing push. These use the laser to basically engrave the top-side of the disc to do a monochrome 1-bit label on the disc. It’s neat, and at this point pretty novel, but the discs available do come at a bit of a higher costs since they’re usually sold only in small quantities.

I have had printable disc labels for longer than I can remember. I would hoard every scrap of disc and VHS labels I could find, always making my own copies. But I’ve always been disappointed with the quality. When I started making my own GOG discs again, I was excited that they would finally look good now that I have a fancy high-end photo printer – but nope! They still look bad. The kind of paper used just isn’t great, they’re a pain in the ass to line up, and the ones I have don’t cover the hub.

But they’re still fine. Use what you have, and while I was initially disappointed with the results, as I go back through some of them, I honestly can’t complain that much aside from my poor alignment.

To print on the disc labels, make sure you put them in your paper tray with the correct orientation identified on the sheet, and use the design templates to line up your work, and print. Pretty straightforward.

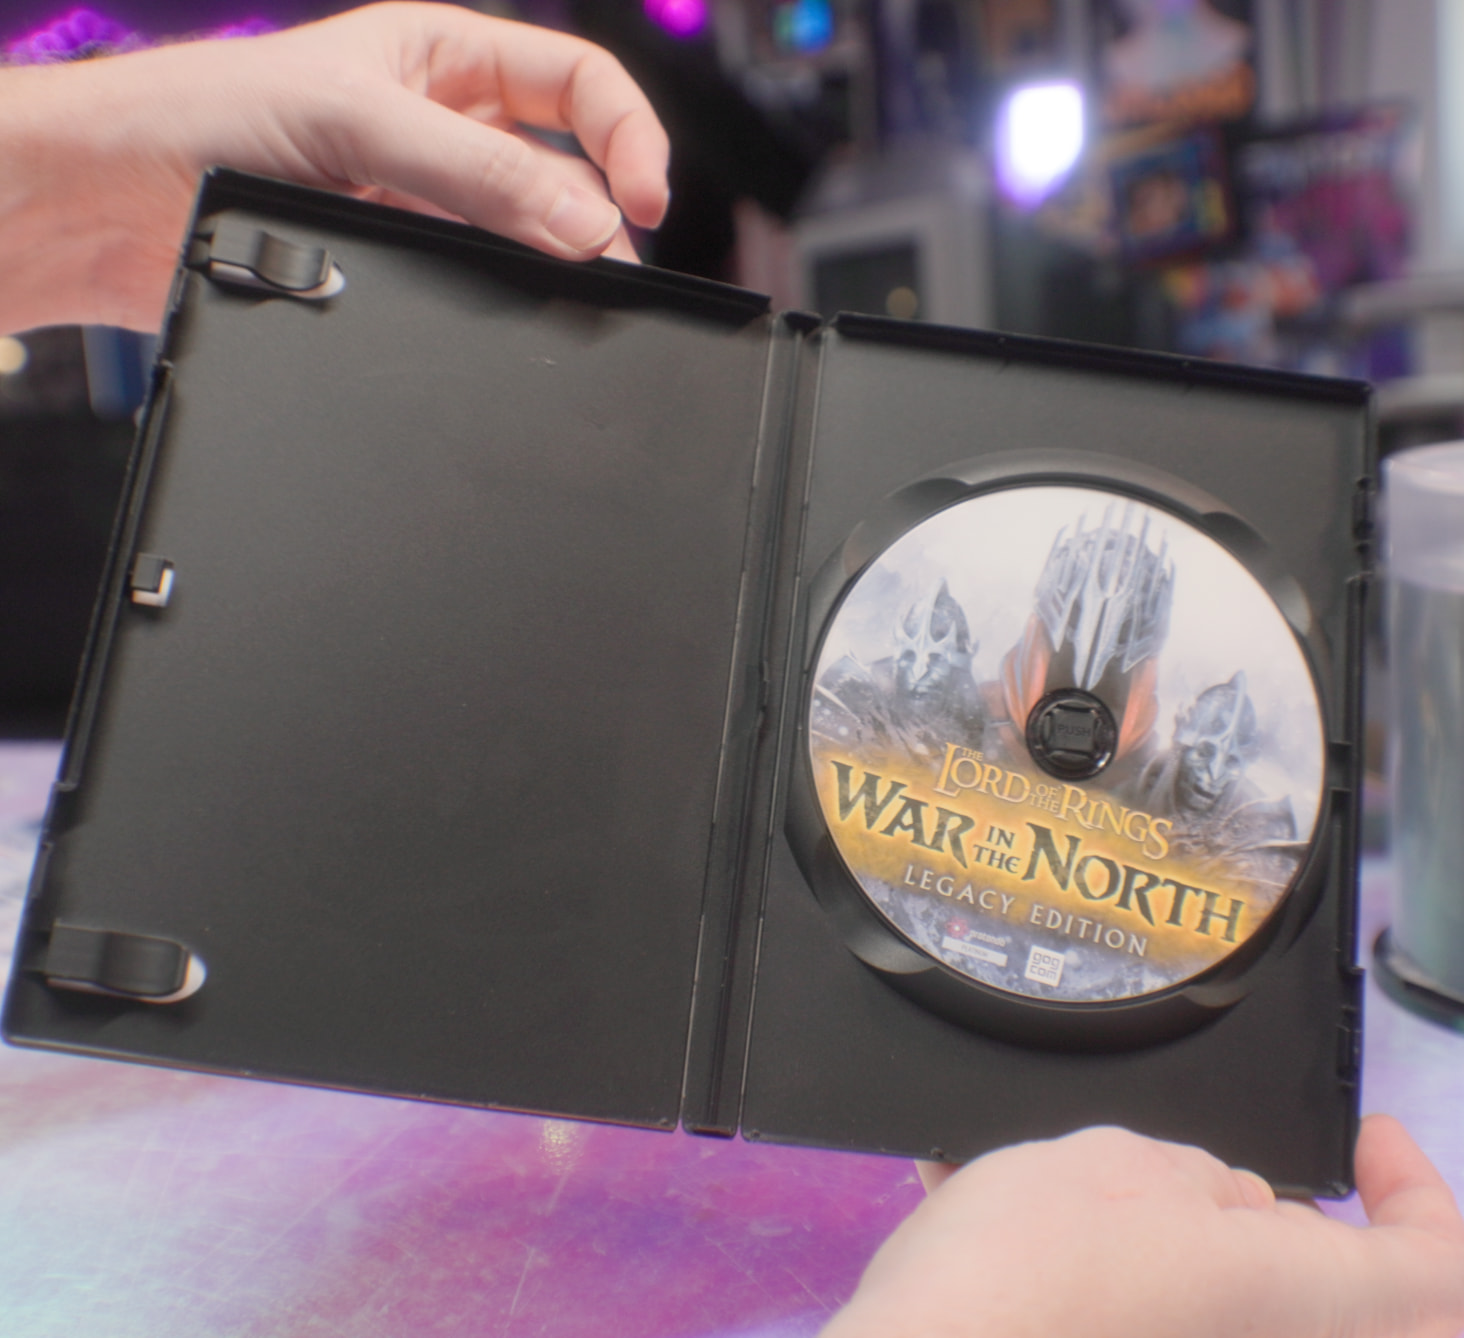
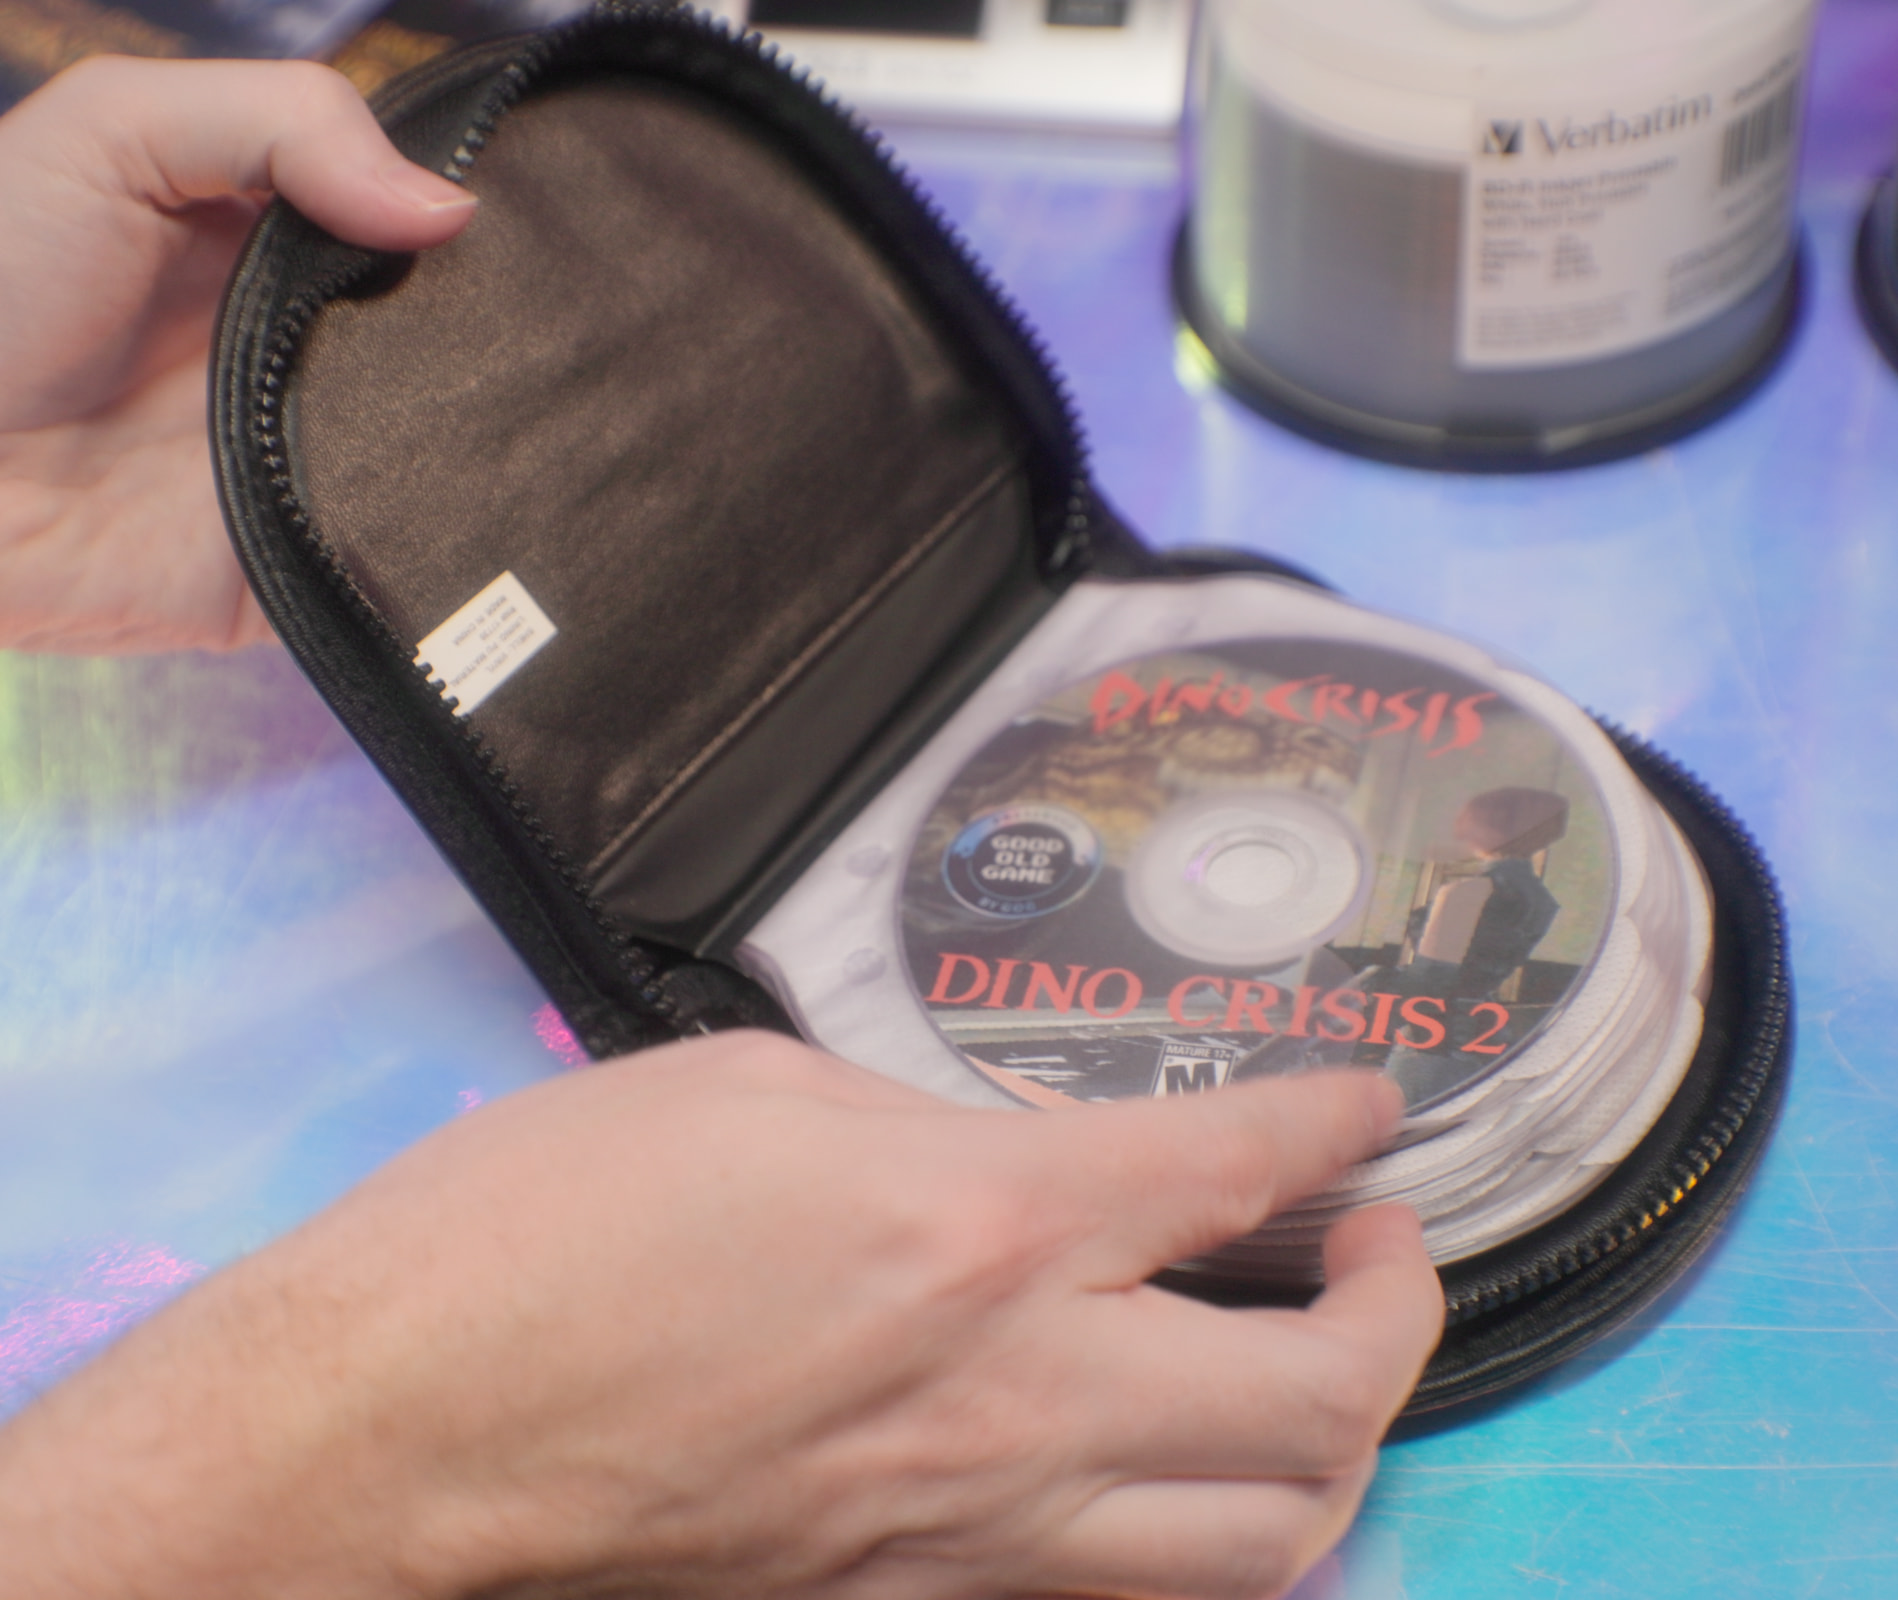
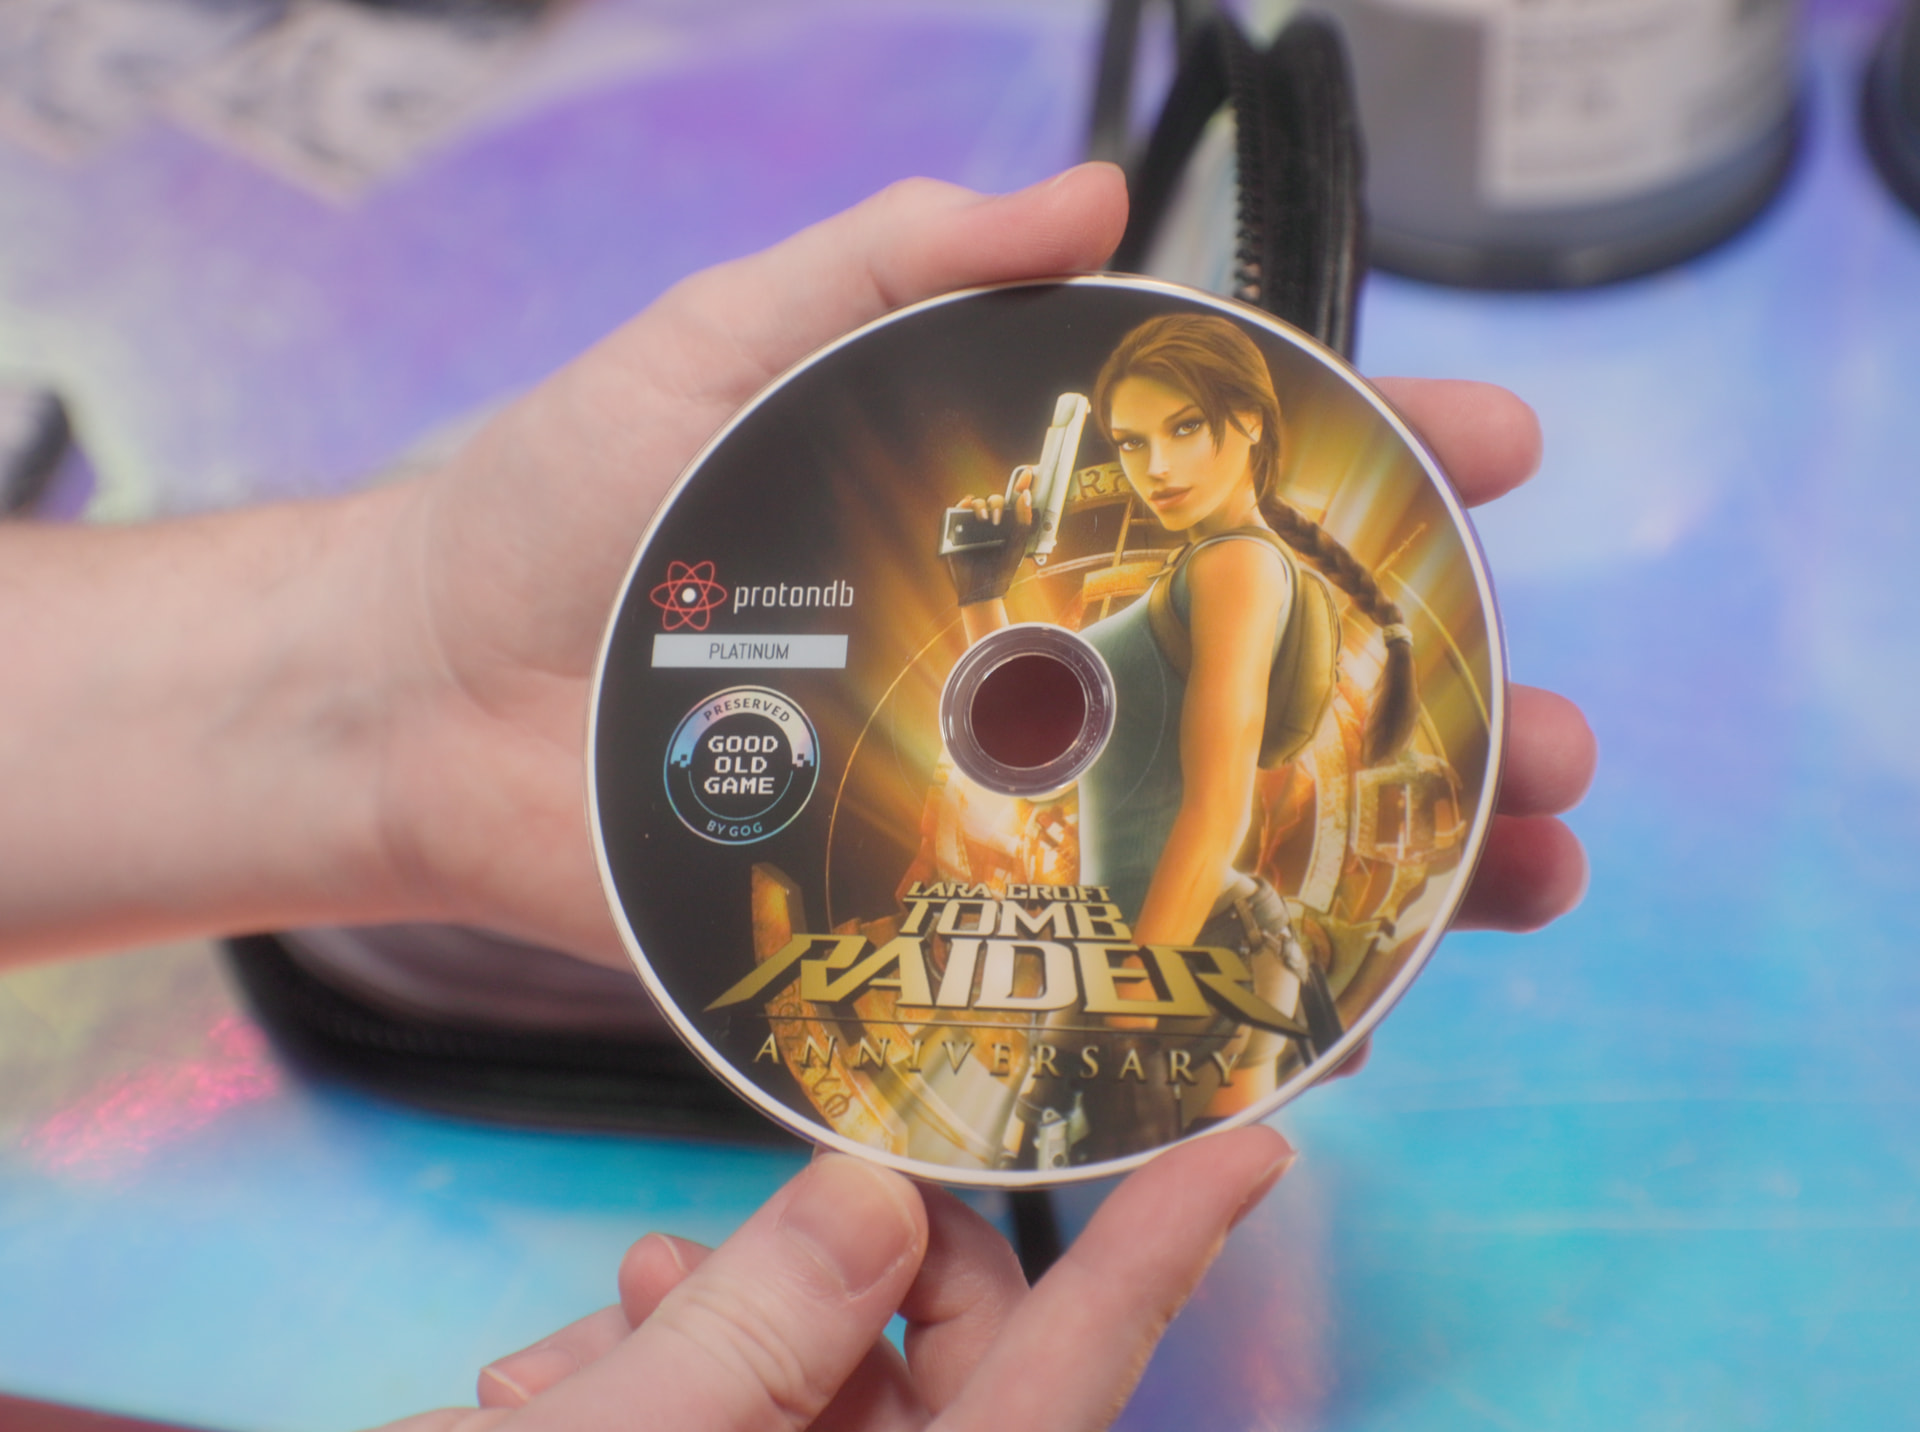
I still have a pretty big supply of standard discs and some labels I intend to use with them, but I invested in big packs of inkjet-printable discs for most of my experiments here, and that’s what I used for this copy of War in the North Legacy Edition.

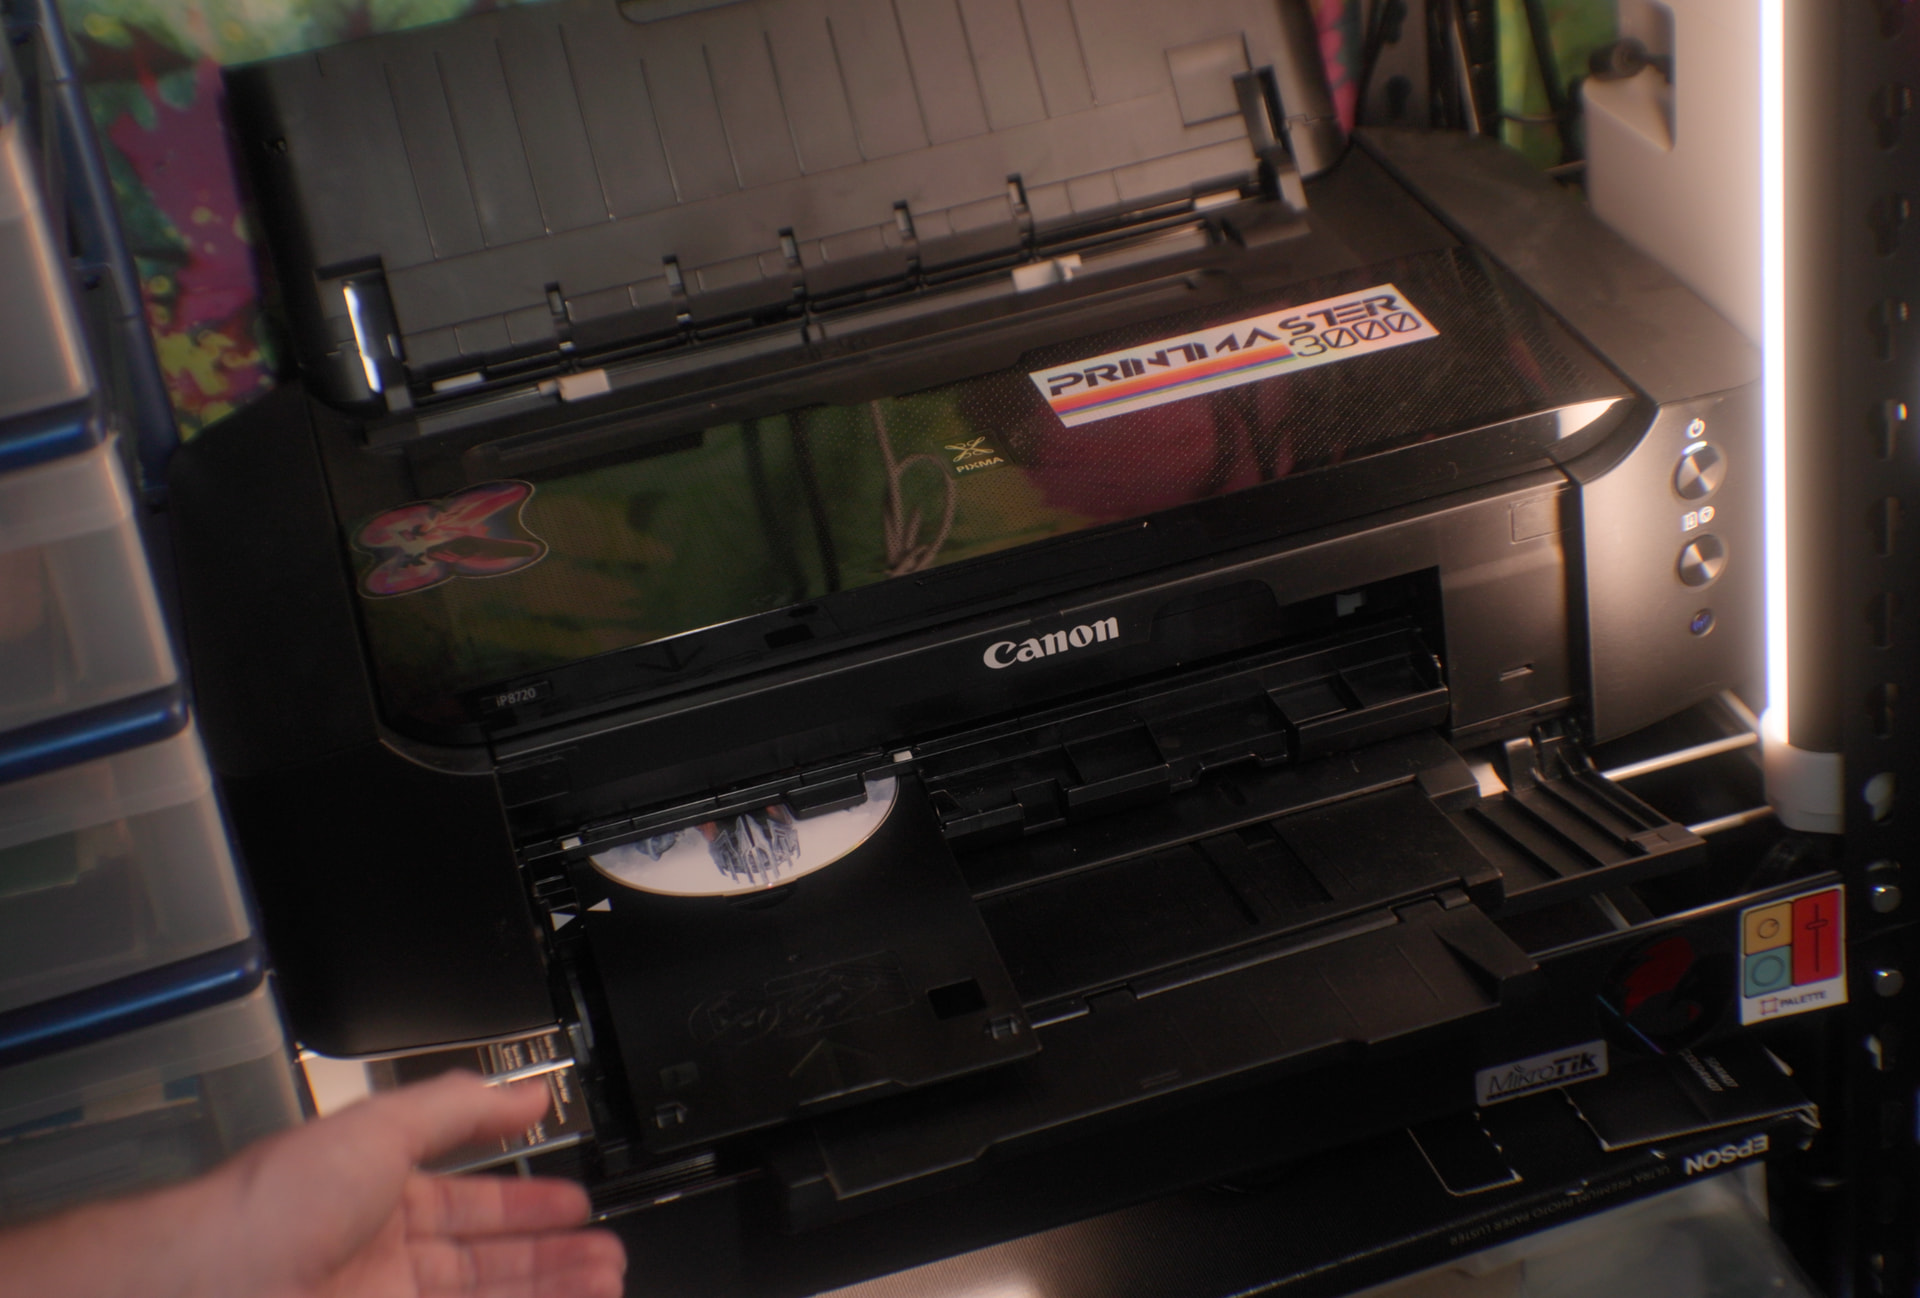
To print this, I’m using a Canon PIXMA IP8720 – a big 13x19” photo printer. I mainly use this for large, high-quality photo prints, but it happens to have a disc tray and disc printing functionality, so I’ve been taking advantage of it.

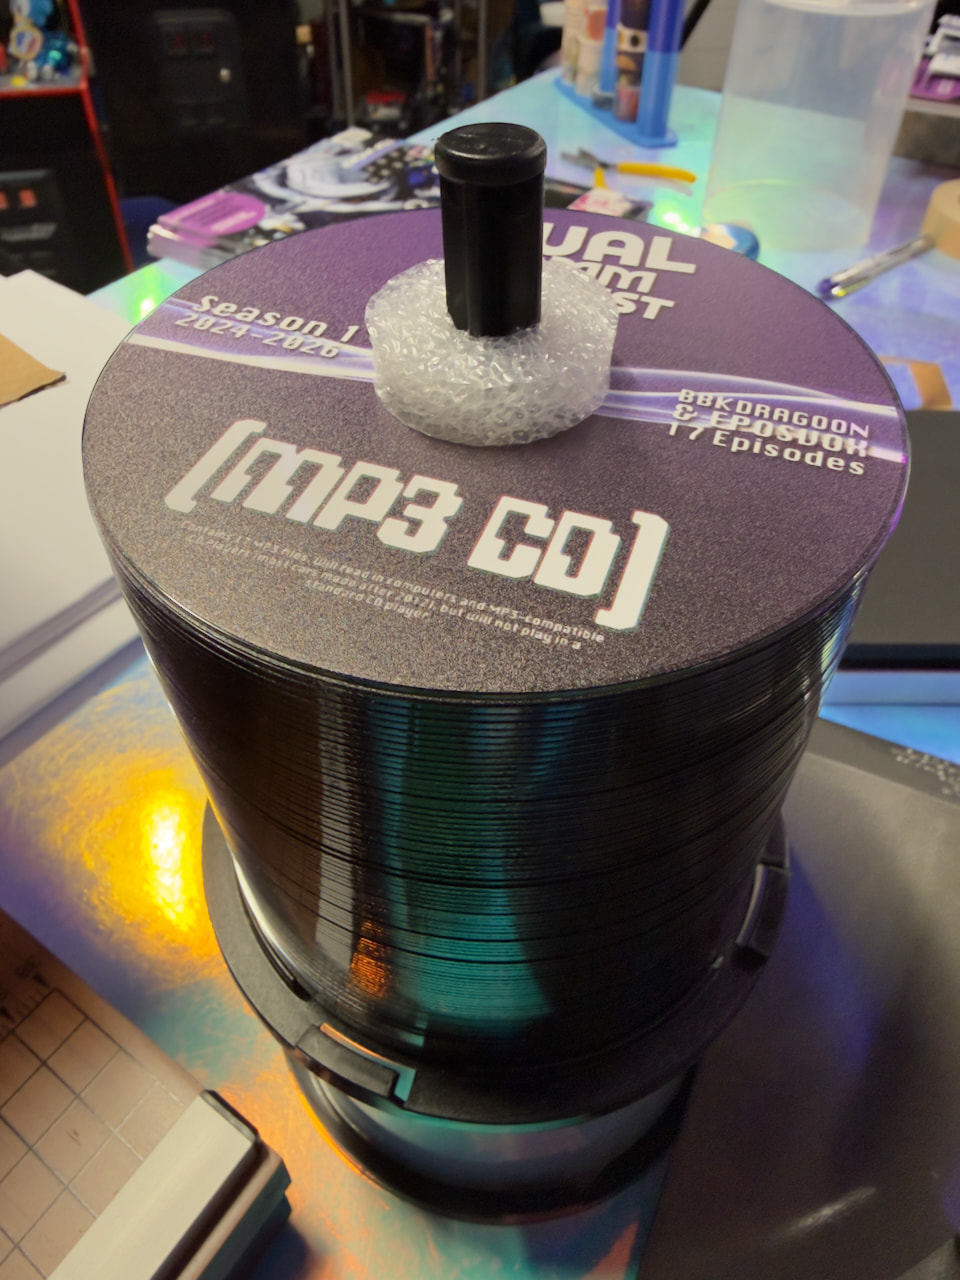
[Note: Do not take this as a specific endorsement/recommendation for this printer for this purpose. While I do love my IP8720, the disc tray is obnoxious. It’s constantly getting stuck and takes a lot of bending and trickery to get it to feed properly, and it’s a slow process. It became such a bottleneck on the DualComm PodZine that I constantly stayed behind on orders, never got to print a bunch of extras to give out, and instead wound up doing a bulk 100-disc order from Blank Media Printing. This method is fine for the occasional one-offs, but is not suitable for consistent recurring work.]

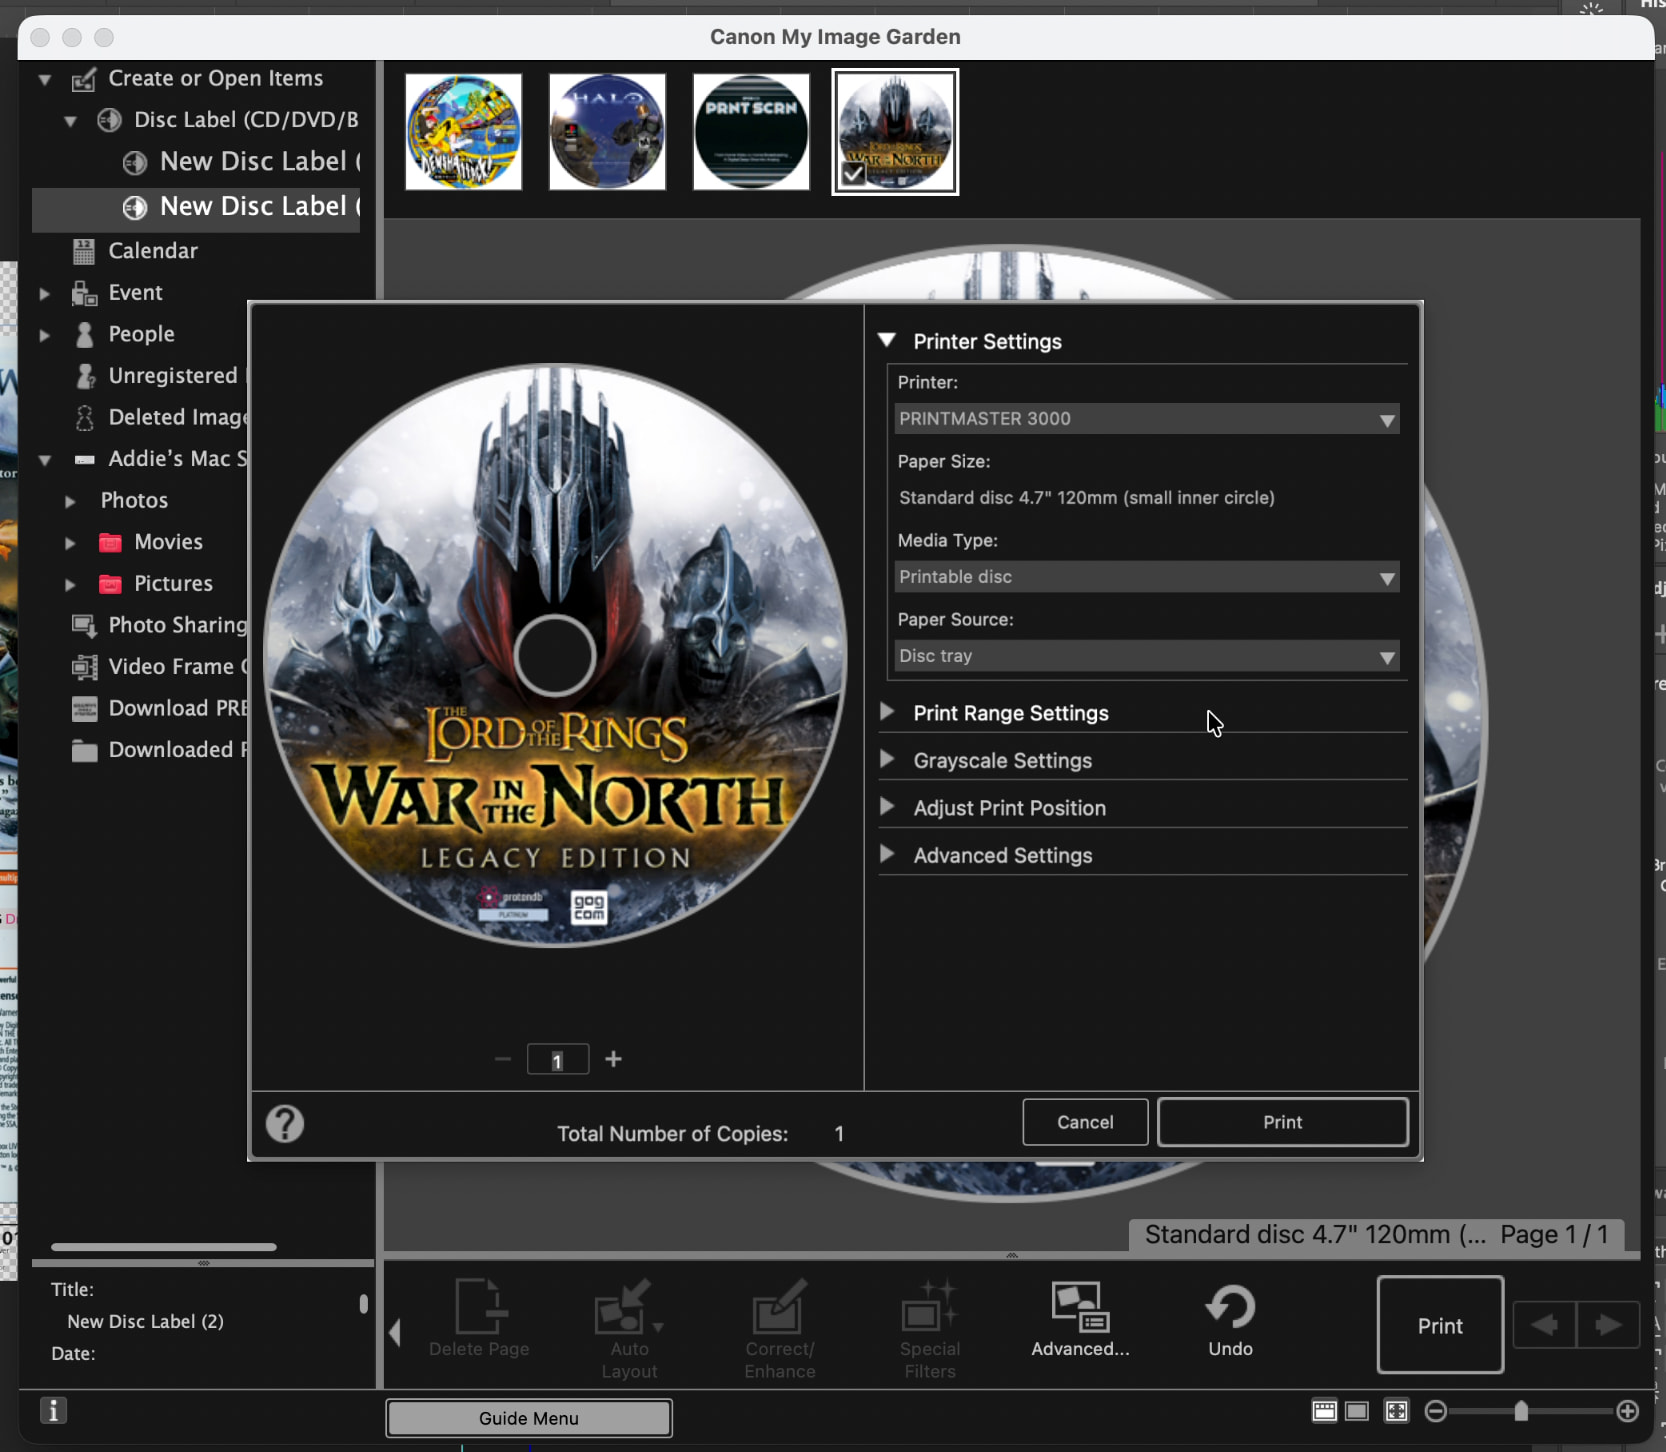
Canon provides a software called “My Image Garden” for printing various things, including discs. It’s pretty straightforward: Add the image, drag it onto the CD, adjust sizing of borders, and tell it to print. The CD tray has to be closed on the printer, then it calibrates the ink positioning for the job, then asks you to open it and put the disc tray in and hit the button to print. Printing doesn’t take that long, but it will need to dry for 30 minutes to an hour after printing.

Burning the Disc

There’s no end of free software for burning data discs:

  • IMGBurn for Windows (get via Ninite to avoid adware)
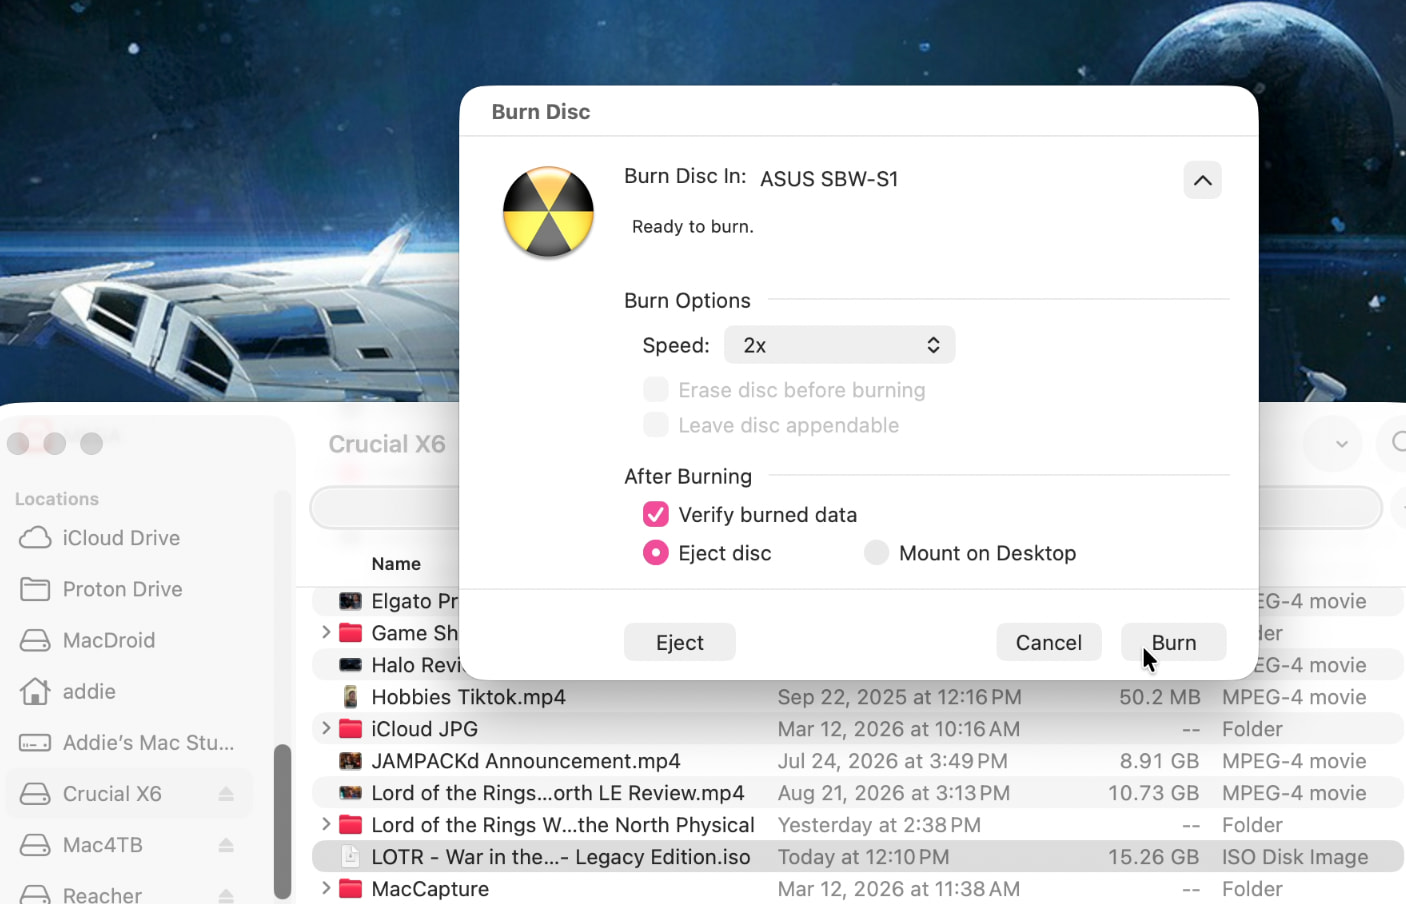
  • Mac OS has a built-in Burn tool that’s quite good
  • Brasero or K3b on Linux

The most practical, straightforward way to burn one of these discs is to just use your disc-burning software to initialize it as a data disc, add your files, give it a label and tell it to burn. That’s it.

But if you want to be extra , you could design a disc menu to interact with and run the installers from. However, this only works on Windows. There’s no autorun capabilities or disc menu software that will run properly on Mac or Linux, and autorun is disabled by default on modern versions of Windows anyway due to security vulnerabilities. This exercise is almost entirely pointless, but if you’re on Windows and want to do this for the nostalgia, there are a couple options. I’ll demo one such option for this game and another for the next game.

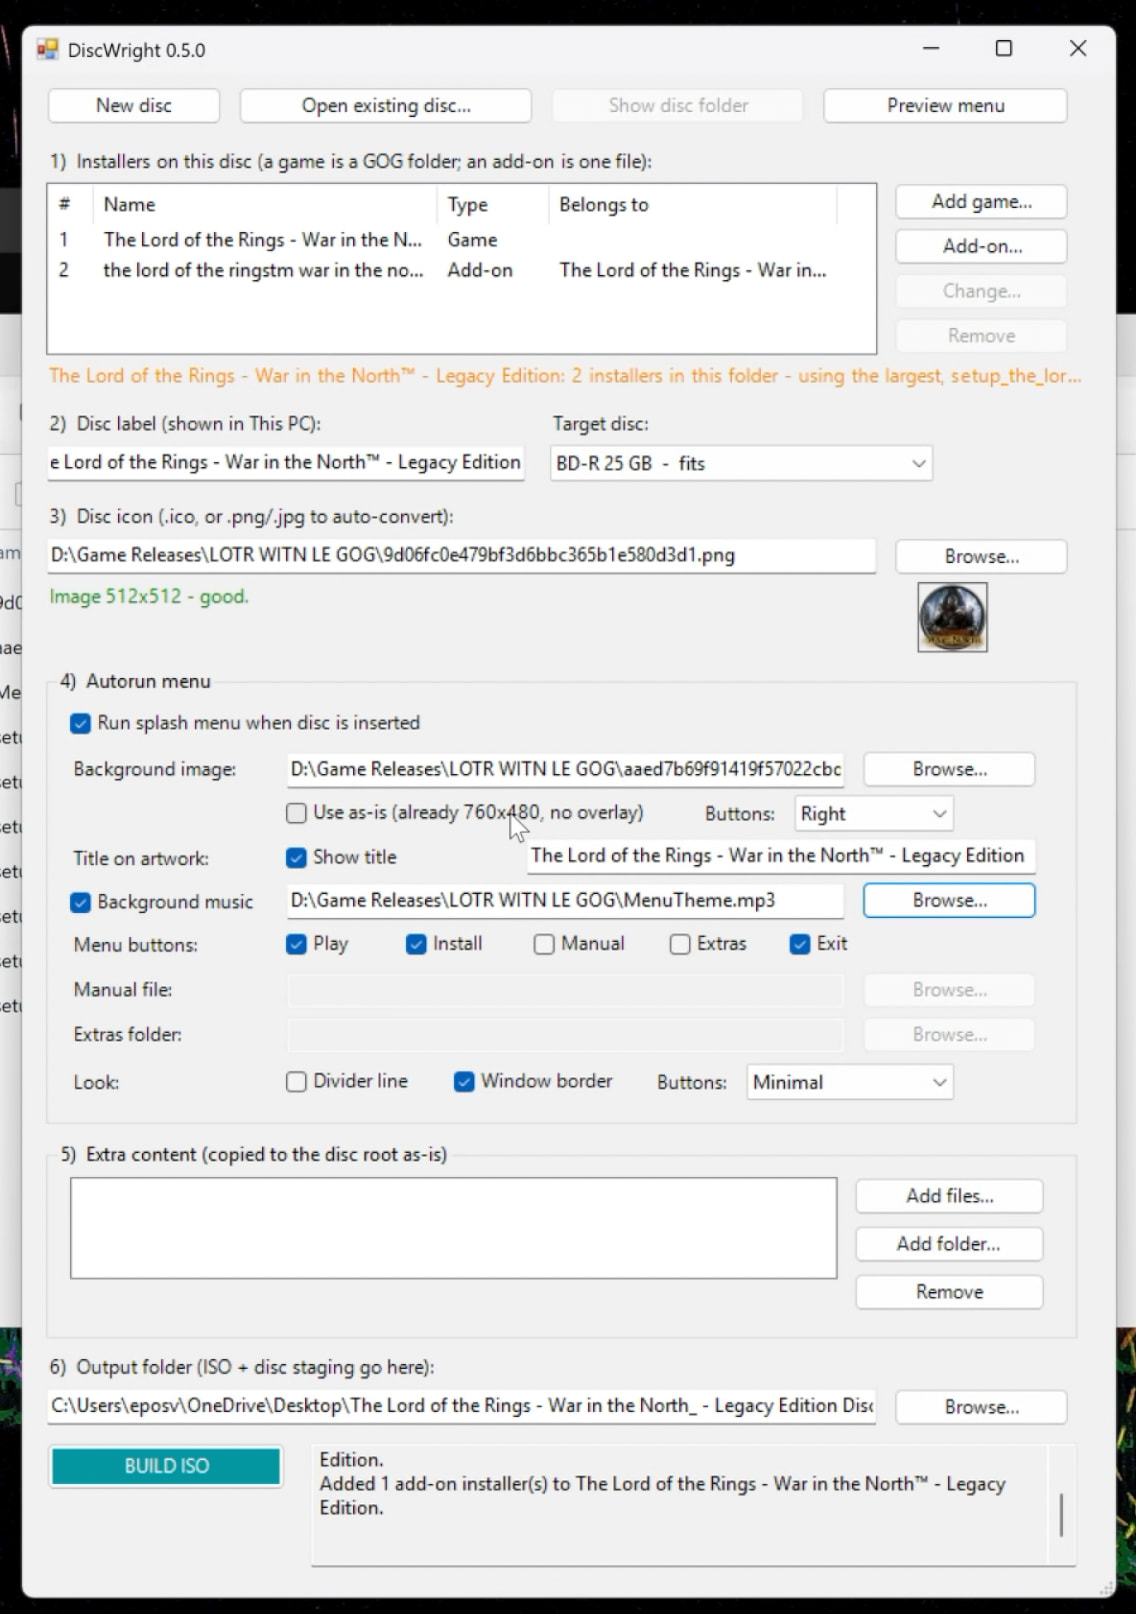
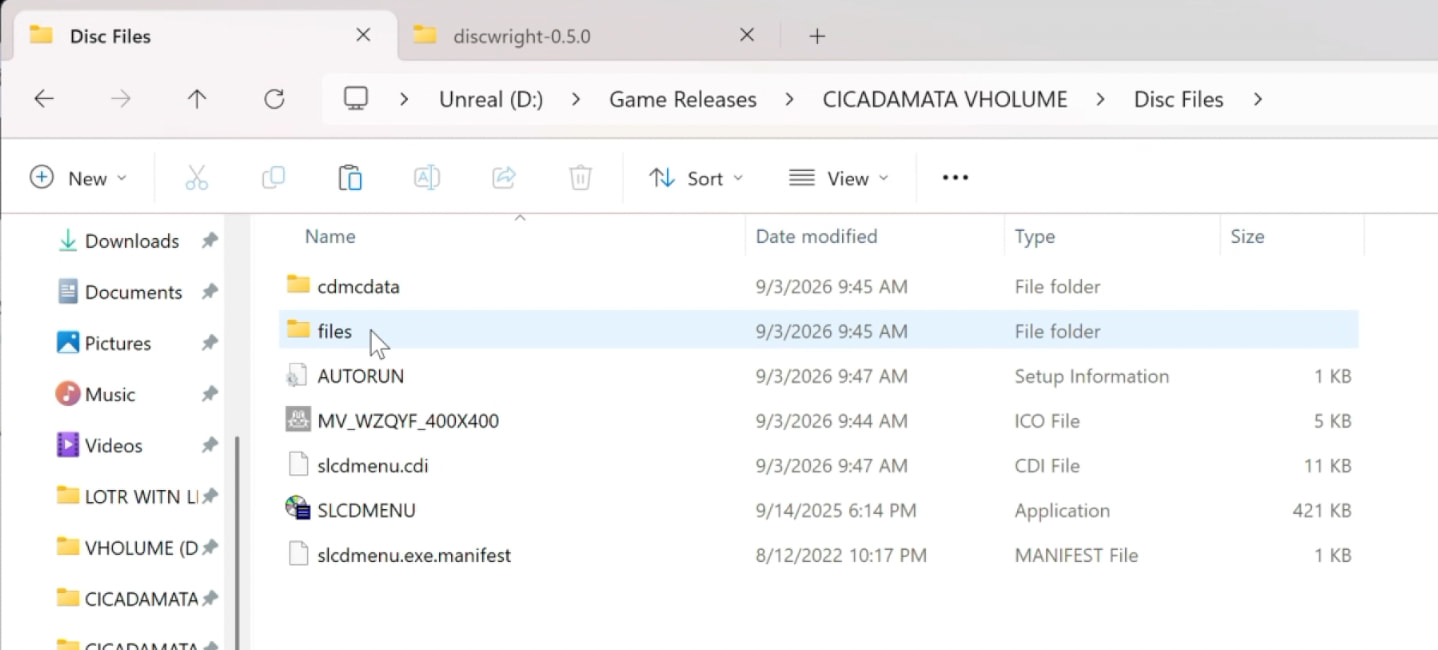
Since this is specifically a GOG game, we can use the new Github project called DiscWright. This runs via newer (Windows 11) versions of PowerShell and allows you to generate an installation menu, set background music, labels, and an icon, for a disc image using your GOG installers. But this only works with GOG installers, not straight game files or other methods of burning games. This is an annoying limitation, but the other software I demo for the next game does not suffer from this.

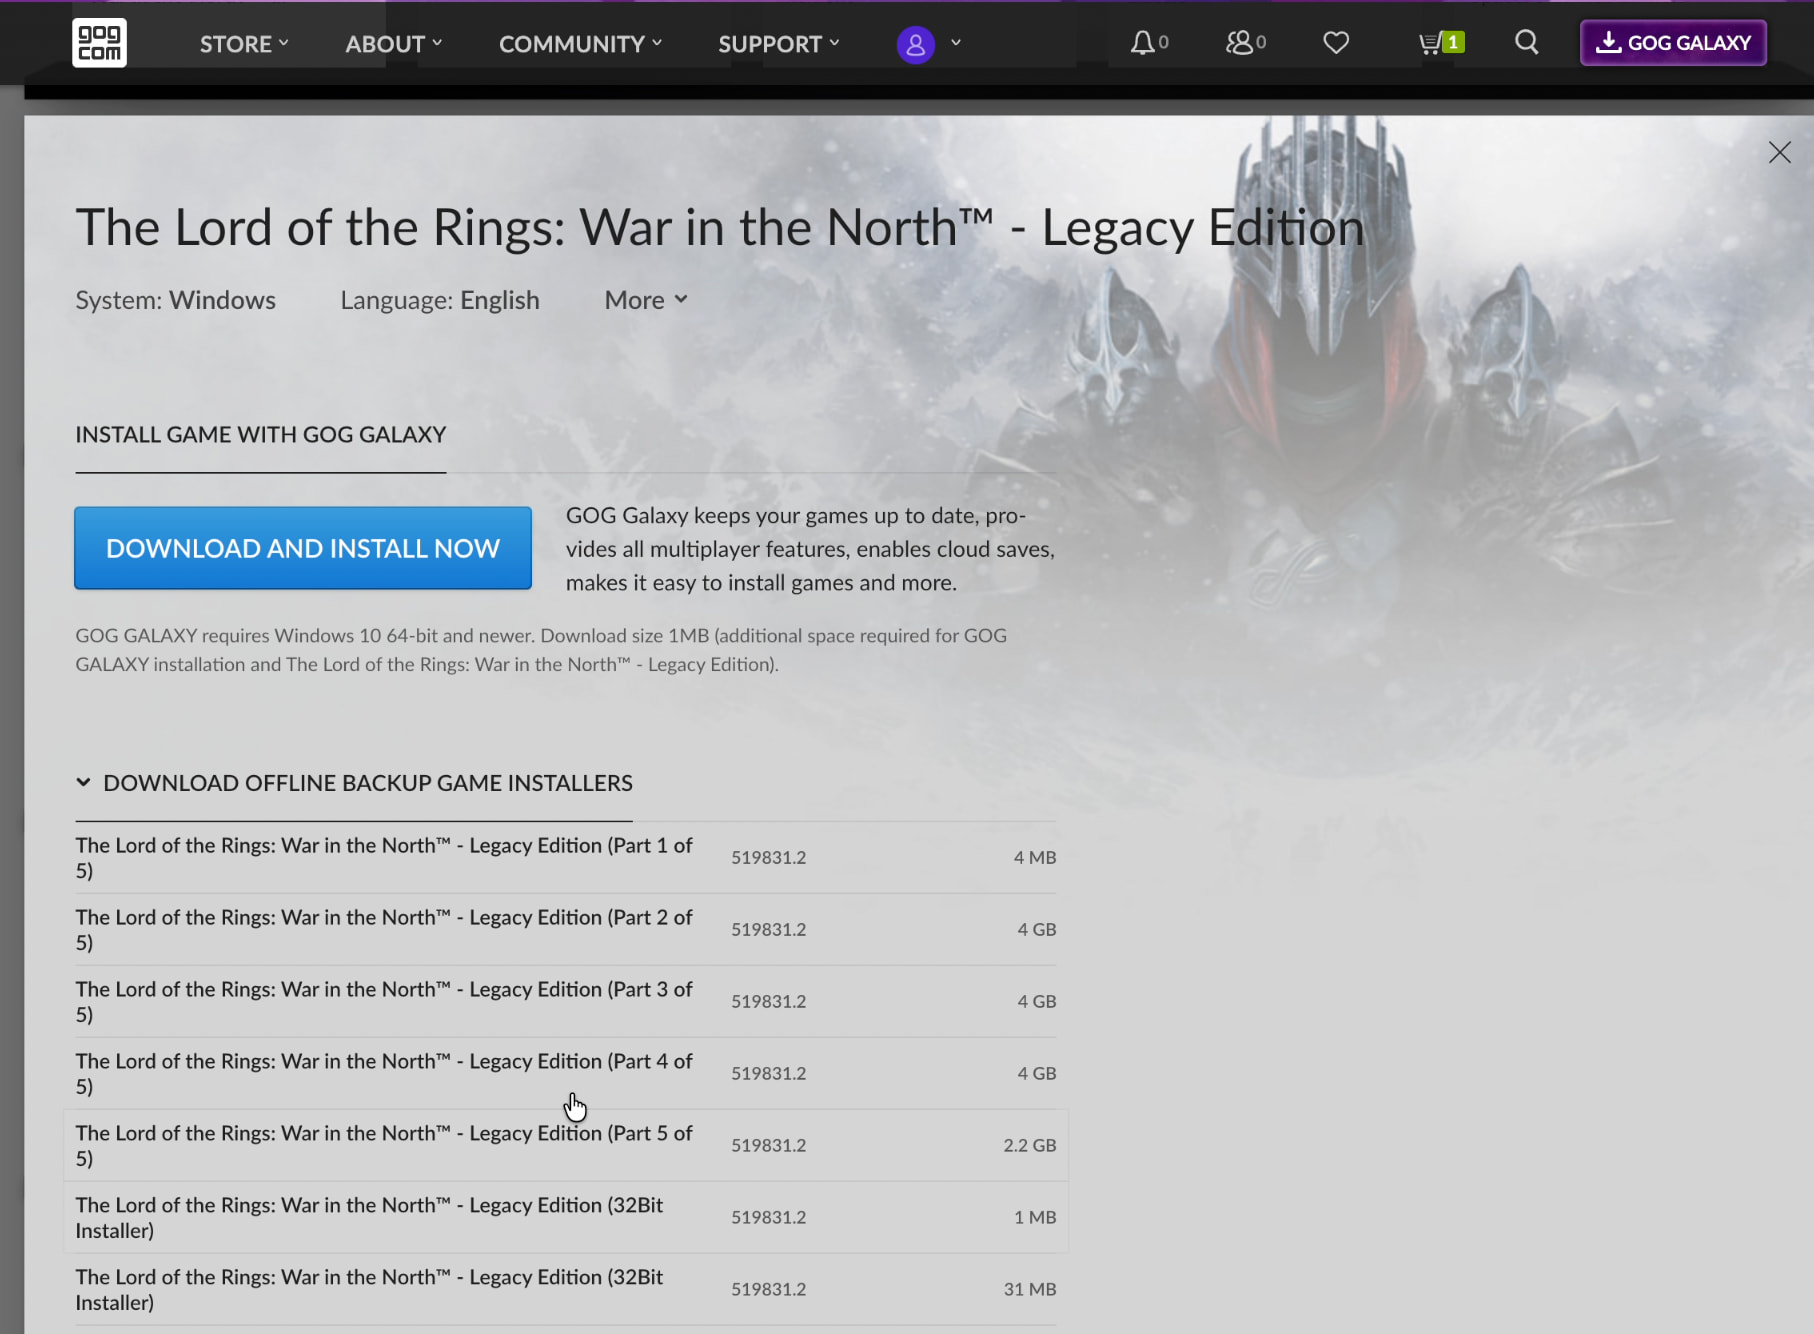
Download all of the GOG installers, bin files, etc. from your GOG account page. (Do NOT download GOG Galaxy for this, we specifically want the whole game files, not their launcher.) Collect them in a folder and take note of what’s there. Specifically for this game we have installers for both 32-bit and 64-bit versions of the game, along with .bin files containing the files needed for the installer.

Download the latest DiscWright zip file from Github and extract its contents to a folder. Then run the “Run DiscWright” batch file.

In this program, you can point it at a folder containing your Github installers, add any executables for Add-Ons for your game – I used this to list the 32-bit installer in the menu here), change the order, and so on. Then you can add the text label for the disc, choose your disc size, add an icon, background image, title and background music, and even add other extra content. Then choose where to output the ISO file to burn, and tell it to run. Since this is a big 17GB installation package, it took quite a while to build the ISO, but it worked!

Now that we have an ISO image, you can use IMGBurn to burn it on Windows, Brasero or K3b to burn it on Linux, or just right-click and hit “Burn to Disc” on Mac, once your blank disc is inserted in the drive. You can see the texture of the back side of the disc change after it’s been burned.

Extra Steps

A physical edition of a digital-only game has been created!


This is really all you need or might want, but there are some things you can do to take it further. One option could be making or printing additional inserts to go in the flap inside the case. You could put in a ton of work and do full manuals. Or make a zine, my Denshattack! FanZine could easily be resized a bit to fit in a case in the manual slot. Or you could print fan art, guides or cheat codes – anything. My favorite thing is opening a game case and finding the original purchase receipt or printed cheat codes or old GameFAQs in there. I both use them and find them to be wonderful nostalgic artifacts and mementos that help add a life to the games.

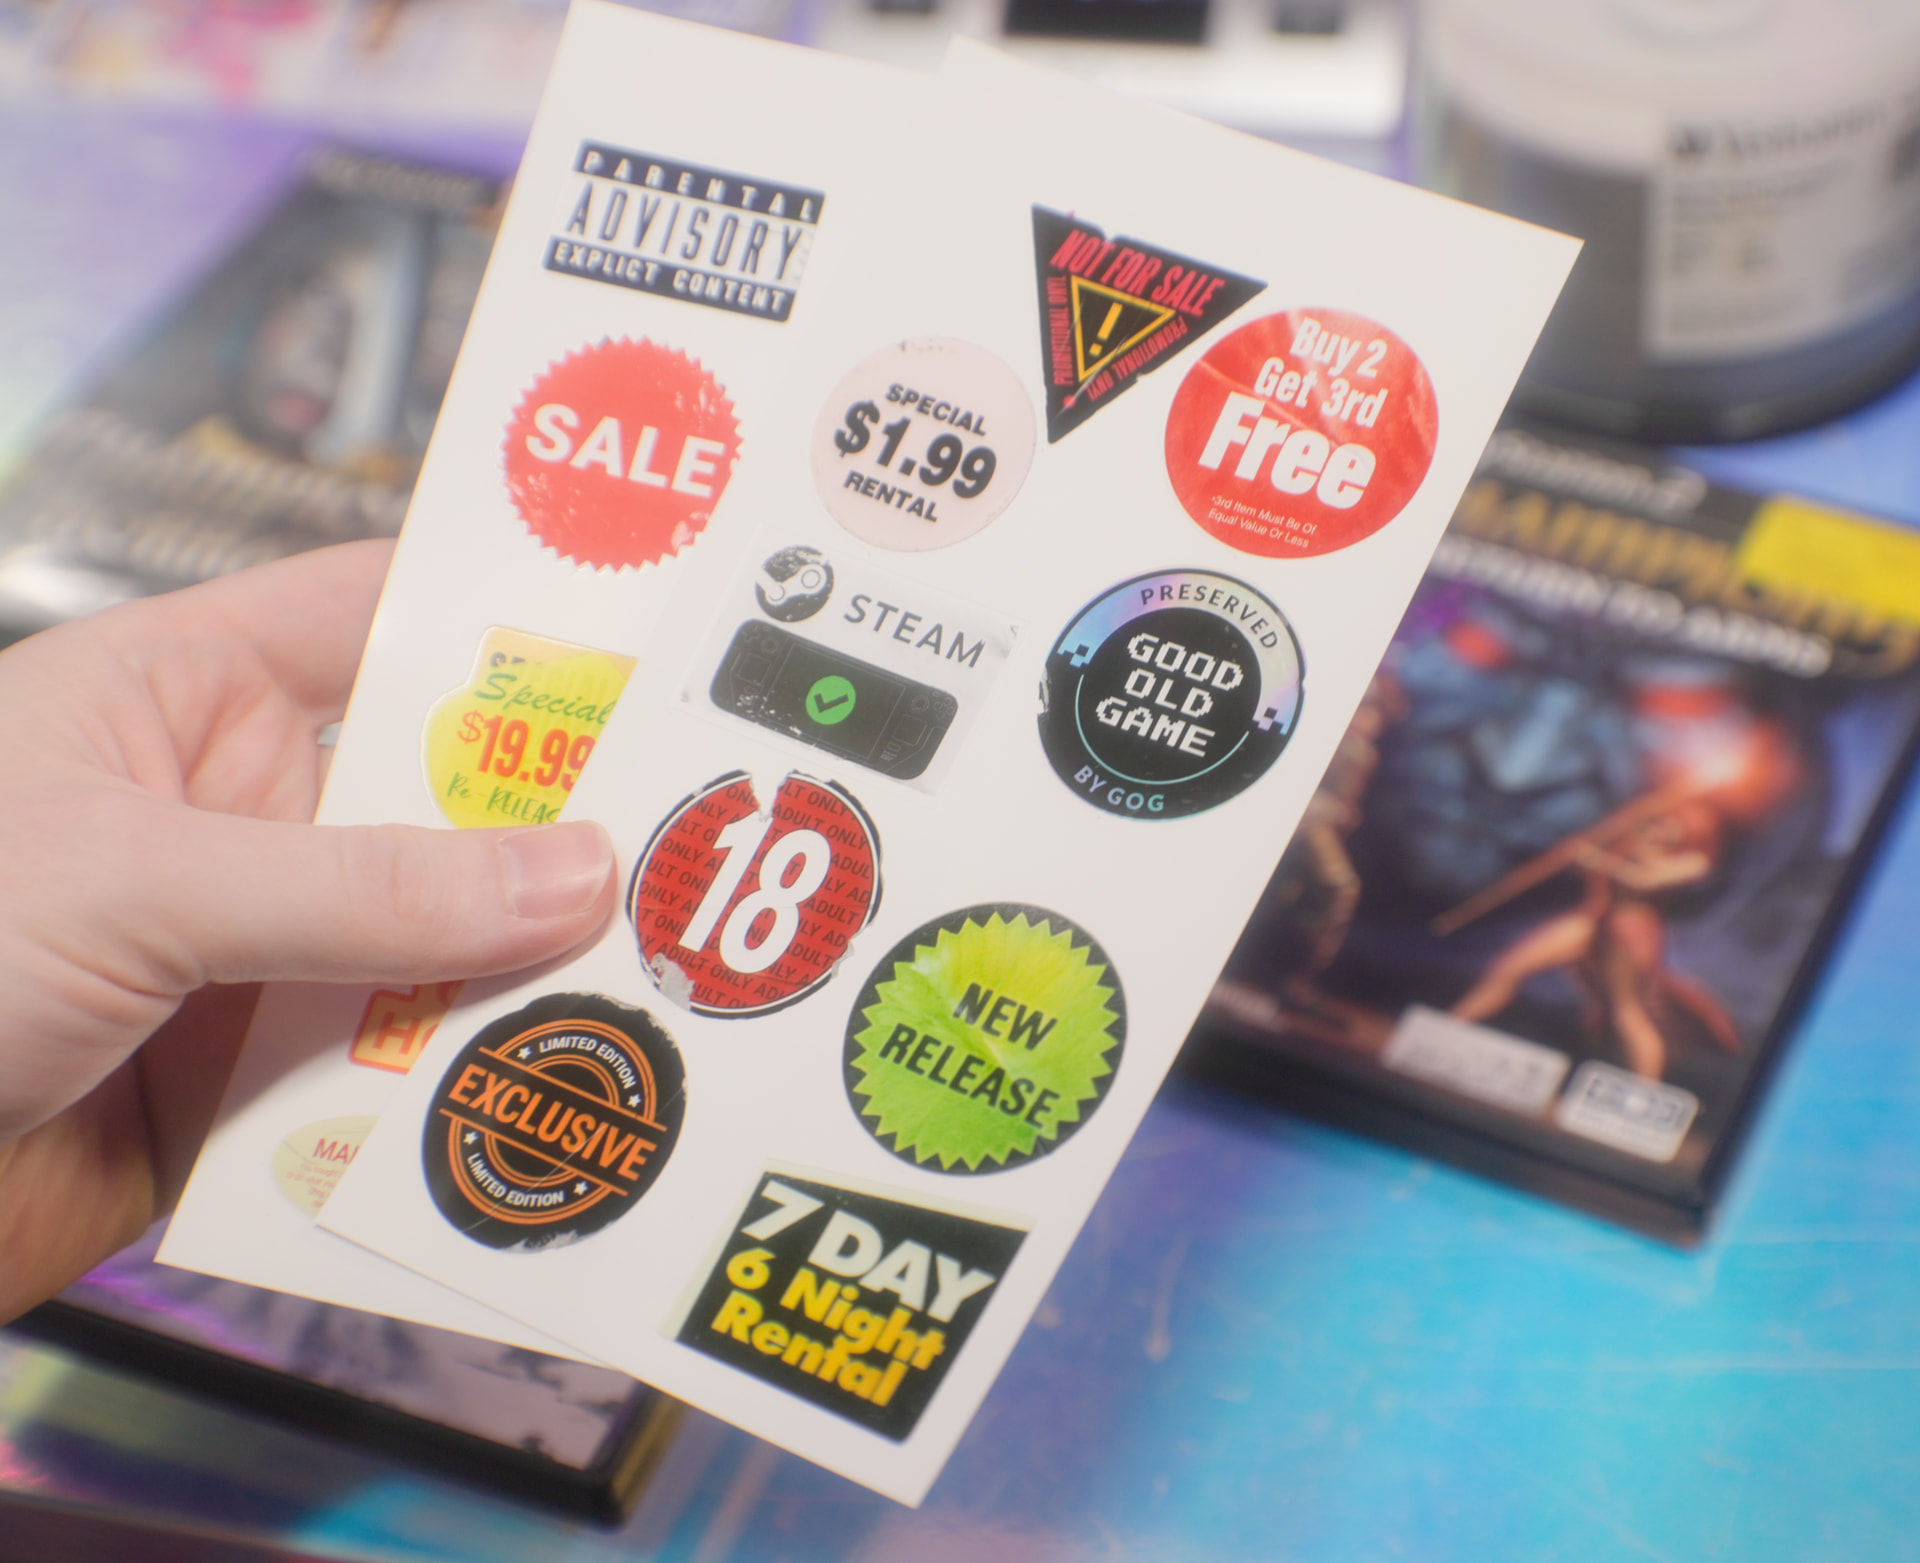
Similarly, game cases also end up carrying a bit of a patina. Most of my favorite games are littered with stickers from game shops – so I actually started building my own sticker packs to replicate old school rental and game shop stickers. One pack is available now on my shop, with more to come. Since the case I used for this copy already had a torn-up Goodwill sticker on it, it made sense to add a couple more to complete the look.

Perfect. Just perfect.
Options for labeling your own discs

You actually have a few options for labeling your disc, depending on what discs and tools you have available to you.

  • Permanent Marker Labeling: Standard discs are designed to just be written on with a marker. It doesn’t look the prettiest, but it’s certainly authentic for homemade media! You could get creative with marker art or even paint it across the top of it! Just don’t go too thick.
  • Printable Disc Labels: You can buy any number of printable disc labels for inkjet and laser printers. The reputable ones provide templates for word processors, design software, etc. that you can use to line up your art. There are two different sizes, some cover the clear “hub” in the center of the disc, some do not.
  • Printable Discs: Verbatim sells inkjet printable discs for all formats! These produce far better quality but requires a printer with a dedicated disc tray capable of printing on discs. You can’t just put a disc in a normal printer without a disc tray. Similar to the printable labels, you can get discs with and without printable hubs in the center.
  • Thermal Printable Discs: If you have a fancy thermal disc printer, you can get thermal printable discs to go with it! The printers for these are specialized equipment and expensive.
  • LightScribe Discs: For a brief period of time, LightScribe drives had a huge marketing push. These use the laser to basically engrave the top-side of the disc to do a monochrome 1-bit label on the disc. It’s neat, and at this point pretty novel, but the discs available do come at a bit of a higher costs since they’re usually sold only in small quantities.

I have had printable disc labels for longer than I can remember. I would hoard every scrap of disc and VHS labels I could find, always making my own copies. But I’ve always been disappointed with the quality. When I started making my own GOG discs again, I was excited that they would finally look good now that I have a fancy high-end photo printer – but nope! They still look bad. The kind of paper used just isn’t great, they’re a pain in the ass to line up, and the ones I have don’t cover the hub.

But they’re still fine. Use what you have, and while I was initially disappointed with the results, as I go back through some of them, I honestly can’t complain that much aside from my poor alignment.

To print on the disc labels, make sure you put them in your paper tray with the correct orientation identified on the sheet, and use the design templates to line up your work, and print. Pretty straightforward.

I still have a pretty big supply of standard discs and some labels I intend to use with them, but I invested in big packs of inkjet-printable discs for most of my experiments here.

1 Like

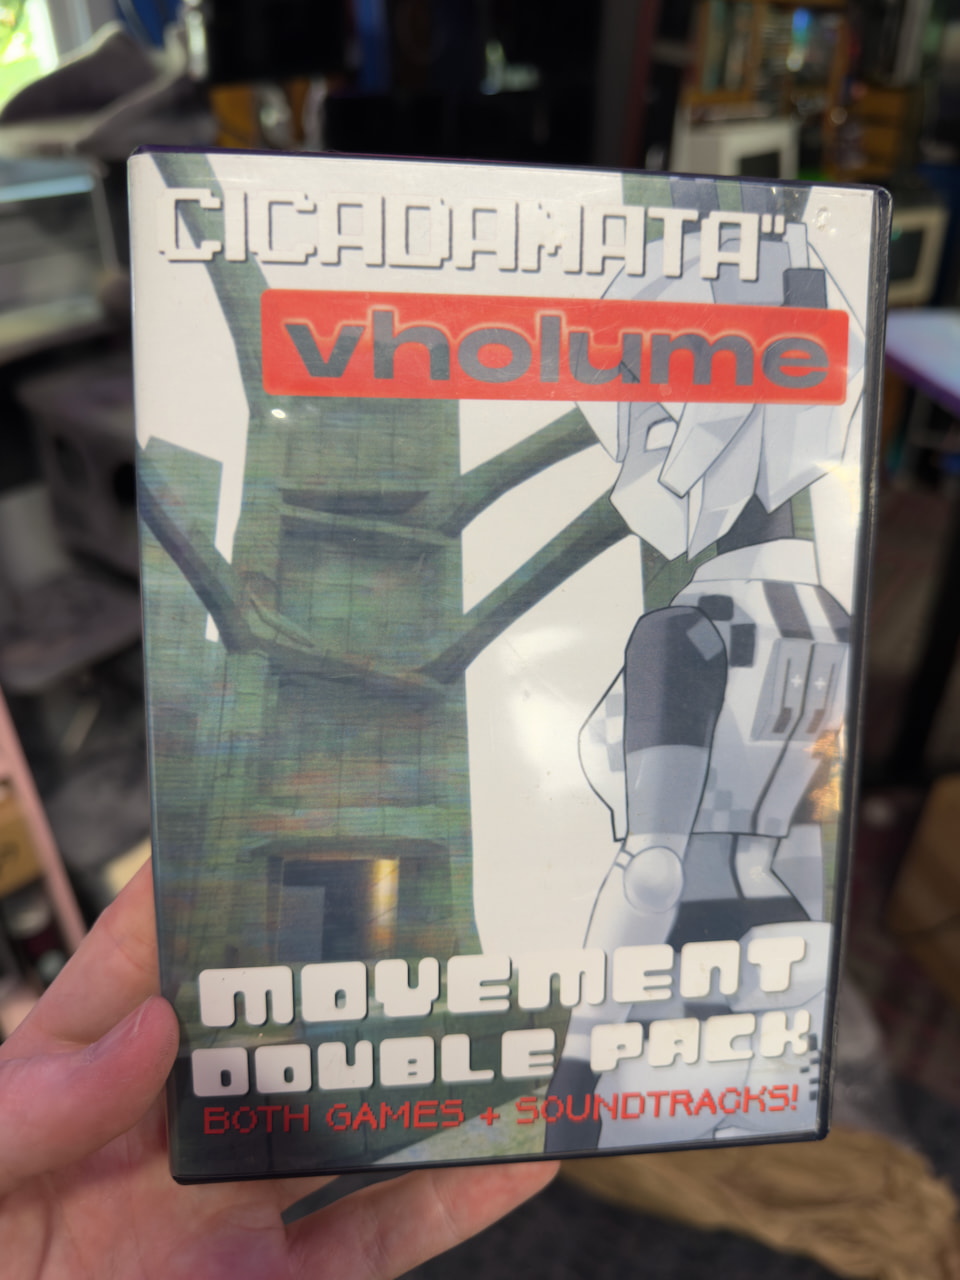
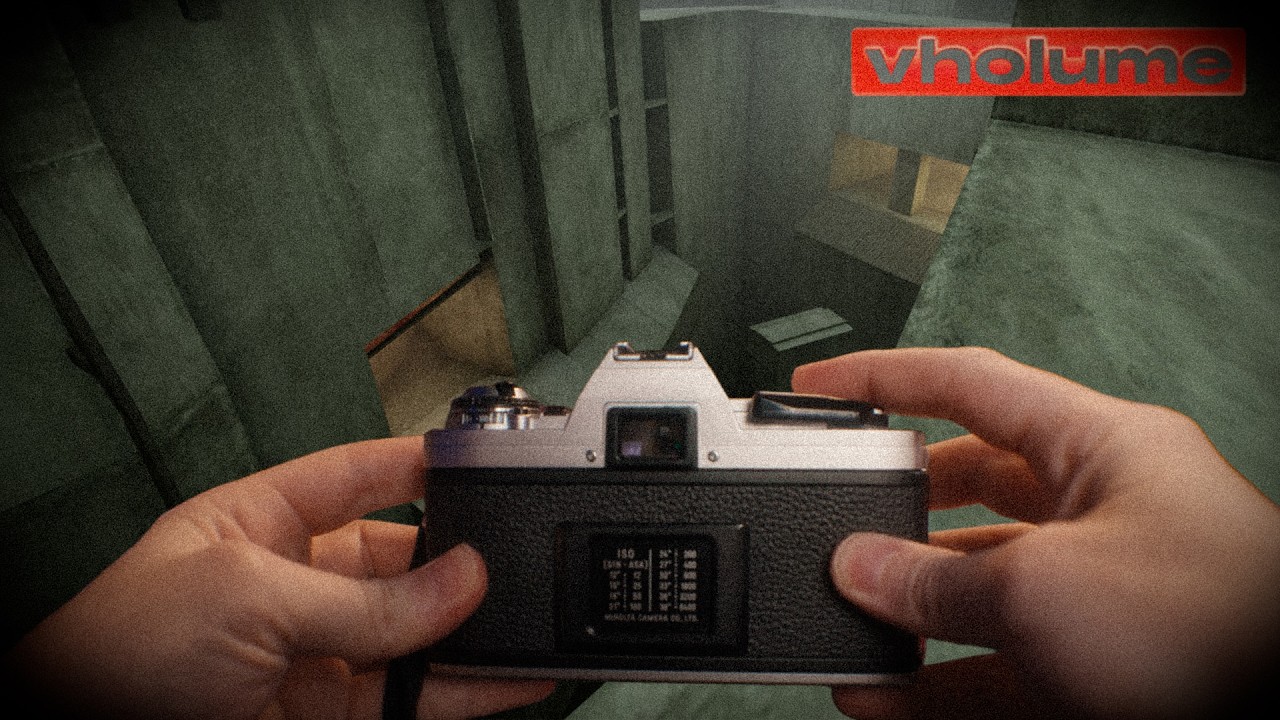
CICADAMATA" / VHOLUME Movement Double Pack

This is a fun one. These two movement-focused games released on the same day (at the same time) and have killer soundtracks. So I wanted to combine them together in an old-school double-pack like we’d get for older consoles or movie pairings, along with their soundtracks. I grabbed the CICADAMATA soundtrack on Bandcamp and the VHOLUME soundtrack on Steam (it isn’t available on Bandcamp yet, sadly).

Both by combining two games into one package and them not being big AAA games, I have to do more design work for this package. This one is a good example of the more creative-driven projects as well as one I made with Affinity instead of PhotoShop.

CD Label

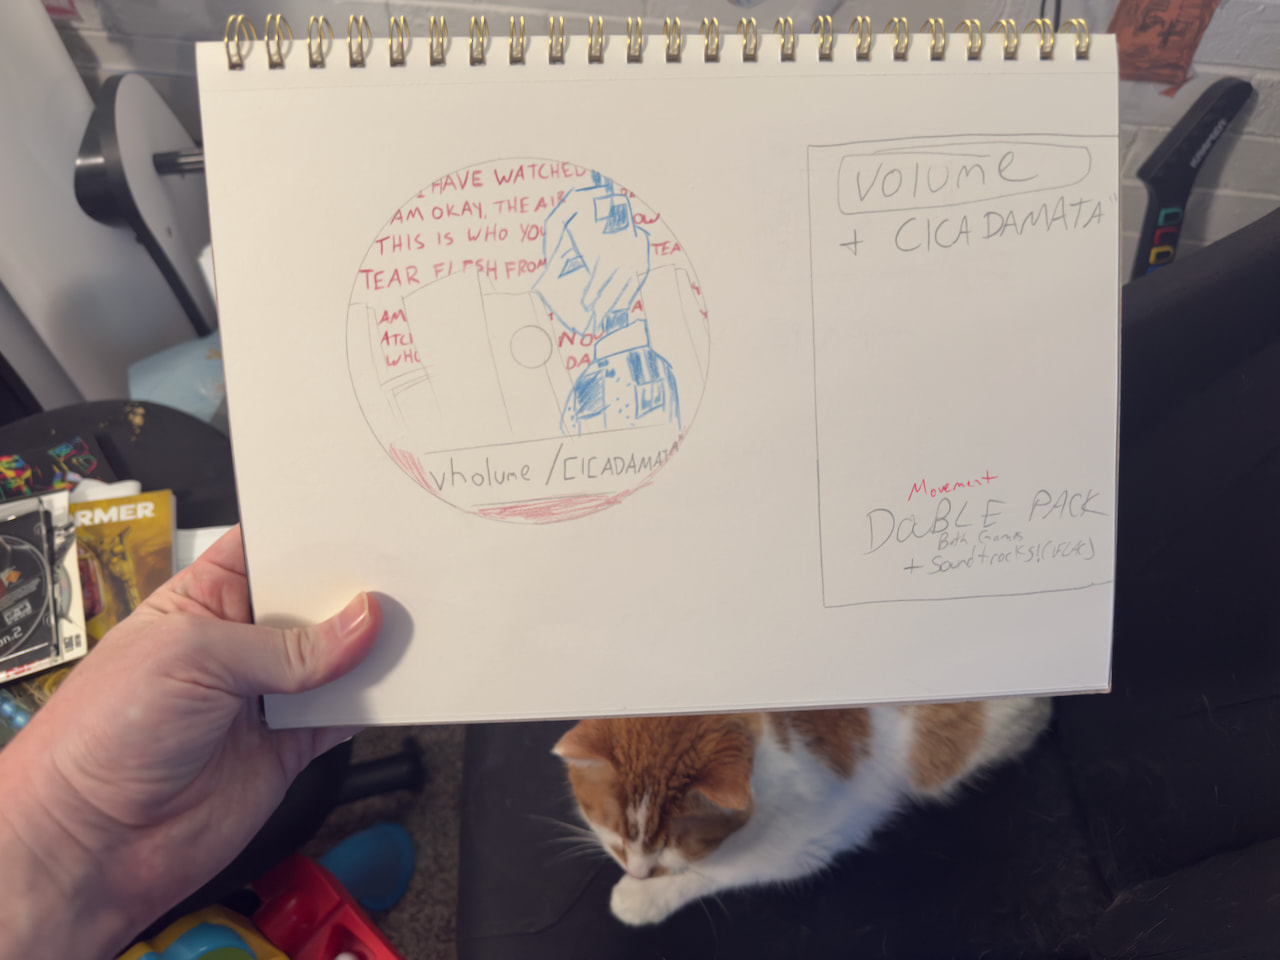
I had big inspiration for this physical edition while playing these games, and went ahead and sketched out my disc label and sleeve idea in my sketchbook. I’m no illustrator, but getting my idea down on paper before opening software helps me tune in better to my ideas and help me visualize better.

Design

There’s not a whole lot of print-ready assets for these games, so I had to get creative and make my own.

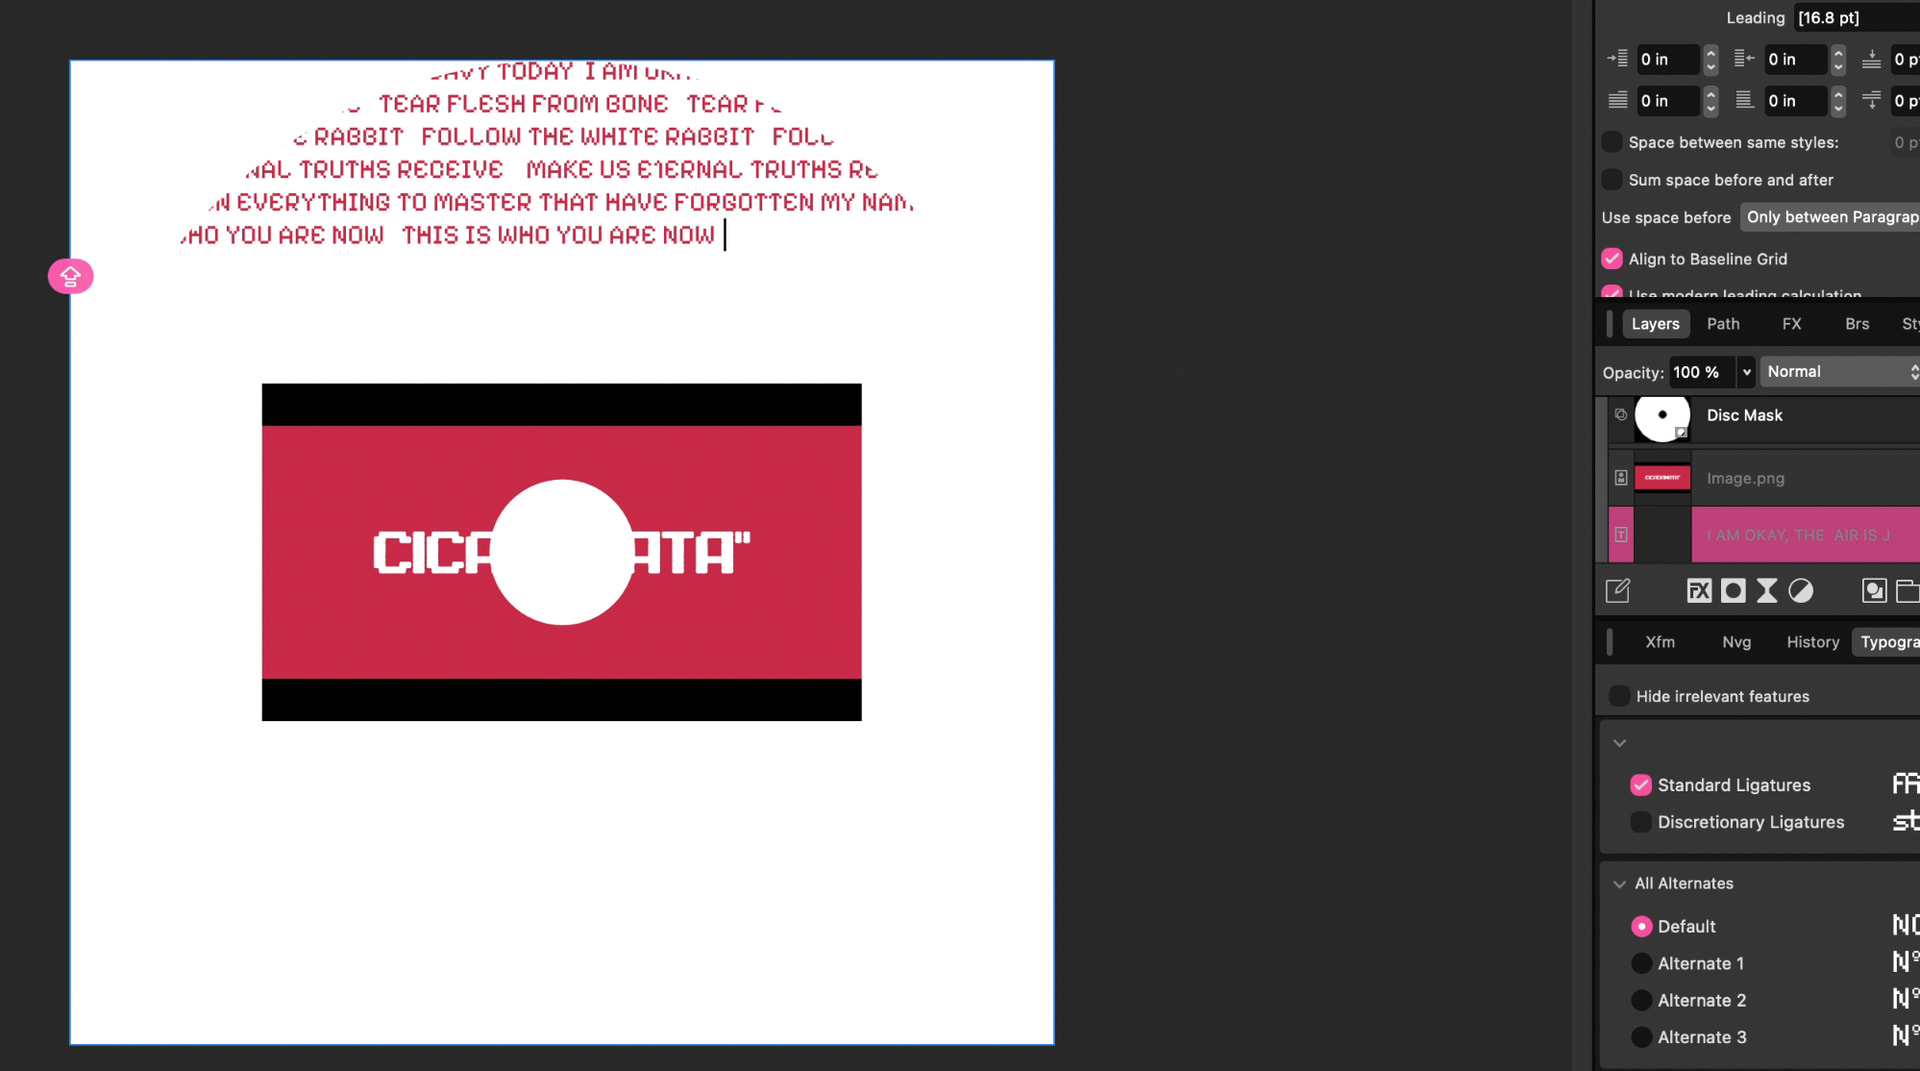
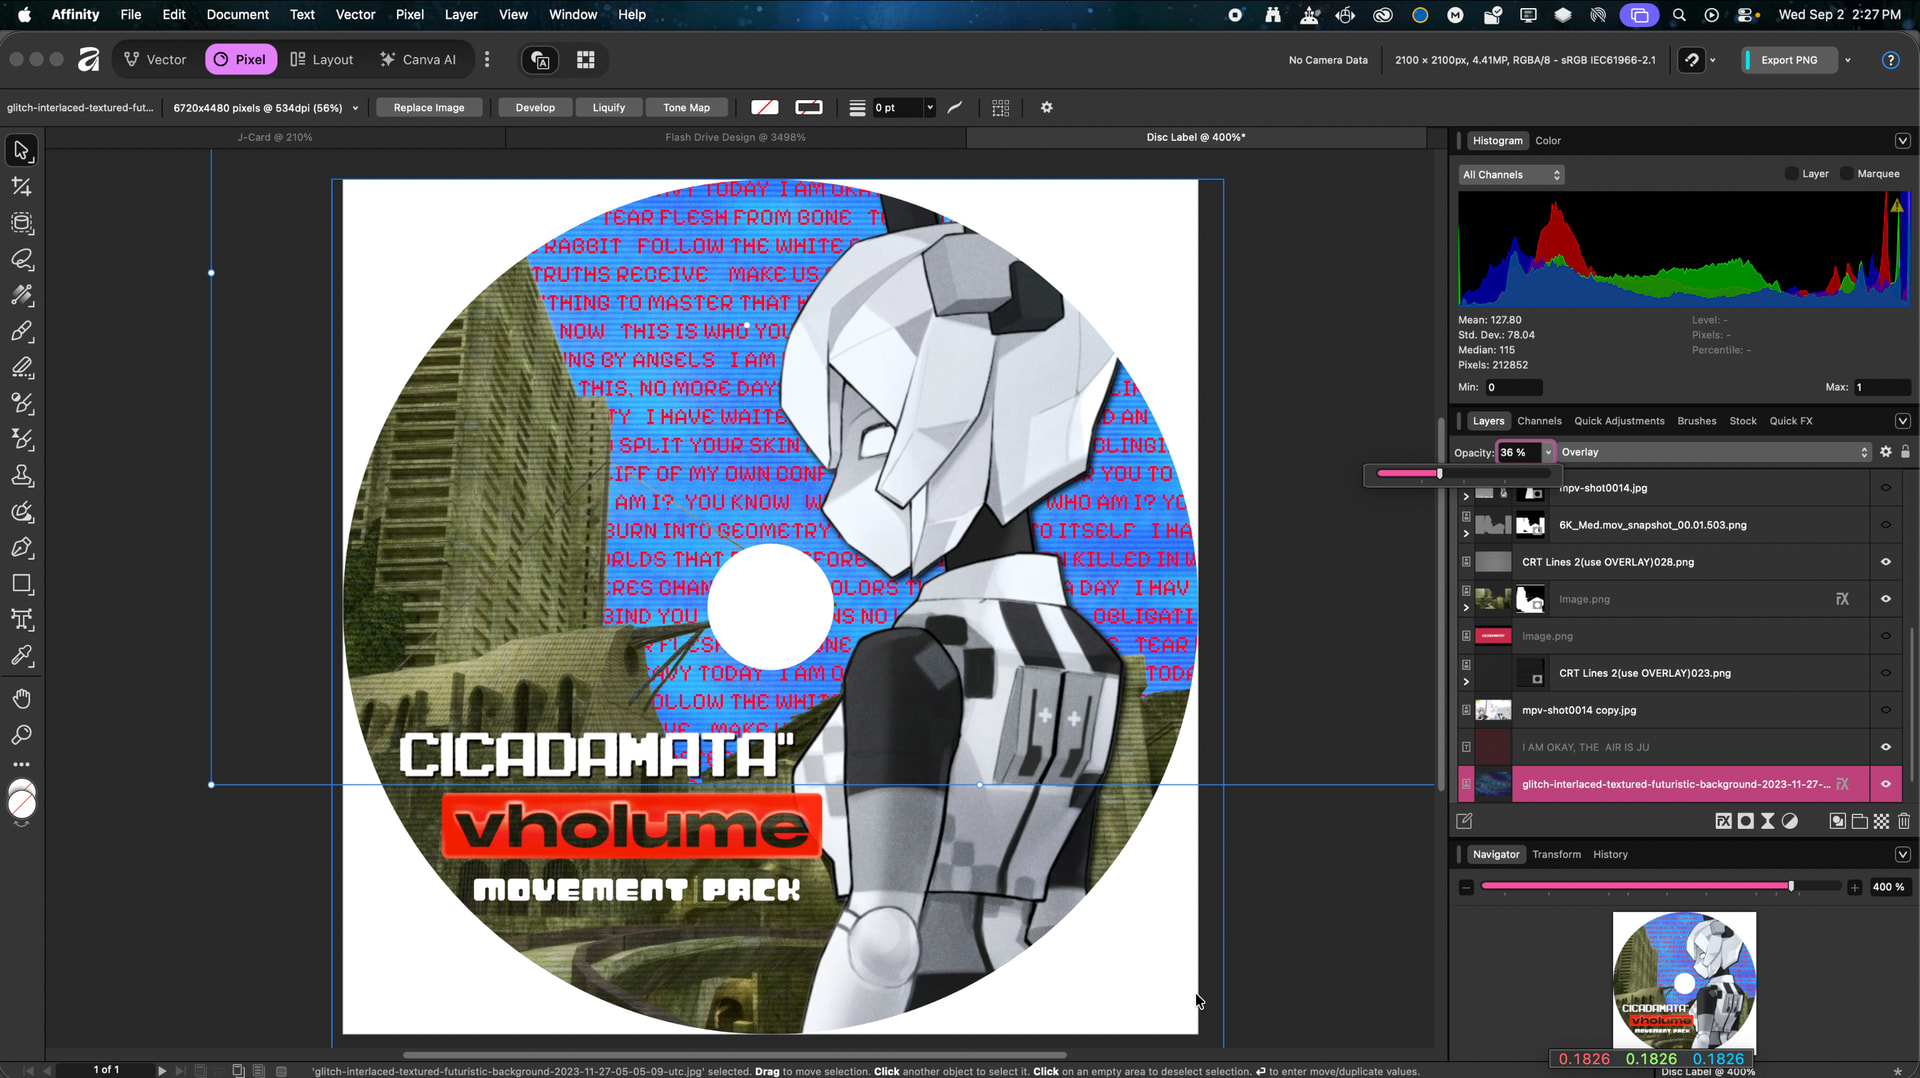
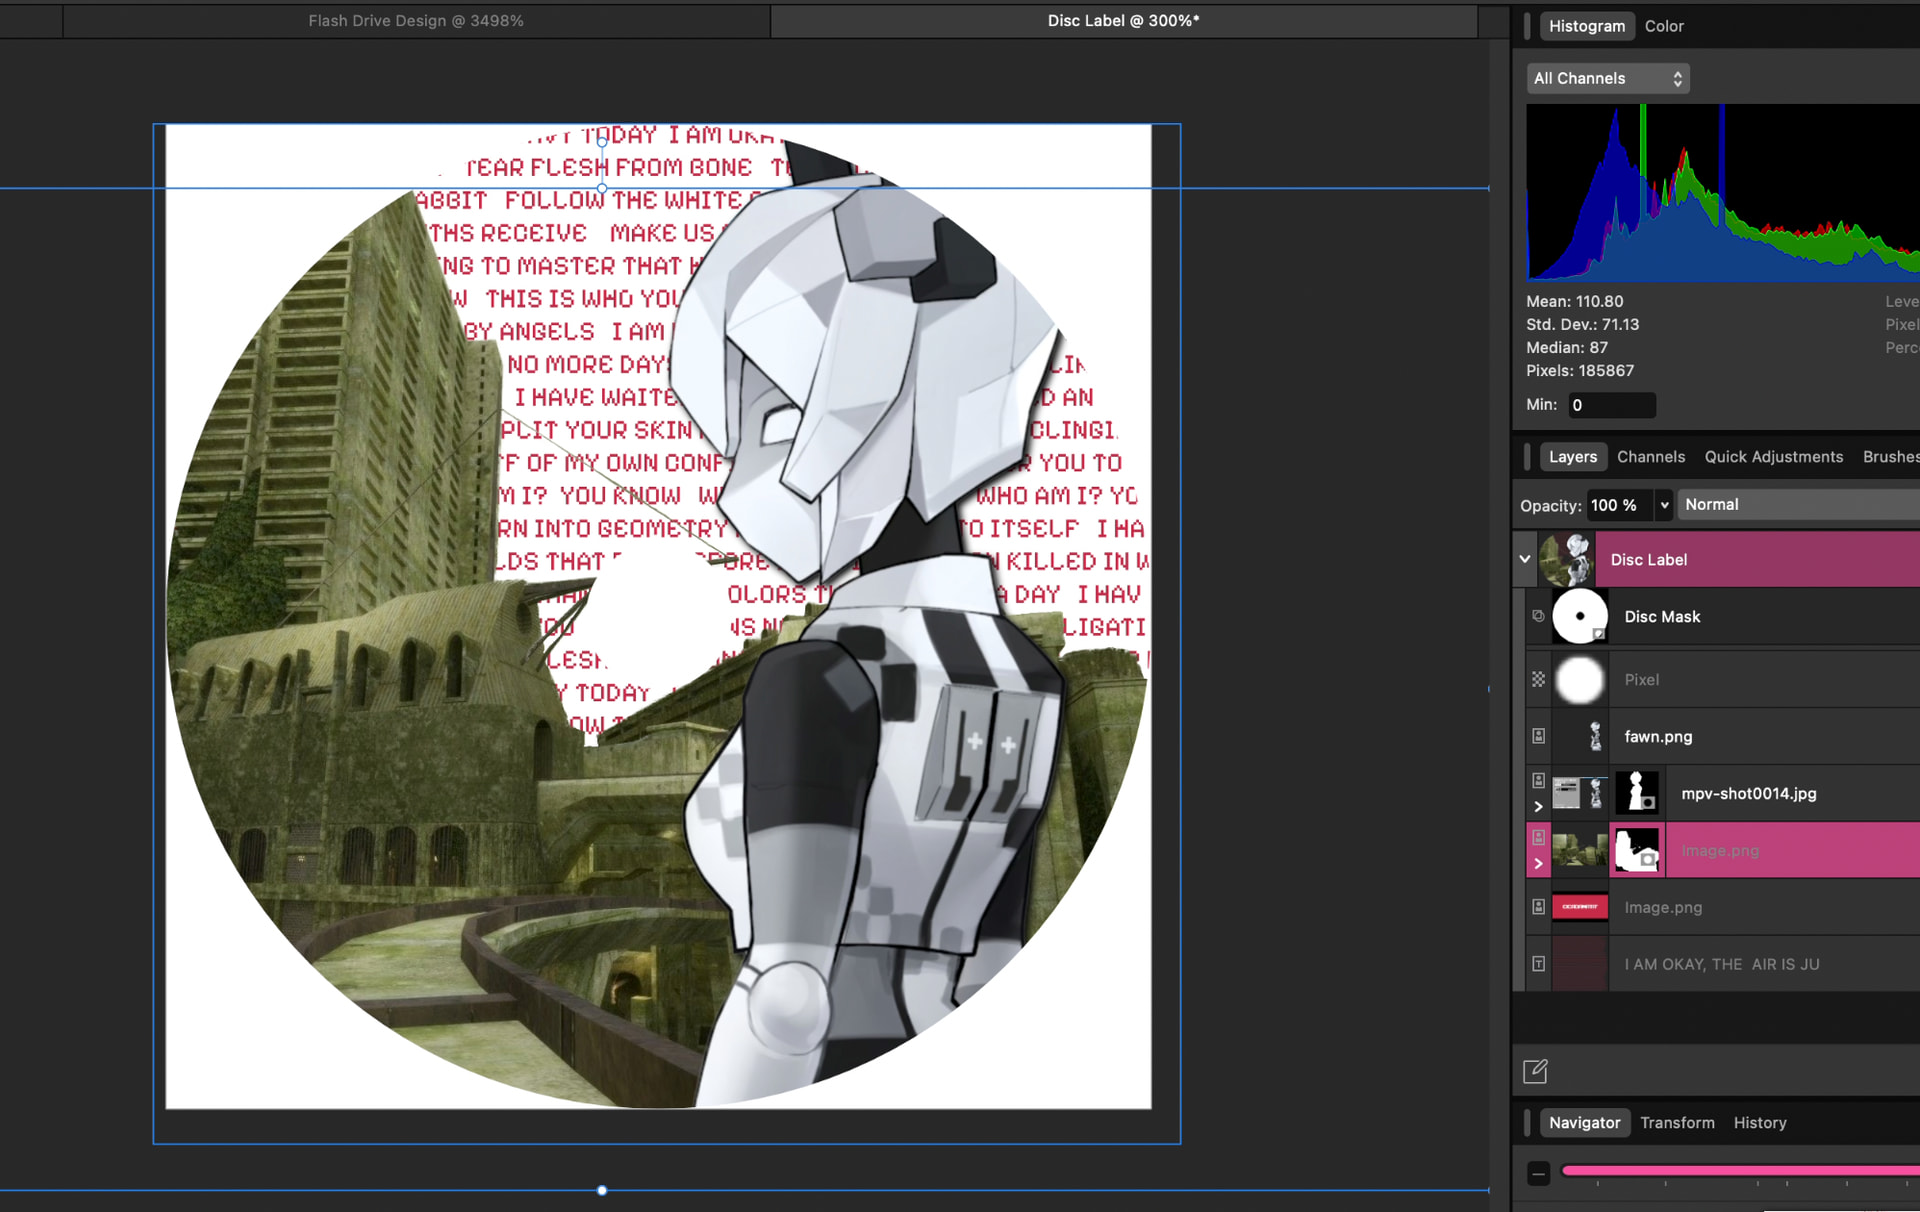
I’m starting with a 7x7” square in Affinity with a basic donut shape mask that matches the dimensions of a disc – I’ve saved this as an Affinity Template available for download.

For this one, I typed many of the quotes from CICADAMATA across the background in one of the red colors used in the game. I don’t have access to the exact fonts used in the game, but I picked one that’s close enough to feel on brand. I didn’t write many of these down, so I had to skim through my game footage to pick up enough quotes to fill in the background without too many repeats.

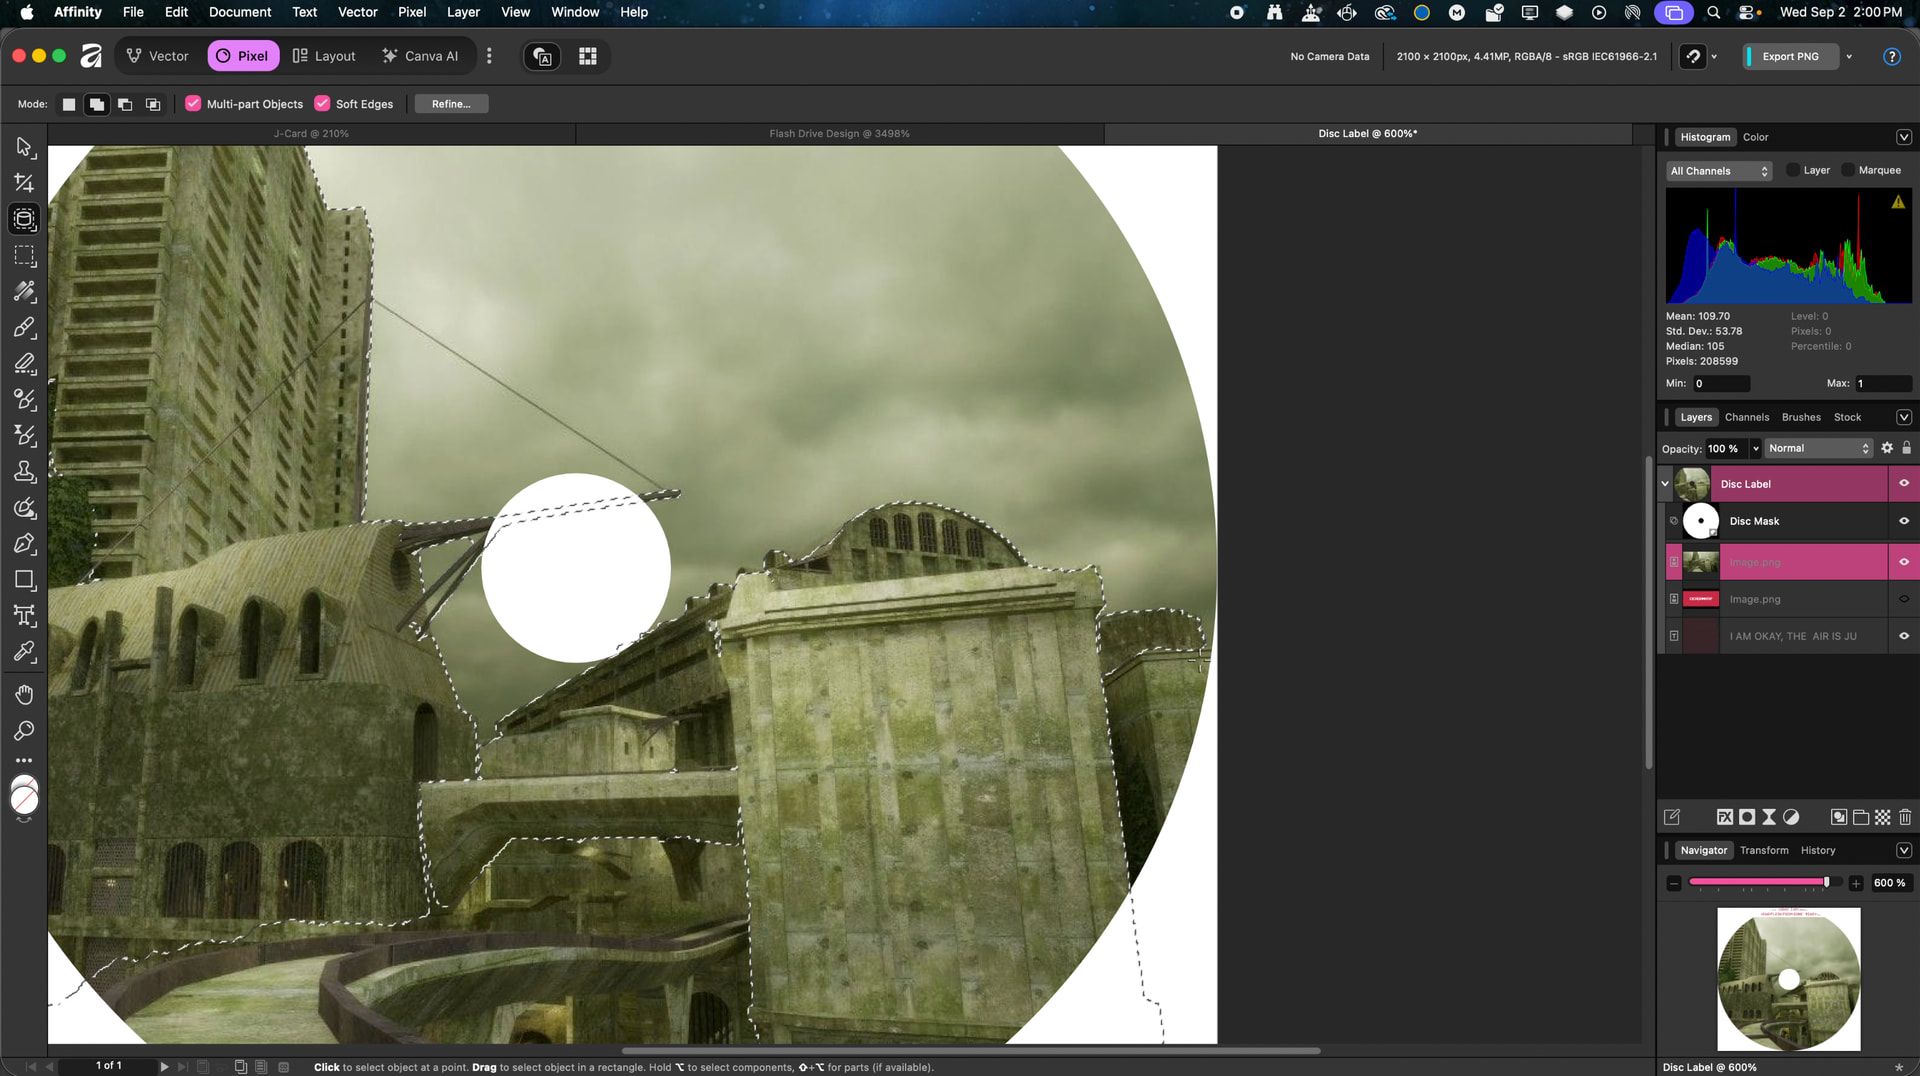
Then I brought in a decent-resolution image of one of the concrete structures from VHOLUME and used a combination of Affinity’s Object Selection tool and manual masking to remove the background sky, leaving just the buildings in front of the words. The quotes are the sky now. THIS IS WHAT SKY IS NOW. Aghem, aaanyway…

Once I was generally happy with this idea, I grabbed a 4K screenshot from my game footage showcasing the player character and again used Affinity’s Object Selection tool to cut them from the background and position here. I wanted it to feel like a good blend of the two games’ ideas on this label.

Then I grabbed the logos for the two games, added the text “Movement Pack” and played around with backgrounds, textures, and overlays until I felt I had made something worthy of printing.

Print

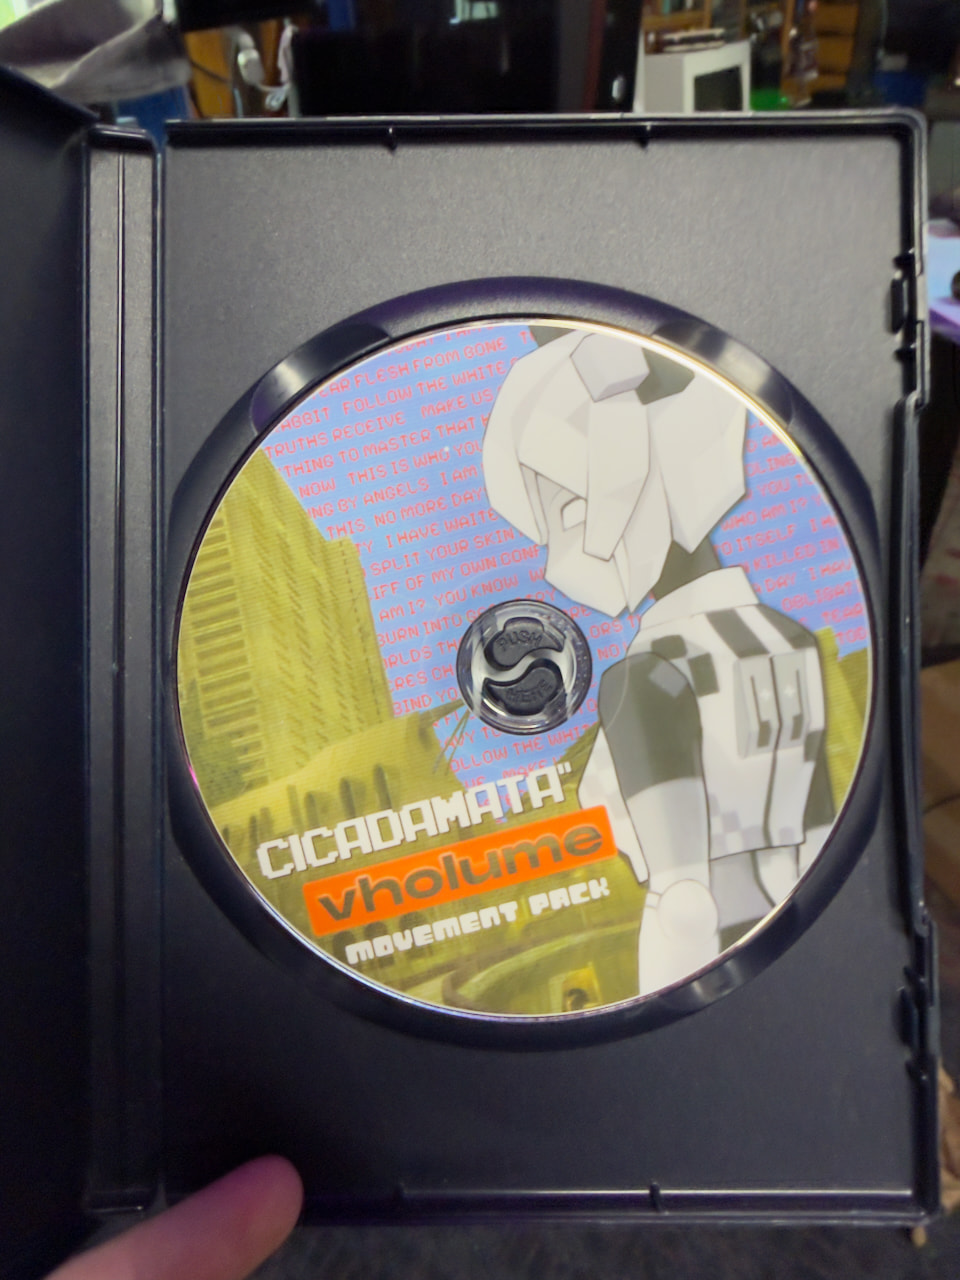
Not much different here from the LOTR game. Pop the disc on my disc tray, print using My Image Garden, let dry. Came out stellar.

Case Sleeve

Again I went with a standard DVD case here. I have lots of CD jewel cases to use, but I like keeping my games mostly in the format of case they would have properly come in and to keep some sort of shelf uniformity. Plus these are just the most common and easiest to design for.

Design

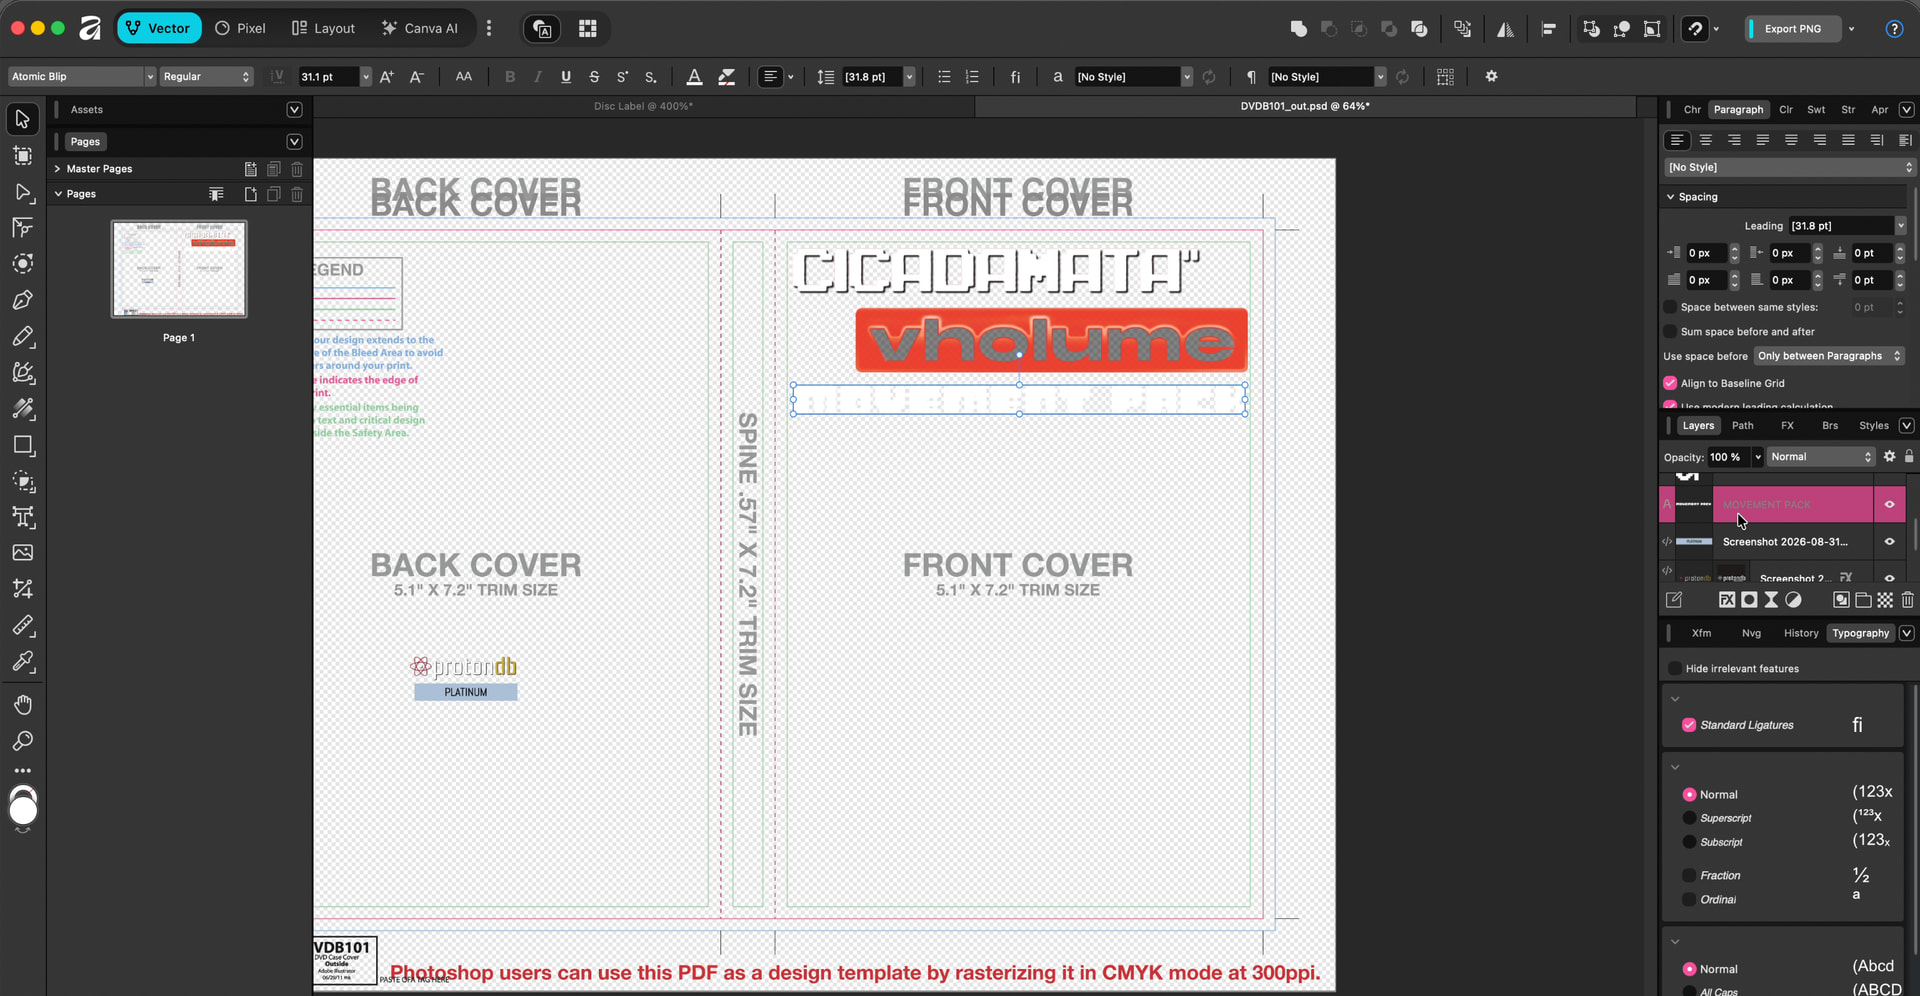
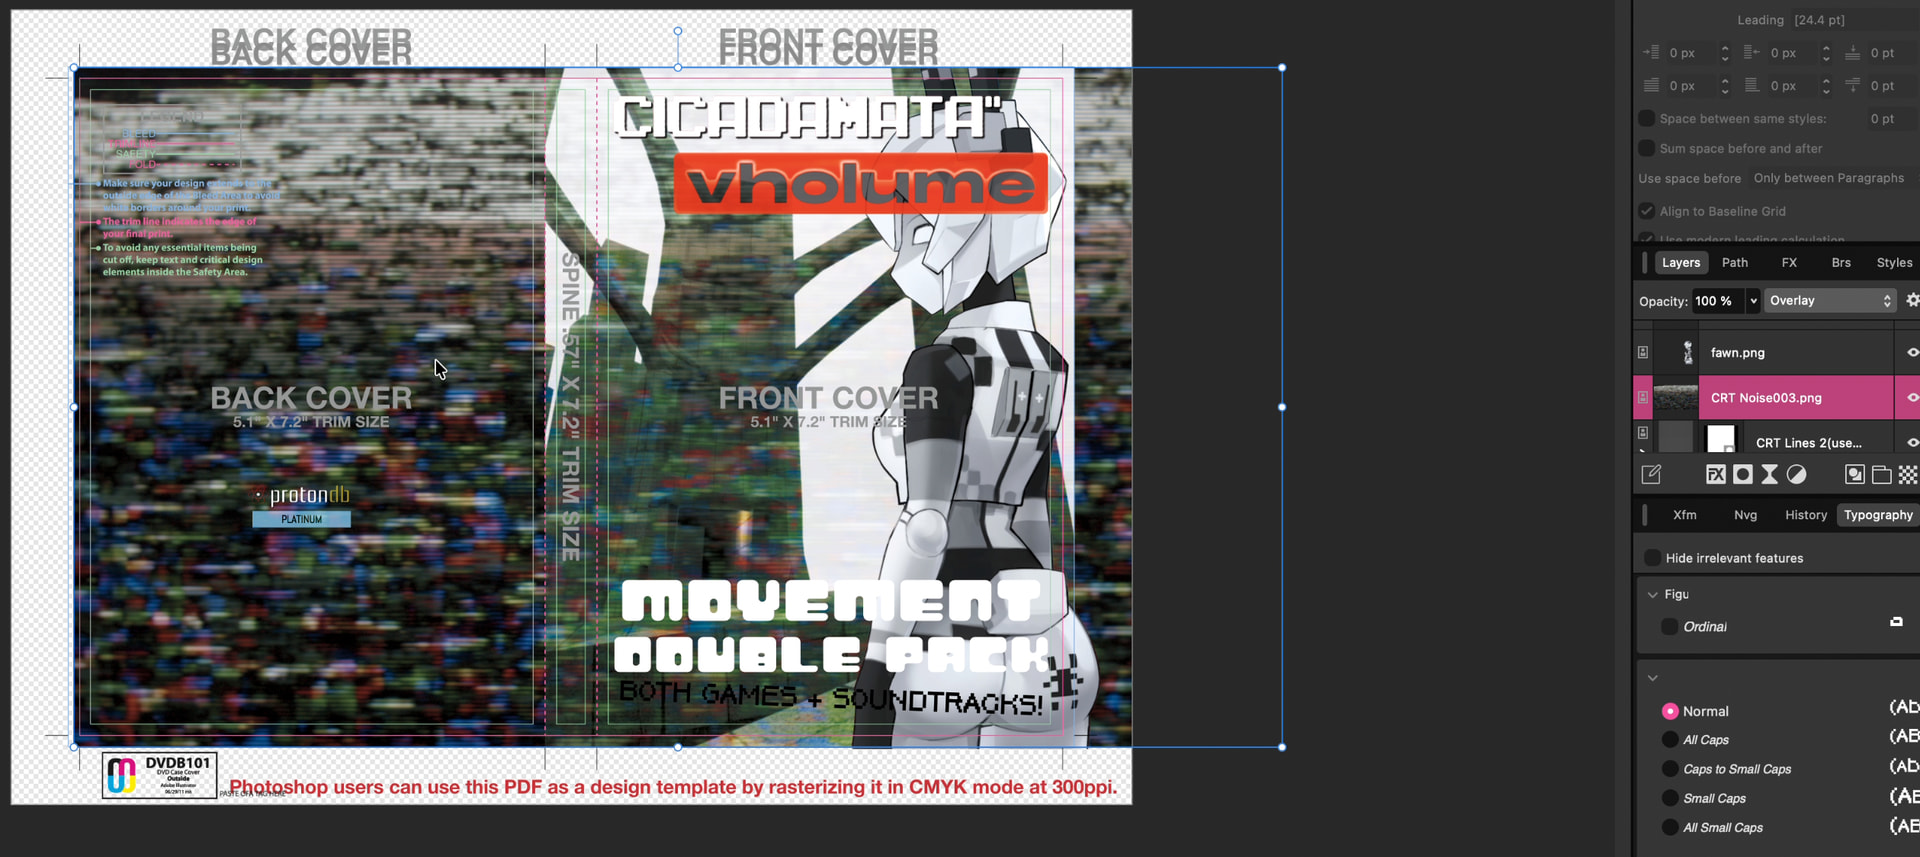
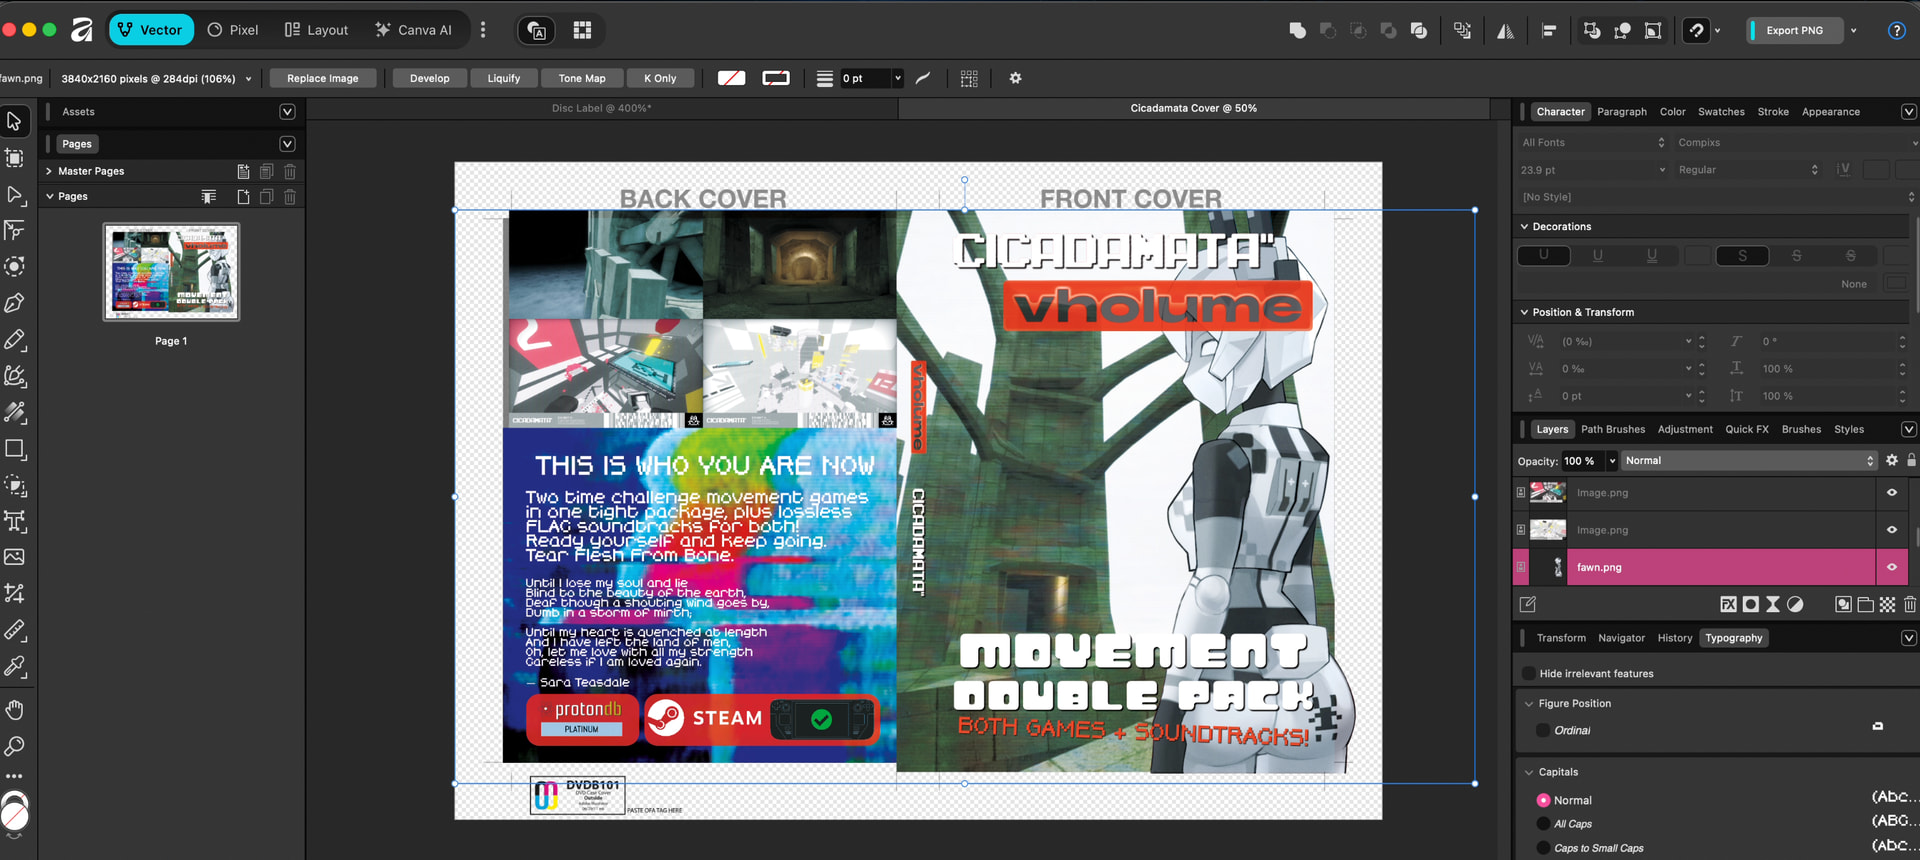
This time I imported the .PSD design from Disc Makers into Affinity and started playing with a layout. I wanted the logos at the top and the flavor text about the double pack at the bottom. Then I brought in the Fawn cutout again, and a different image from VHOLUME for the background. I wanted this one to be simpler, but was struggling to find good images of the VHOLUME set pieces.

I wound up just spending a LOT of time playing with textures on here to get it looking how I like. For the spine, I again chose to have the background image bleed over onto it to keep a uniform look. I toyed with sizing it up to cover both sides, but just couldn’t land a composition I was happy with and instead kept it to the front and spine.

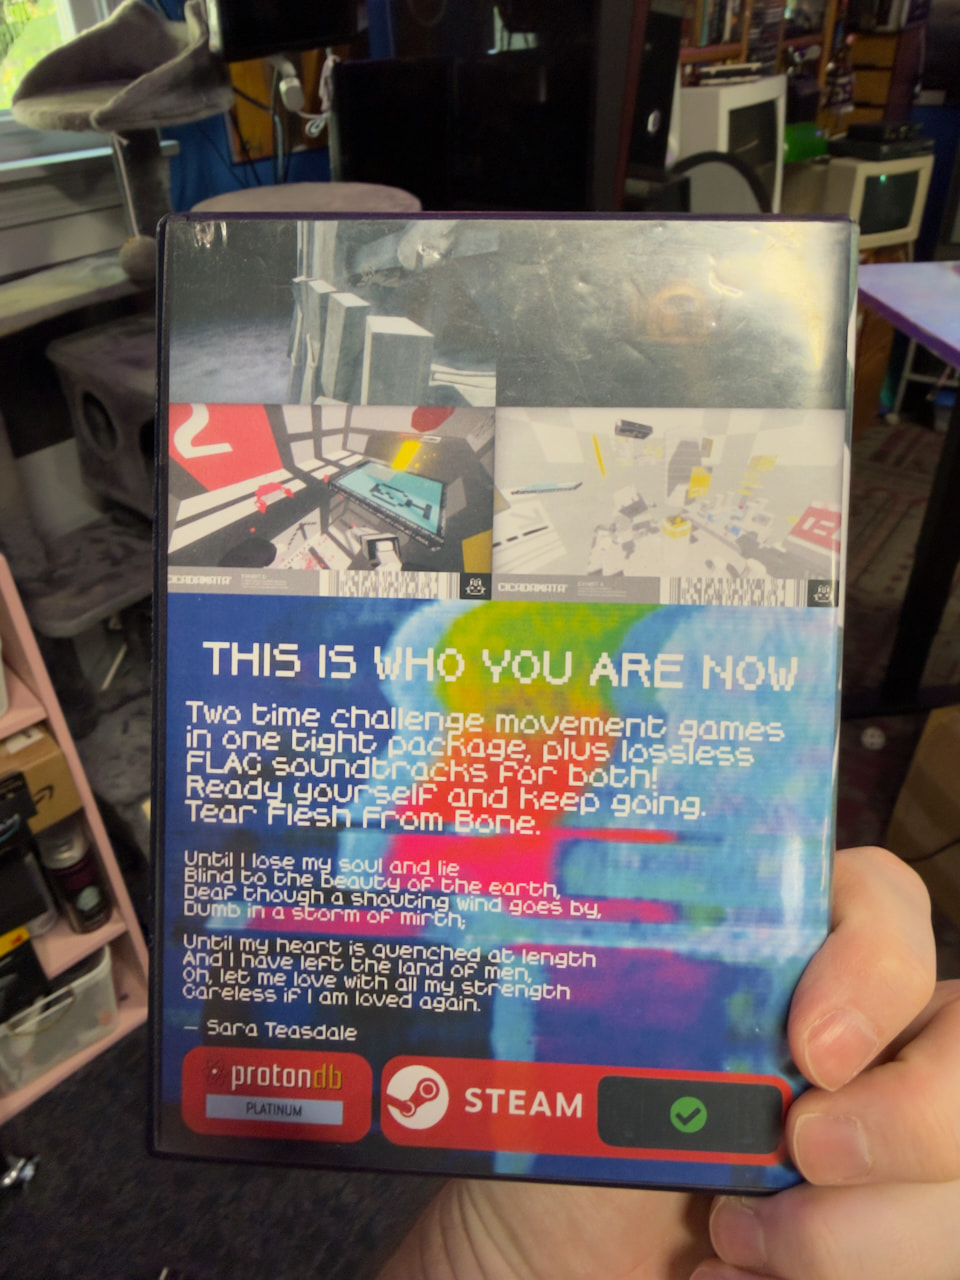
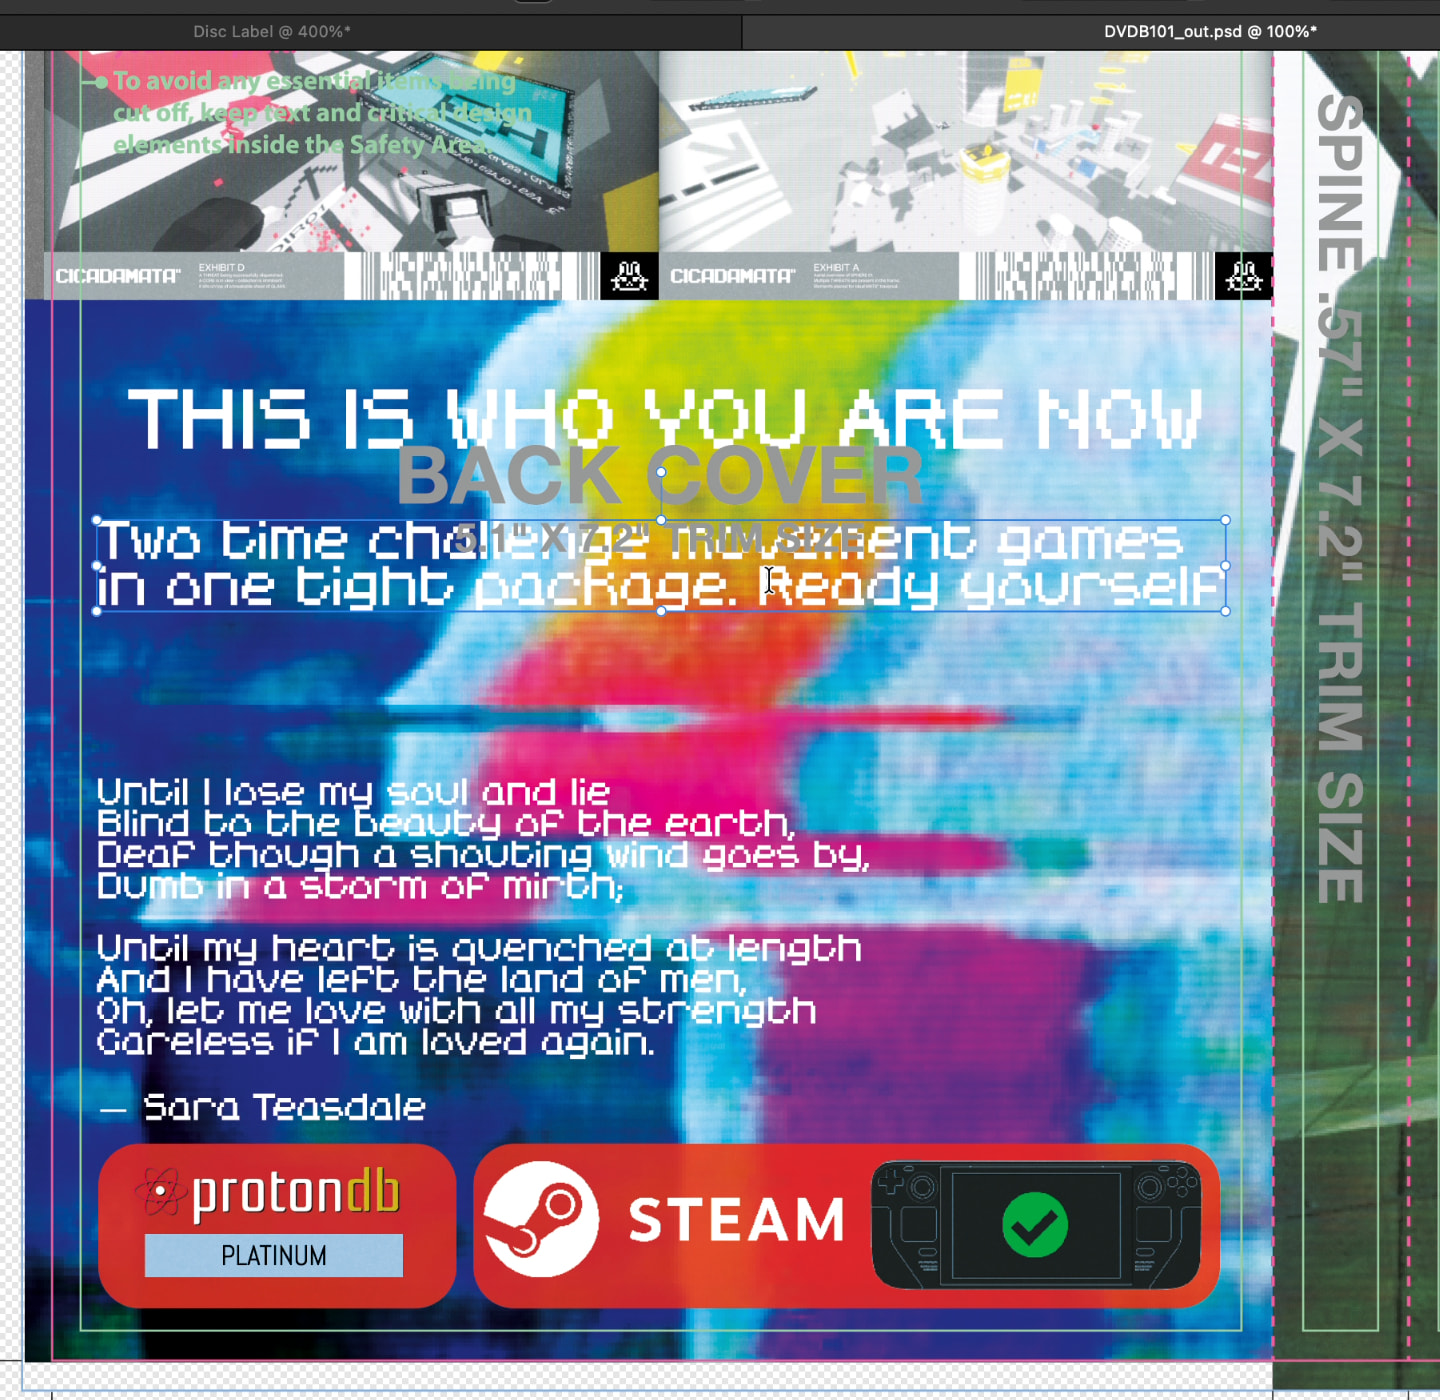
After I was happy with the front, I moved onto the back. I wanted some of the text bubbles (like you’d find on a normal game case) highlighting the ProtonDB rating and the fact that these games work on Steam Deck on the back. I sampled the red from the VHOLUME logo and made simple translucent rounded rectangles for these.

Next I brought in a couple screenshots from each game to sample the worlds and art style for the top half of the back cover. You could totally design these with frames and pull quotes and such like on normal game cases, but I always end up feeling like they look too cheesy when I try, so I kept it simple.

Using a pixelated font, I added a giant quote from CICADAMATA and a copy of one of the poems referenced by a character in VHOLUME, then wrote up a brief promo text block about the double pack.

I wrapped up this design by putting both games’ logos on the spine.

Print

Like with the LOTR game, I’m printing this disc sleeve with my EcoTank 4760 and on glossy brochure paper. This time, instead of cropping my canvas I left it at the full size, but when setting up my borderless print I just told it to keep the scale at 100%, chopping off during the print. (Again, remembering to set MIN Expansion in the Borderless settings!)

Then I used my paper guillotine to chop off the extra bits and fit it in the case.

Disc Burning

Since these games are not GOG games, DiscWright will not work here. These are tough games to burn because you’re not given an installer of any sort, and they’re not DRM-Free. That means when I pull my Steam files for the game and move them to another PC, the games will not run. They check for Steam (and for your license via Steam) and then crash when they can’t find it.

Thankfully, there are sites out there that provide “unlocked” versions of games to freely download, or you can use a “Steam emulator” (basically a replacement for the Steam DLL file in your game folder) to trick the game into running anyway. Since I’ve already bought the games, I have zero problem acquiring these versions. I bought the game, I should be allowed to play how I want. But make sure you support the developers of games you want to play.

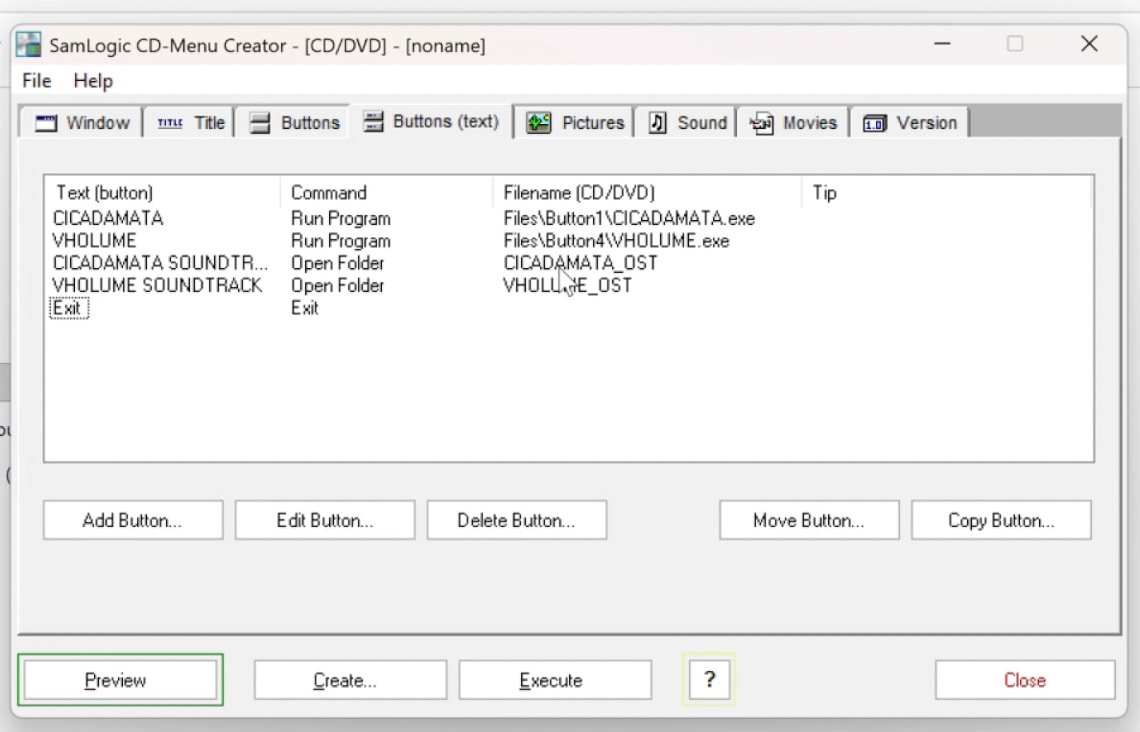
Since there’s no installers, I am using a different program to generate the disc menu and autorun configuration. Along the journey a couple years ago, I purchased a license to the SamLogic CD-Menu Creator software. It costs money, but this is one of the OG disc menu creators going back to the Windows 9.x days. It’s very old school and a little confusing, but fun. I’ve made countless GOG menus with this software.

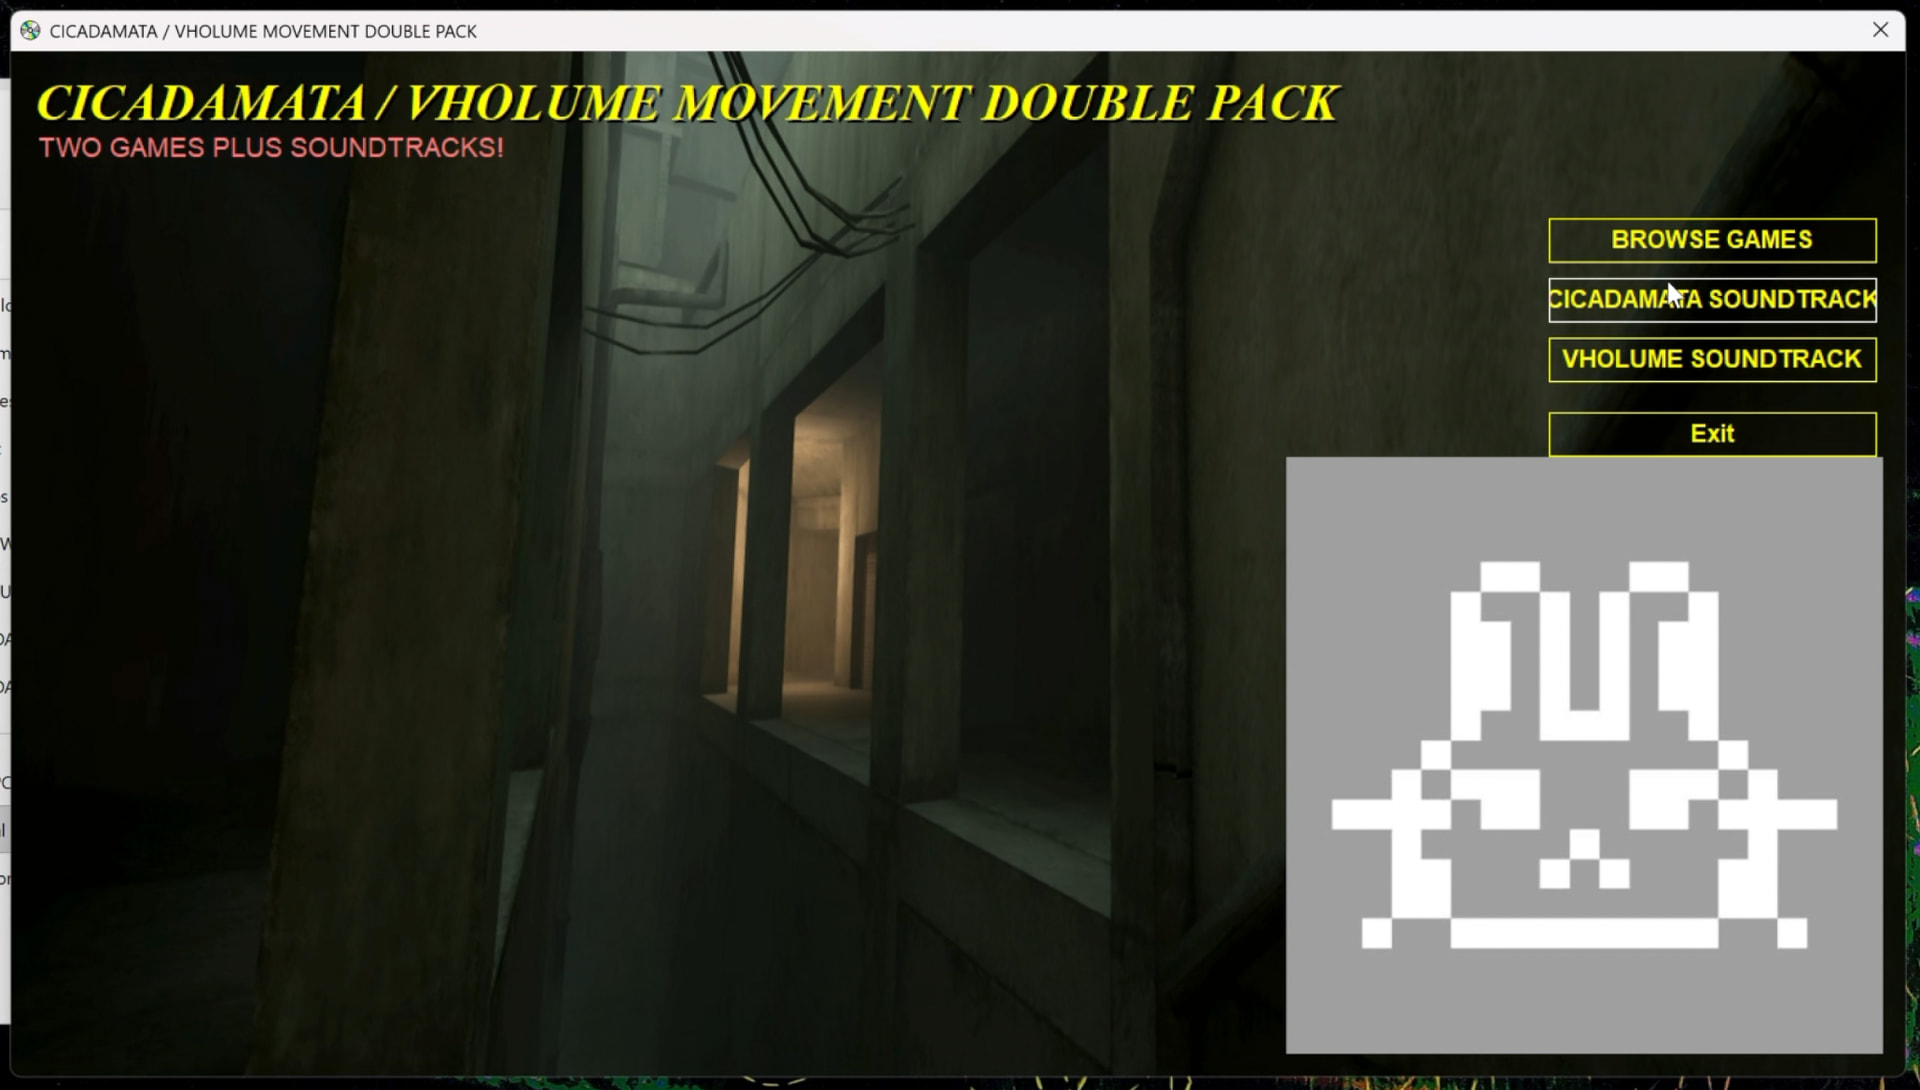
You can customize the size of the menu window, window title and captions, button positioning, colors, and so on. You can add a background image, a track to play on the menu, buttons to launch anything you want, and so on.

The setup for these games was simple since honestly this is mostly a waste of time and I’ve stopped doing it for most discs. I just had three buttons: One to take you to the “Games” folder with two .7z archives for the games, one to take you to the CICADAMATA OST folder, and the last to take you to the VHOLUME OST folder. Pretty simple.

But on past GOG entries with the installers, I’ve had multiple versions of the games’ installers, Add-On installers, links to the game’s ProtonDB pages that open in your web browser, direct links to open the Manual PDF, and so on.

When you’re done making your menu, you can preview it to see how it looks. Then hit “Create” and it generates a folder structure to go on the root of your disc, burned as a data disc. This requires more intervention before you burn, however.

It will only create folders you name for “open folder” buttons or move individual files for individual file-launching buttons. So, for example, if you add a GOG installer file as one button, it will only move that specific .exe file to the new CD folders. You have to go in and copy all of the accompanying files that need to live next to it into the correct folder before burning.

Or in this example, the music folders it makes are empty. It has no awareness of what you want in it, so you have to copy files there. DiscWright is a little better in this regard, since it can move all the files for you.

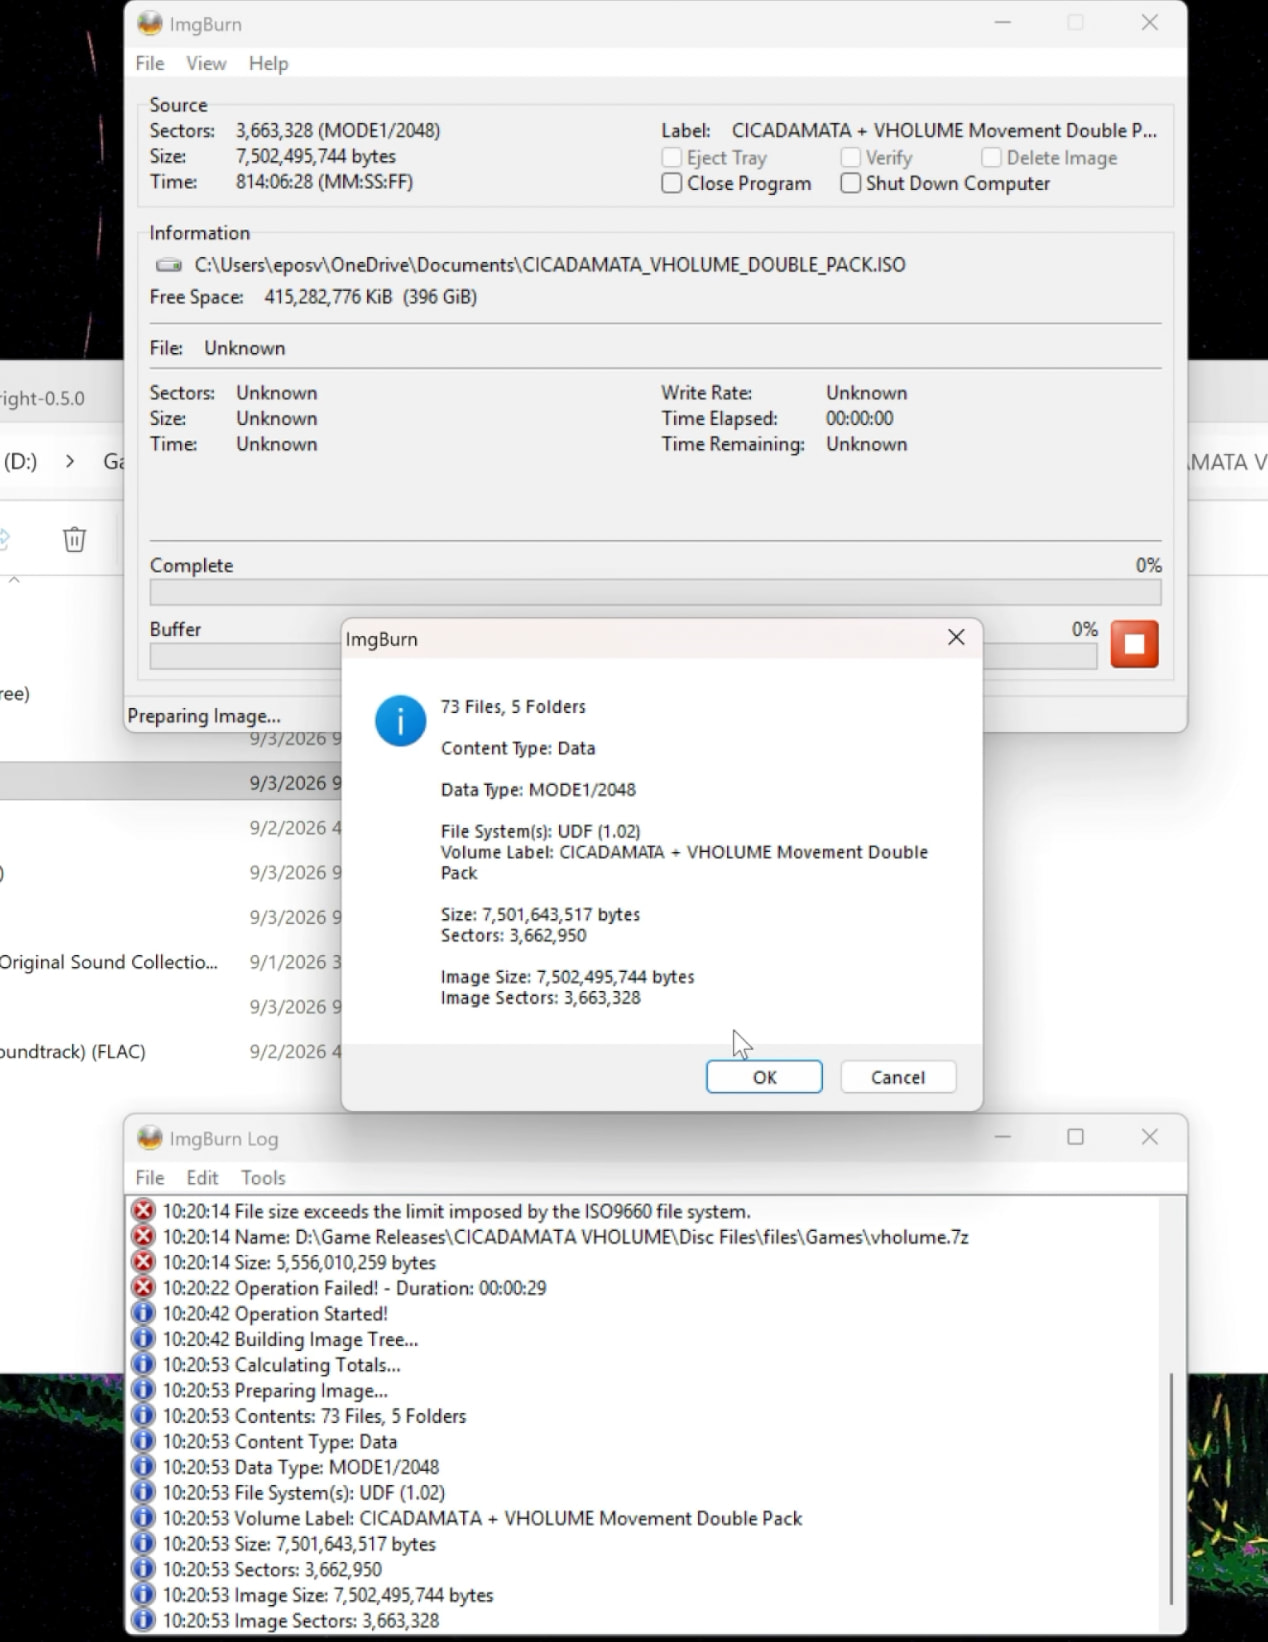
Test the menu before proceeding, then use something like IMGBurn (Windows) or Brasero (Linux) to turn the folder structure into an ISO and make the disc text labels.

I chose to zip up the game files here, as the VHOLUME folder structure wound up having too many subdirectories that it broke the limits of the available ISO formats and would have produced a corrupted image.

Burn the disc with the software of your choice – ideally at the slowest speed to avoid errors – and you’re good to go!

TA DA! Another SICK physical game made.

1 Like

A Reminder About AutoRun

Before covering my next game project, I again wanted to remind you that AutoRun is basically a dead concept. It was the source of no end of security issues: We literally spread a malware worm through my entire high school by taking an infected flash drive, plugging it into every PC we could find, waiting 10 seconds (while nothing visibly happened on the PC screen) and moving onto the next one back in the day. It was also an easy vector for bloatware or pranks, and in a different form is still used for bloatware, with ASUS motherboards being able to auto-install Armoury-Crate directly from the motherboard and LG monitors now downloading McAfee through Windows update.

AutoRun is disabled by default on modern Windows and is effectively non-existent on Mac and Windows. You also won’t find any software to make AutoRun menus for Mac or Linux, since the resulting product can’t run there.

You also don’t need fancy software to configure a disc’s AutoRun options. All you need is a file called “autorun.inf” in the root data folder being burned to the CD. This can control the label of the CD, the icon shown, and options to run.

A basic example of this would be:

[autorun]

open=setup.exe

icon=icon.ico

label=My Custom CD

Or you could have a more advanced one with programs, music, websites, etc.:

[autorun]

open=setup1.exe

shellexecute=setup2.exe

icon=assets\icon.ico

label=Multi-Option Demo Disc

[content]

Music=audio\track1.mp3

Website=https://www.example.com

Documents=docs\manual.pdf

Just right-click and mount your ISO to test the image before burning to make sure you didn’t make a mistake and it’s pretty easy!

Alternative Disc Cases

You don’t have to stick to standard disc cases, you can make your own!

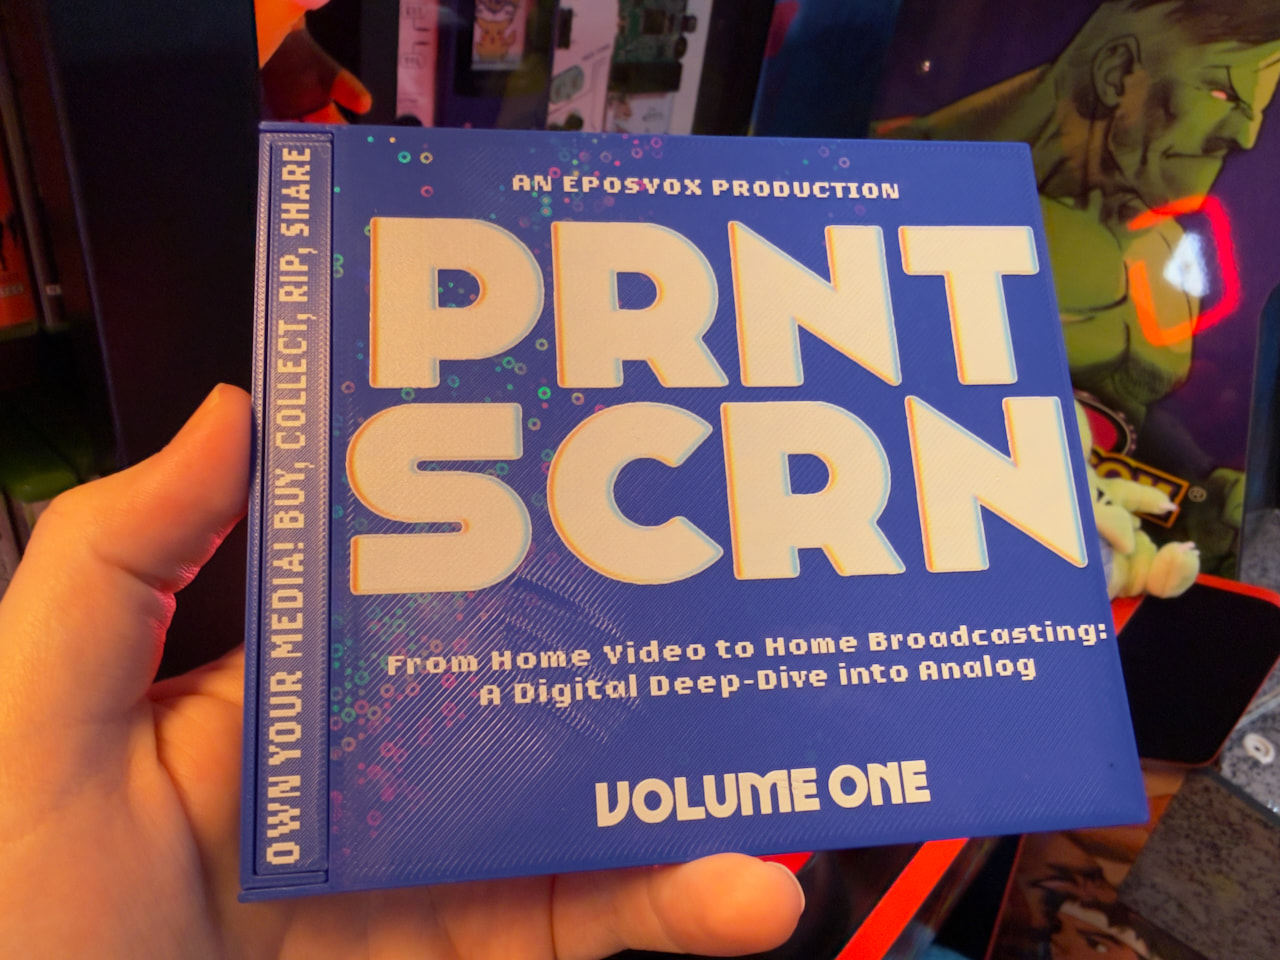
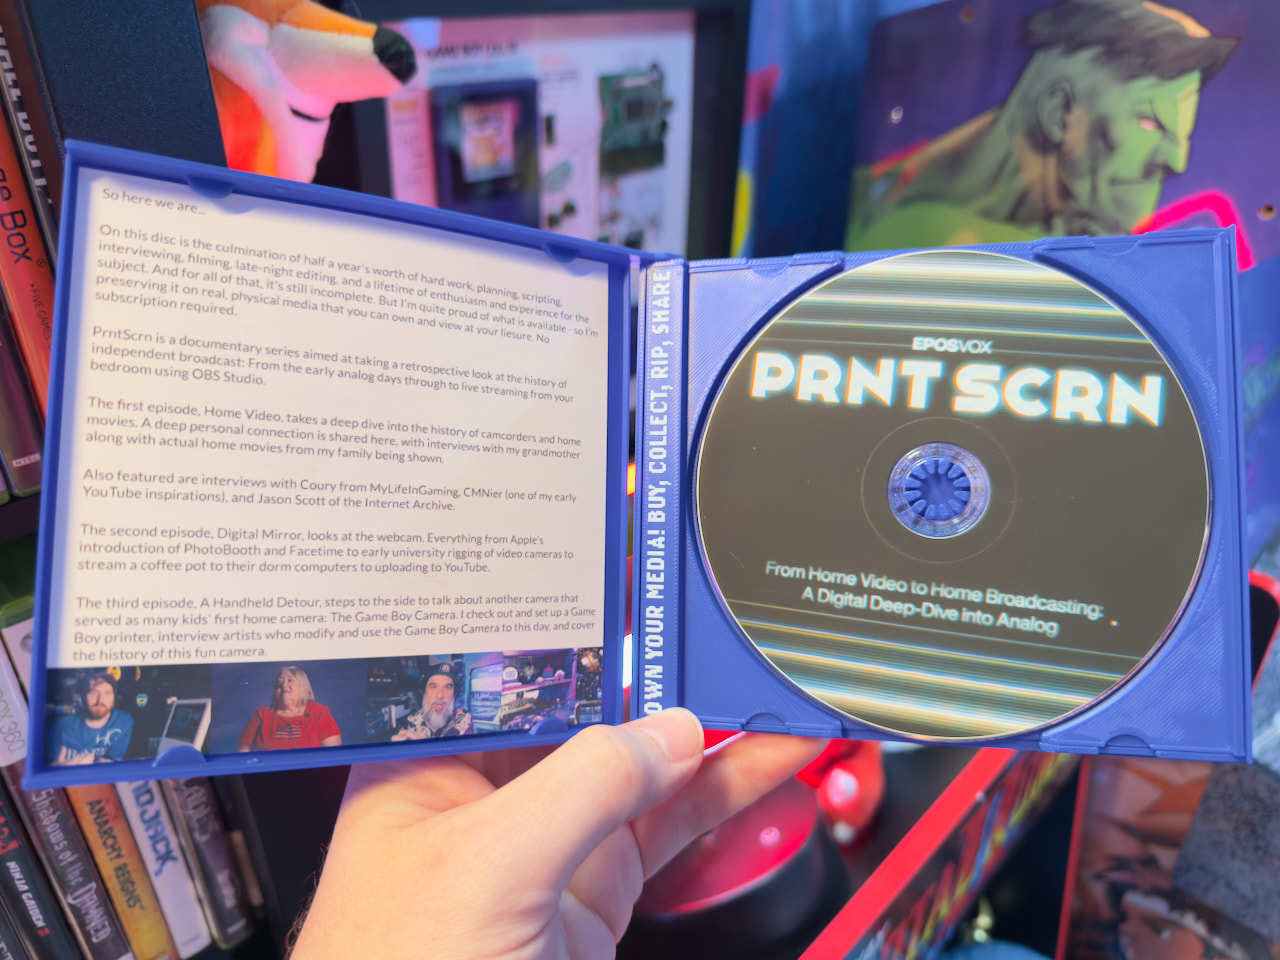
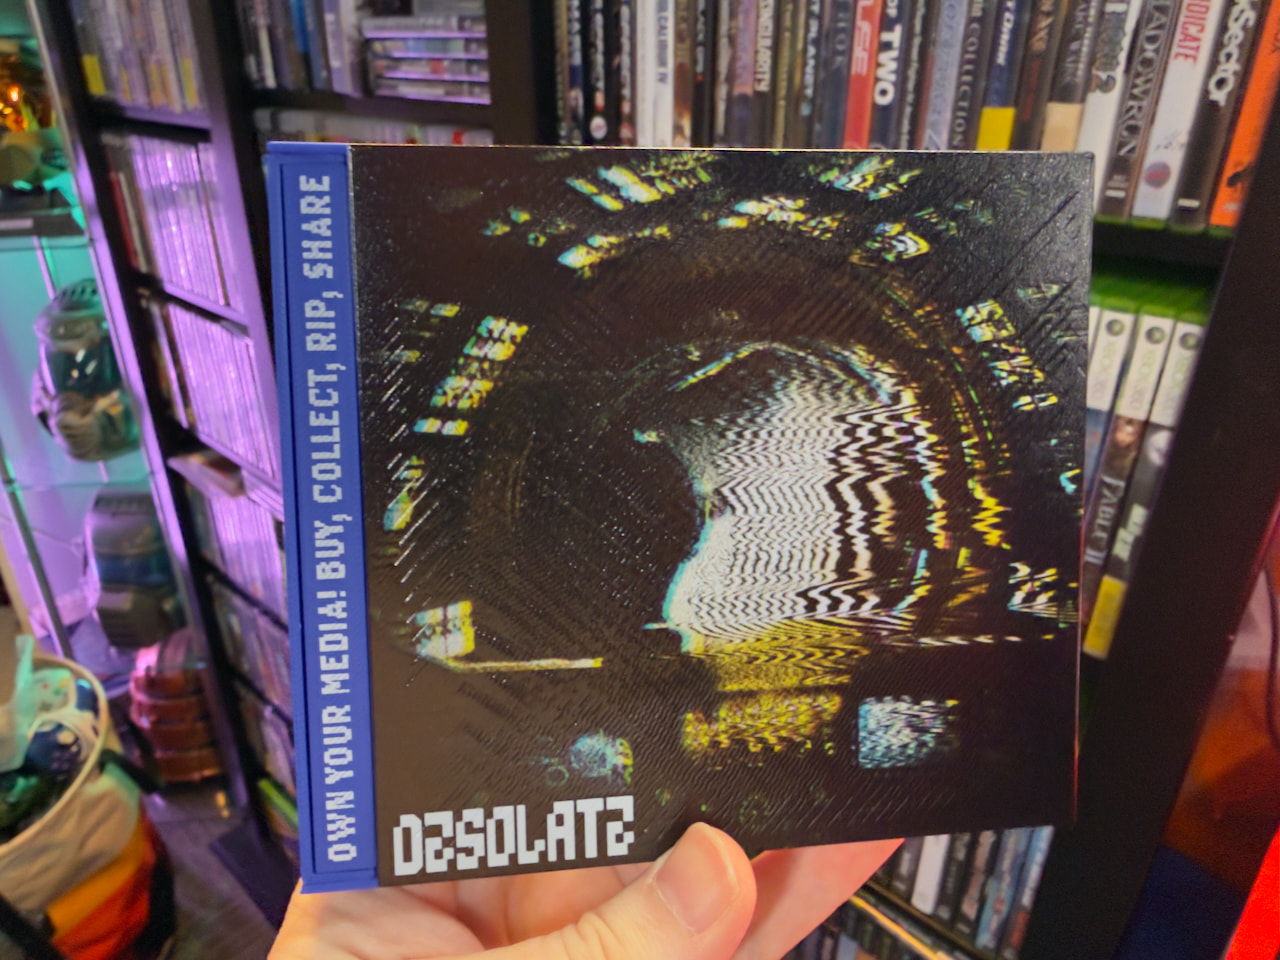
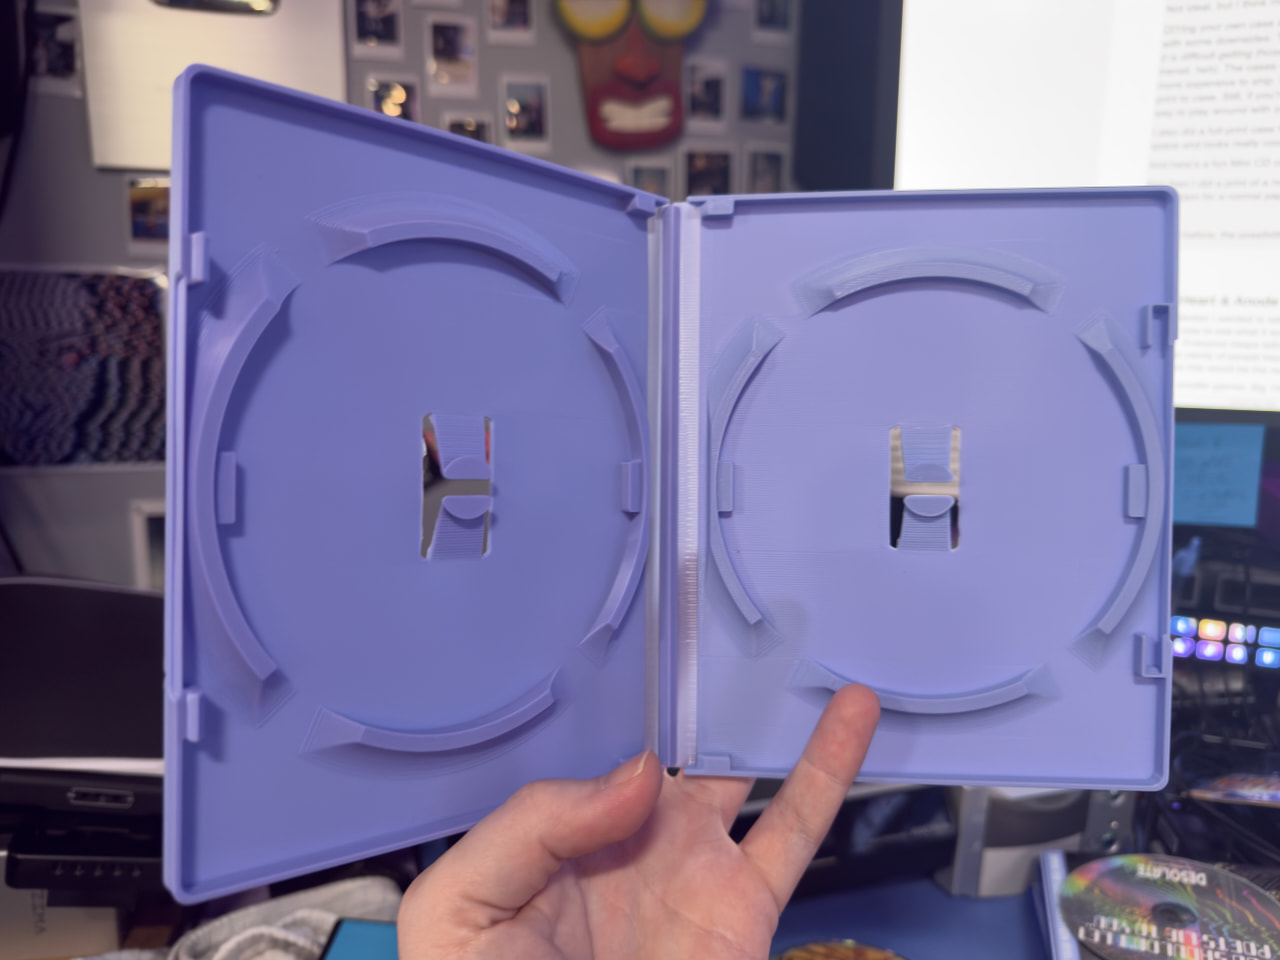
Here’s a standard jewel case replacement I 3D printed:


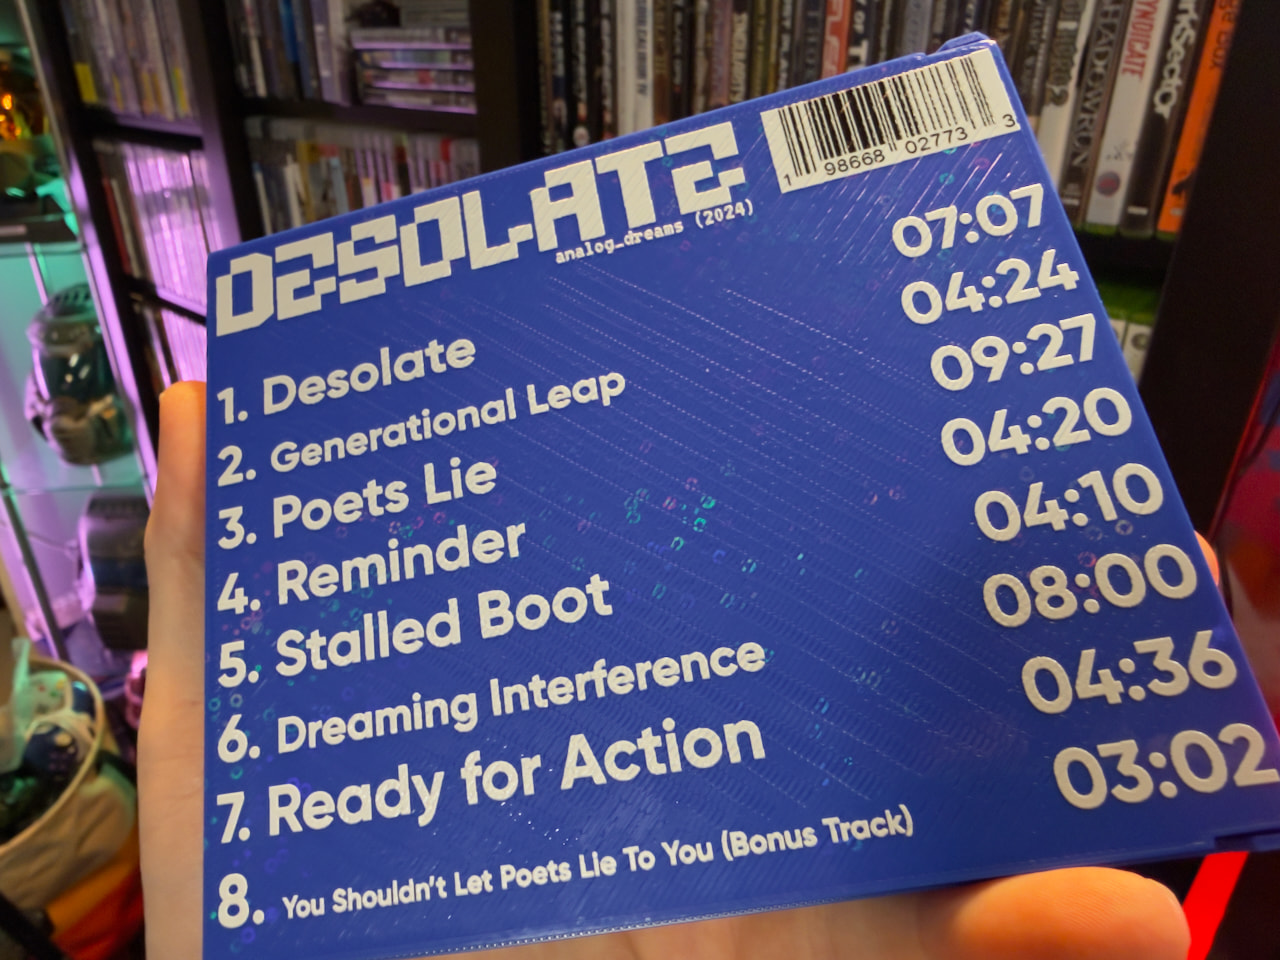
You can use translucent filament or other effects to make them unique. And from there you can draw or paint on the covers, use printed labels or vinyl with a cutter device like a Cricut, get stencils and spraypaint on them, or even UV print them!

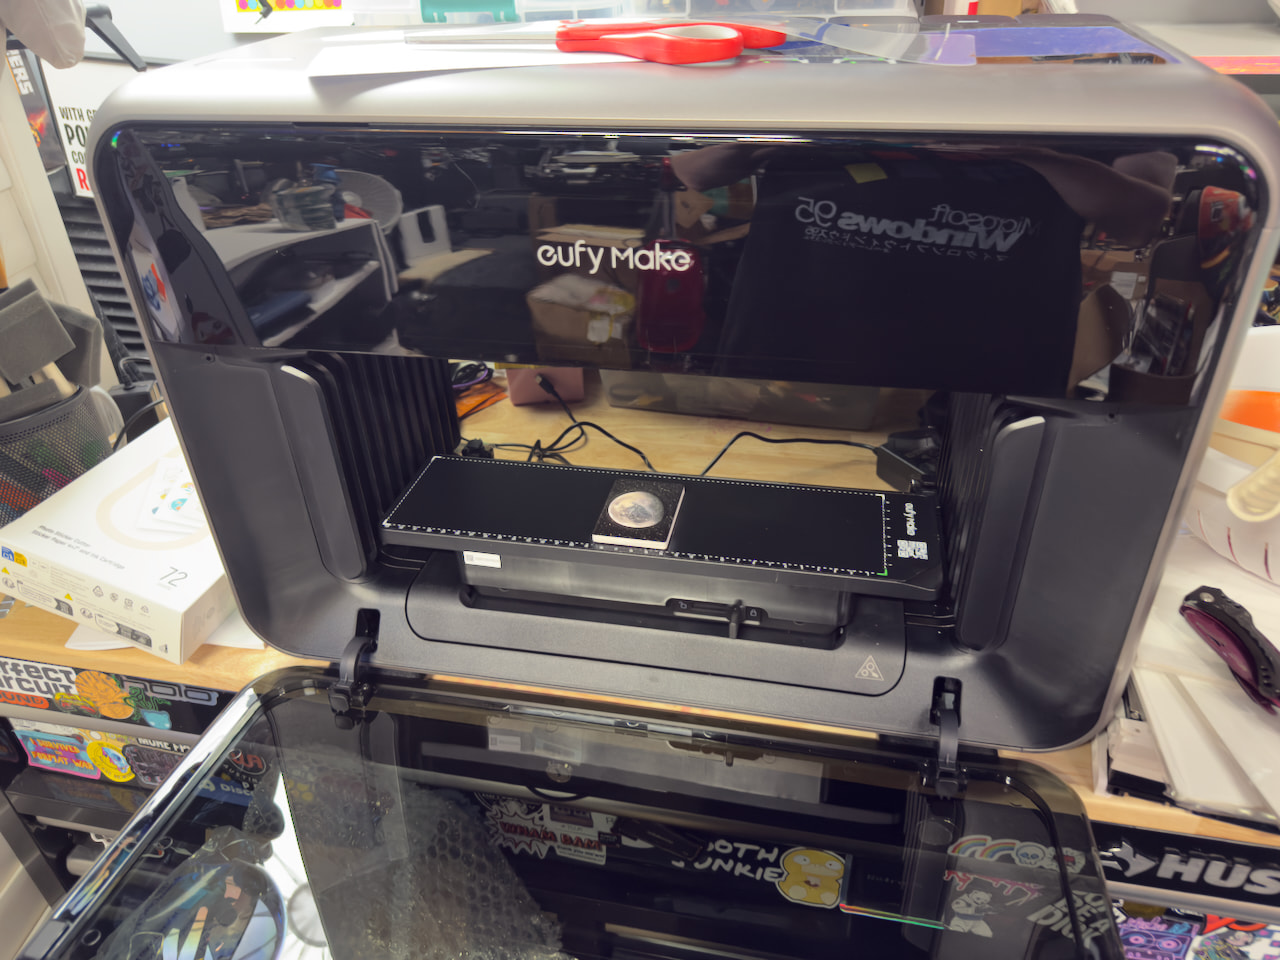
I’ve been experimenting with these and printing directly on them using my EufyMake E1 UV Printer. [Again, not a direct endorsement/recommendation, you can see the pretty major gripes I ran into with it right away in my live journal thread.] This uses ink mixed with ultraviolet-curable resin to make quick, permanent prints on any (mostly flat) surface!

I’ve experimented with plain text and full-coverage visuals printed on these and it works pretty great, honestly. Then a custom-printed CD and printed insert fits nicely and makes for a really unique package. The only problem is the spine: The case is too tall to print on in the E1 (and would not stay upright anyway) and it’s mostly too small to cleanly write on or use my Cricut to cut vinyl lettering for. I may resort to trying to print super thin sticker labels for the spines. Not ideal, but I think most people would be fine with it.


DIYing your own case adds a big unique flair to it and is great for one-offs, but does come with some downsides. The cost-per-unit is much higher than a bulk empty case order (though it is difficult getting those shipped to me without a good handful of them being shattered in transit, heh). The cases are also heavier than standard jewel cases, which would make them more expensive to ship. Plus they add a lot of wait time to the process, taking 1-2 hours per print to case. Still, if you’re just doing it for yourself and have access to a 3D printer, it’s a fun way to play around with your media. I LOVE the results.

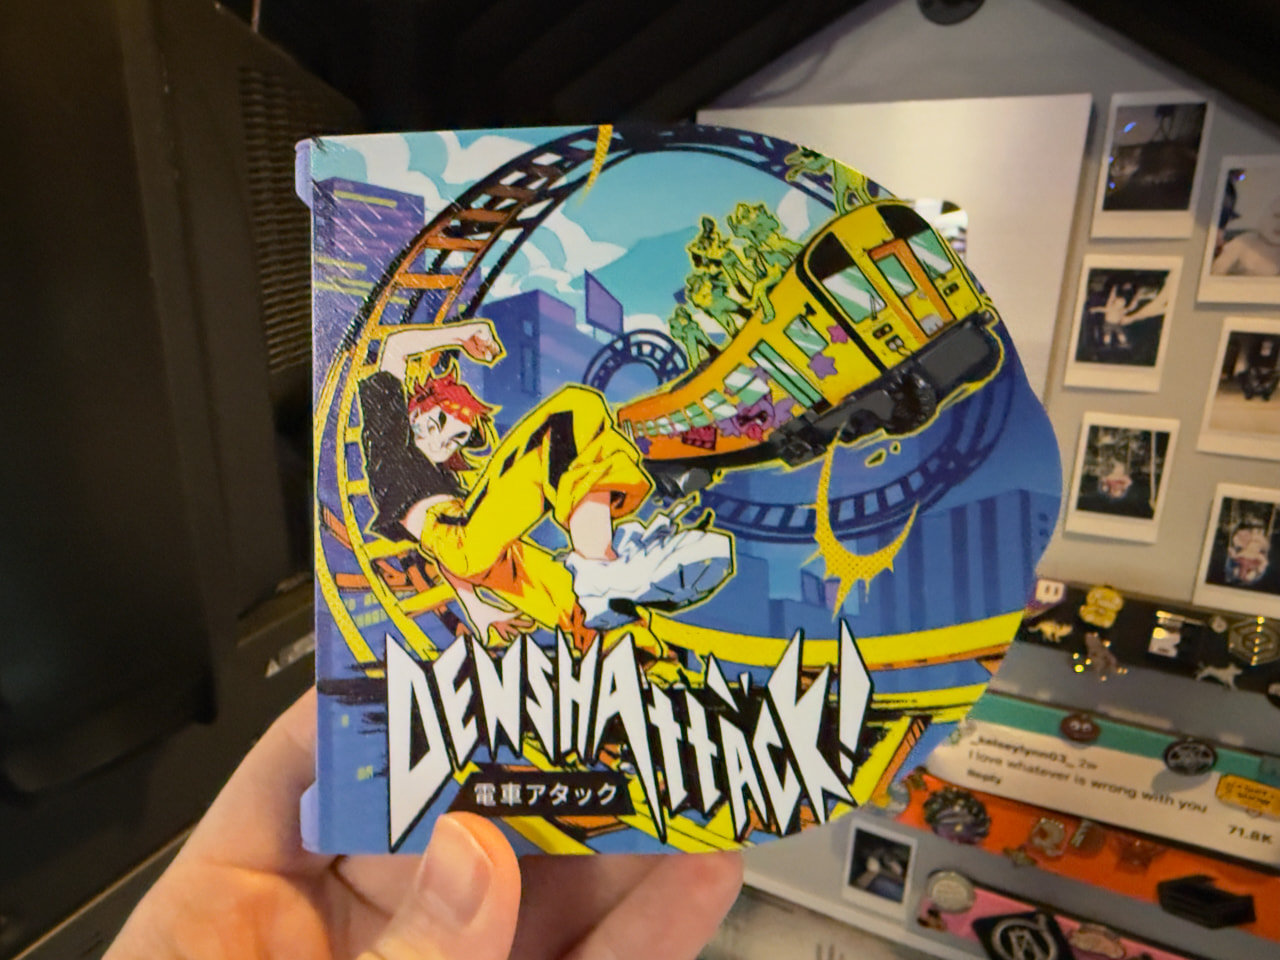
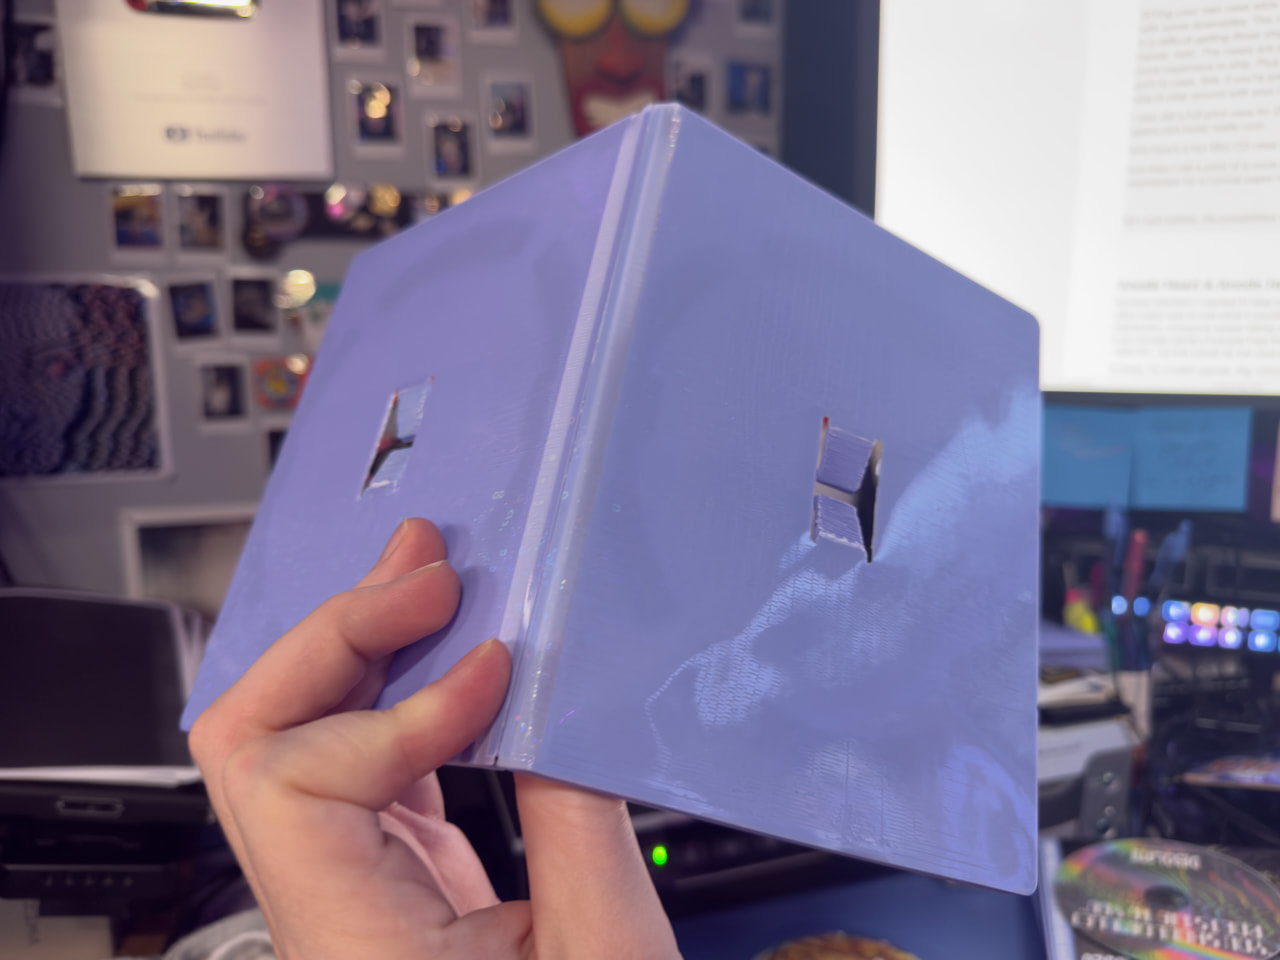
I also did a full-print case for Denshattack! with a slim, D-shaped case that takes up a lot less space and looks really cool:


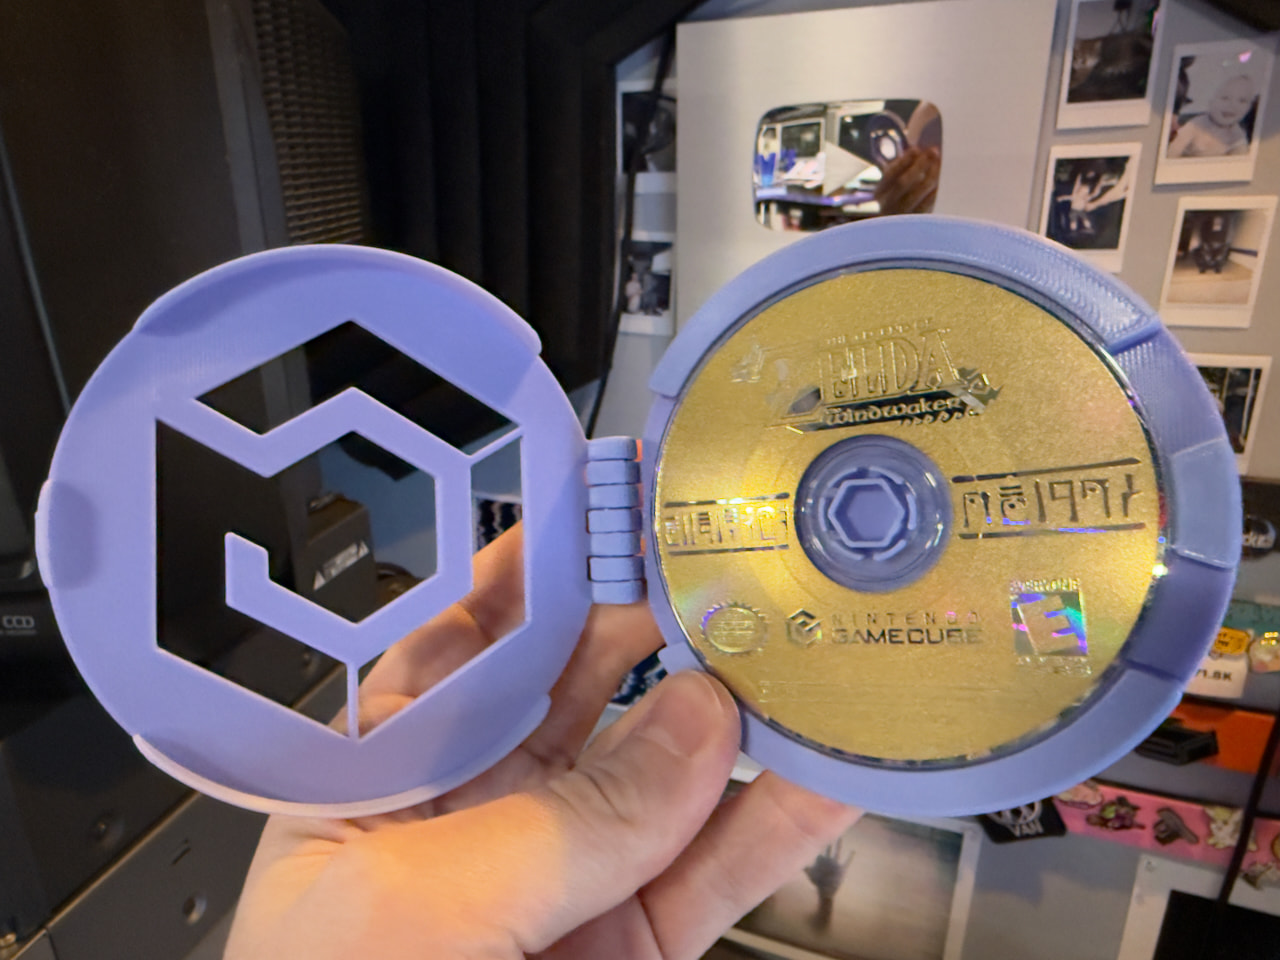
And here’s a fun Mini CD case for GameCube style games:


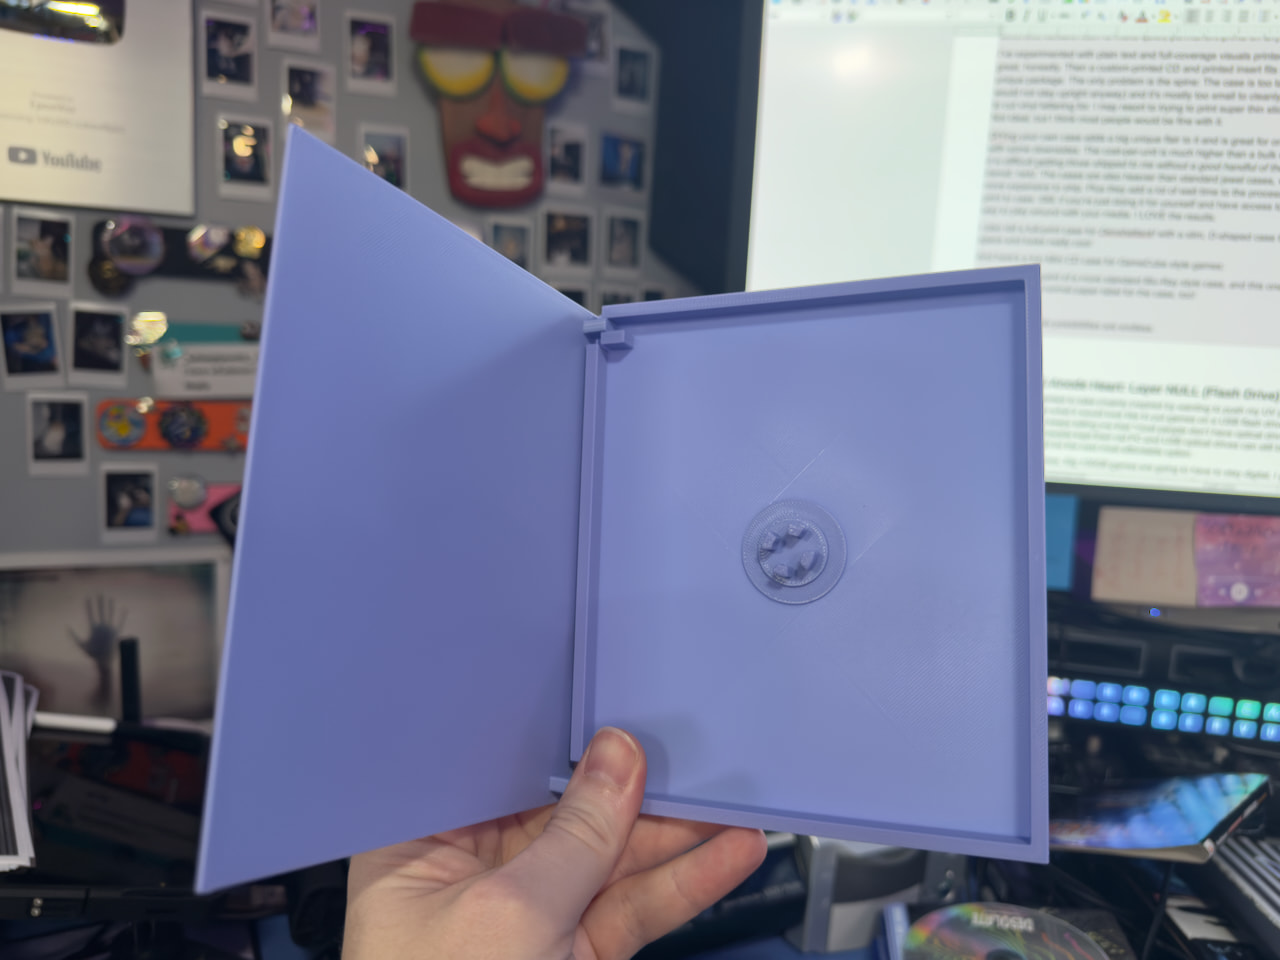
And then I did a print of a more standard Blu-Ray style case, and this one even has a locking mechanism for a normal paper label for the case, too!


As I said before, the possibilities are endless.

1 Like

Anode Heart & Anode Heart: Layer NULL (Flash Drive)

Another direction I wanted to take (mainly inspired by wanting to push my UV printer to off-label uses) was to see what it would look like to put games on a USB flash drive for distribution. Everyone keeps telling me that “most people don’t have optical drives anymore” - even though plenty of people kept their old PC and USB optical drives can still be had for ~$20-30 – so this would be the next most affordable option.

At least, for smaller games. Big 100GB games are going to have to stay digital, I guess, with both BDXLs being expensive and not widely-supported and flash memory skyrocketing in price thanks to AI and datacenter grifters in 2026. But for these two tiny games and their soundtrack? Let’s give it a shot.

Case

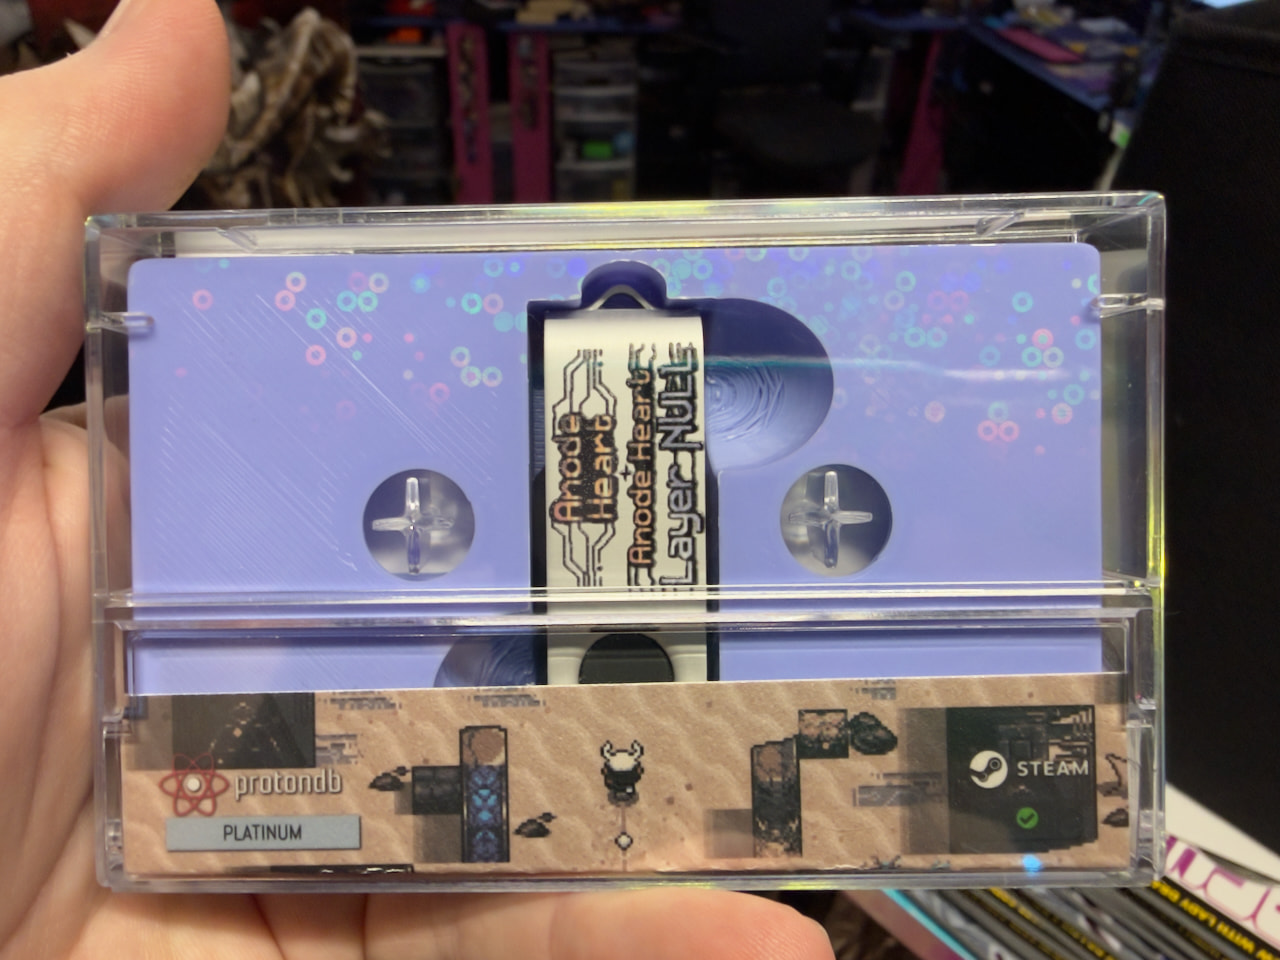
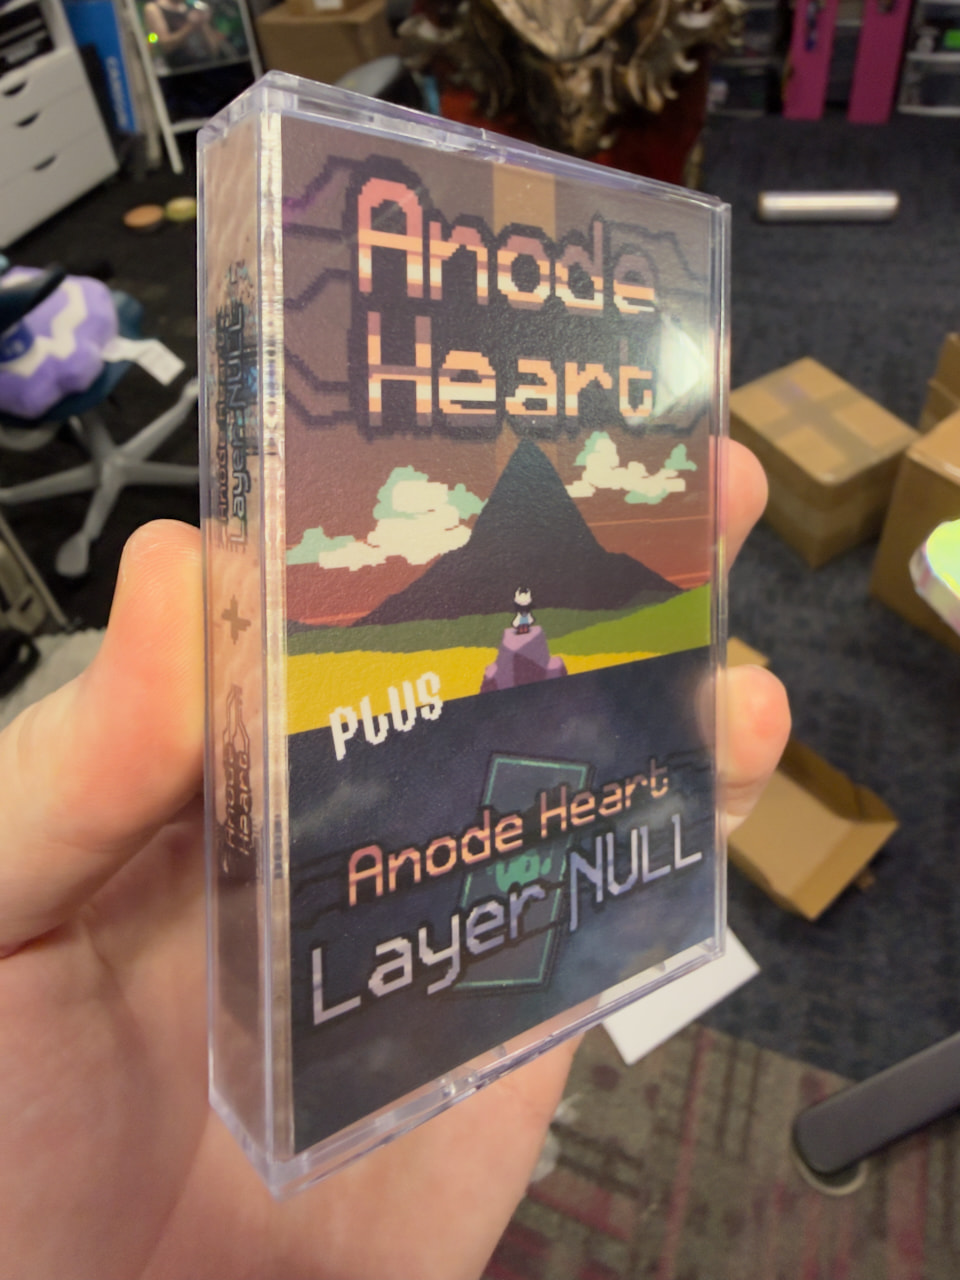
Since the flash drive is so small, the case should be small, too! I’ve seen people use cassette tape cases for Game Boy, Game Boy Color, and Game Boy Advance games, and it kind of made sense to use it again here.

Plus, I already had experience doing a run of cassette tape-style flash drives for a couple of our Backing Track music albums.

Insert

Now, I personally don’t just want the flash drive loose in the case bouncing around. Some might be okay with that, but that just feels cheap to me and kind of defeats the purpose of making case. (I also hate it when disc cases break and the disc just flops around in those, too!)

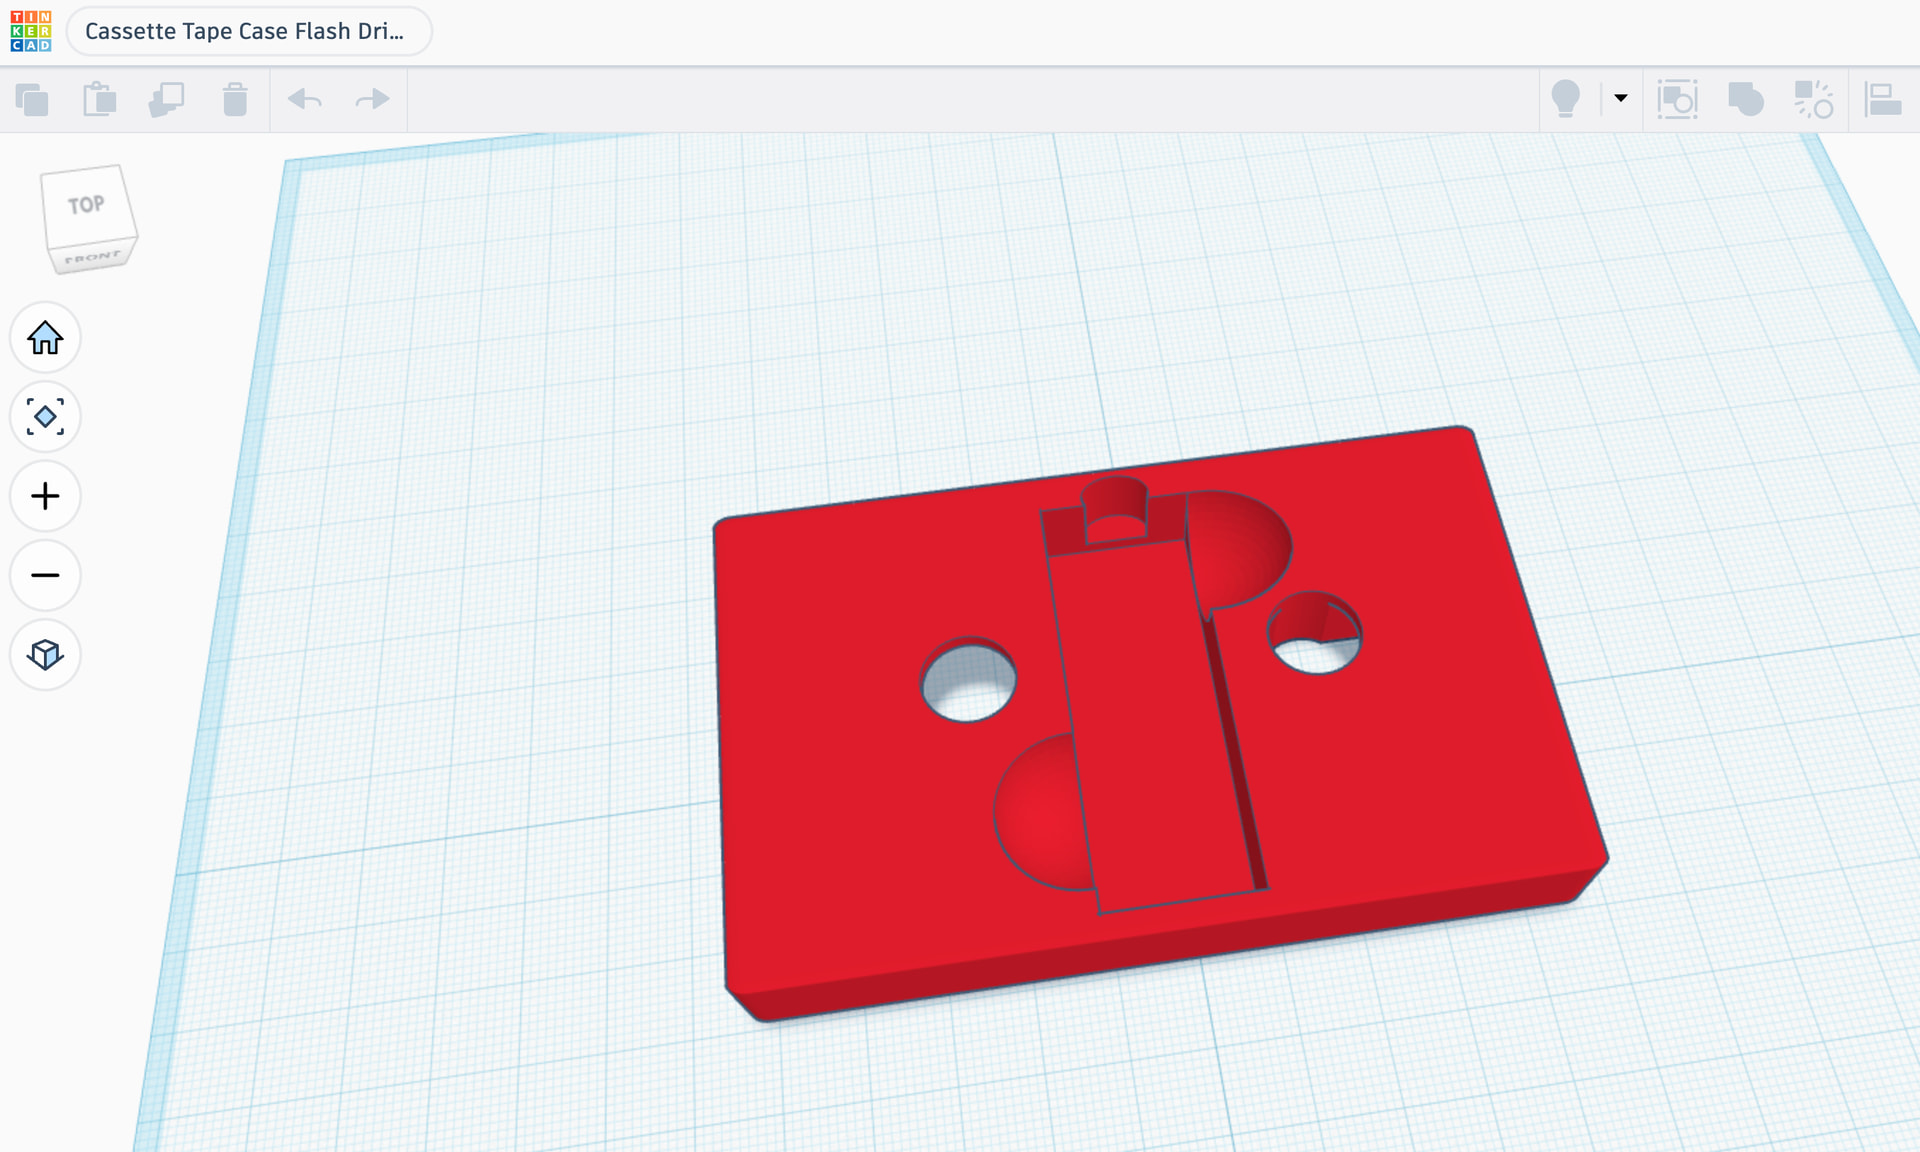
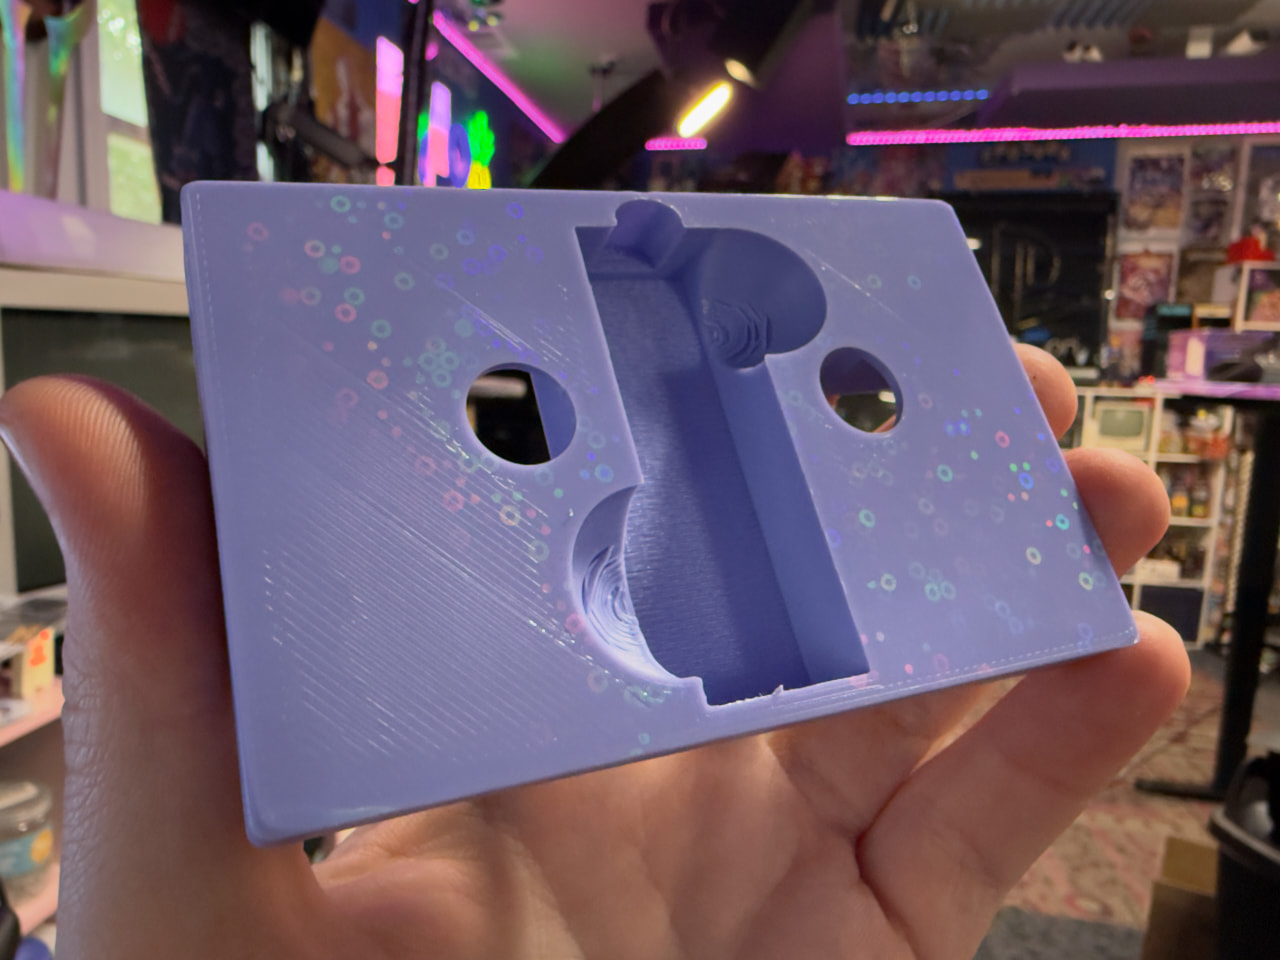
So I needed to design an insert to hold the drive. This could be made of anything, but using what’s readily available to me, I took some measurements, hopped onto TinkerCAD, and drafted up a general idea. A rounded rectangle with a slot for the drive, a couple holes to make it easier to remove, then cutouts for the tape grips. I’m pretty sure you can get tape cases without the spikes that go inside the tape’s holes, but I didn’t have any at all in my tape collection, so I just accounted for it in the design. This took… a few drafts to get right, but by the next day I had something great and ready to go.

Since I’m nice, I’ve made my TinkerCAD file publicly available here. This will require tweaking for a given flash drive, so it’s not a universal one-size-fits-all thing. There are so many different shapes and sizes for flash drives.

JCard

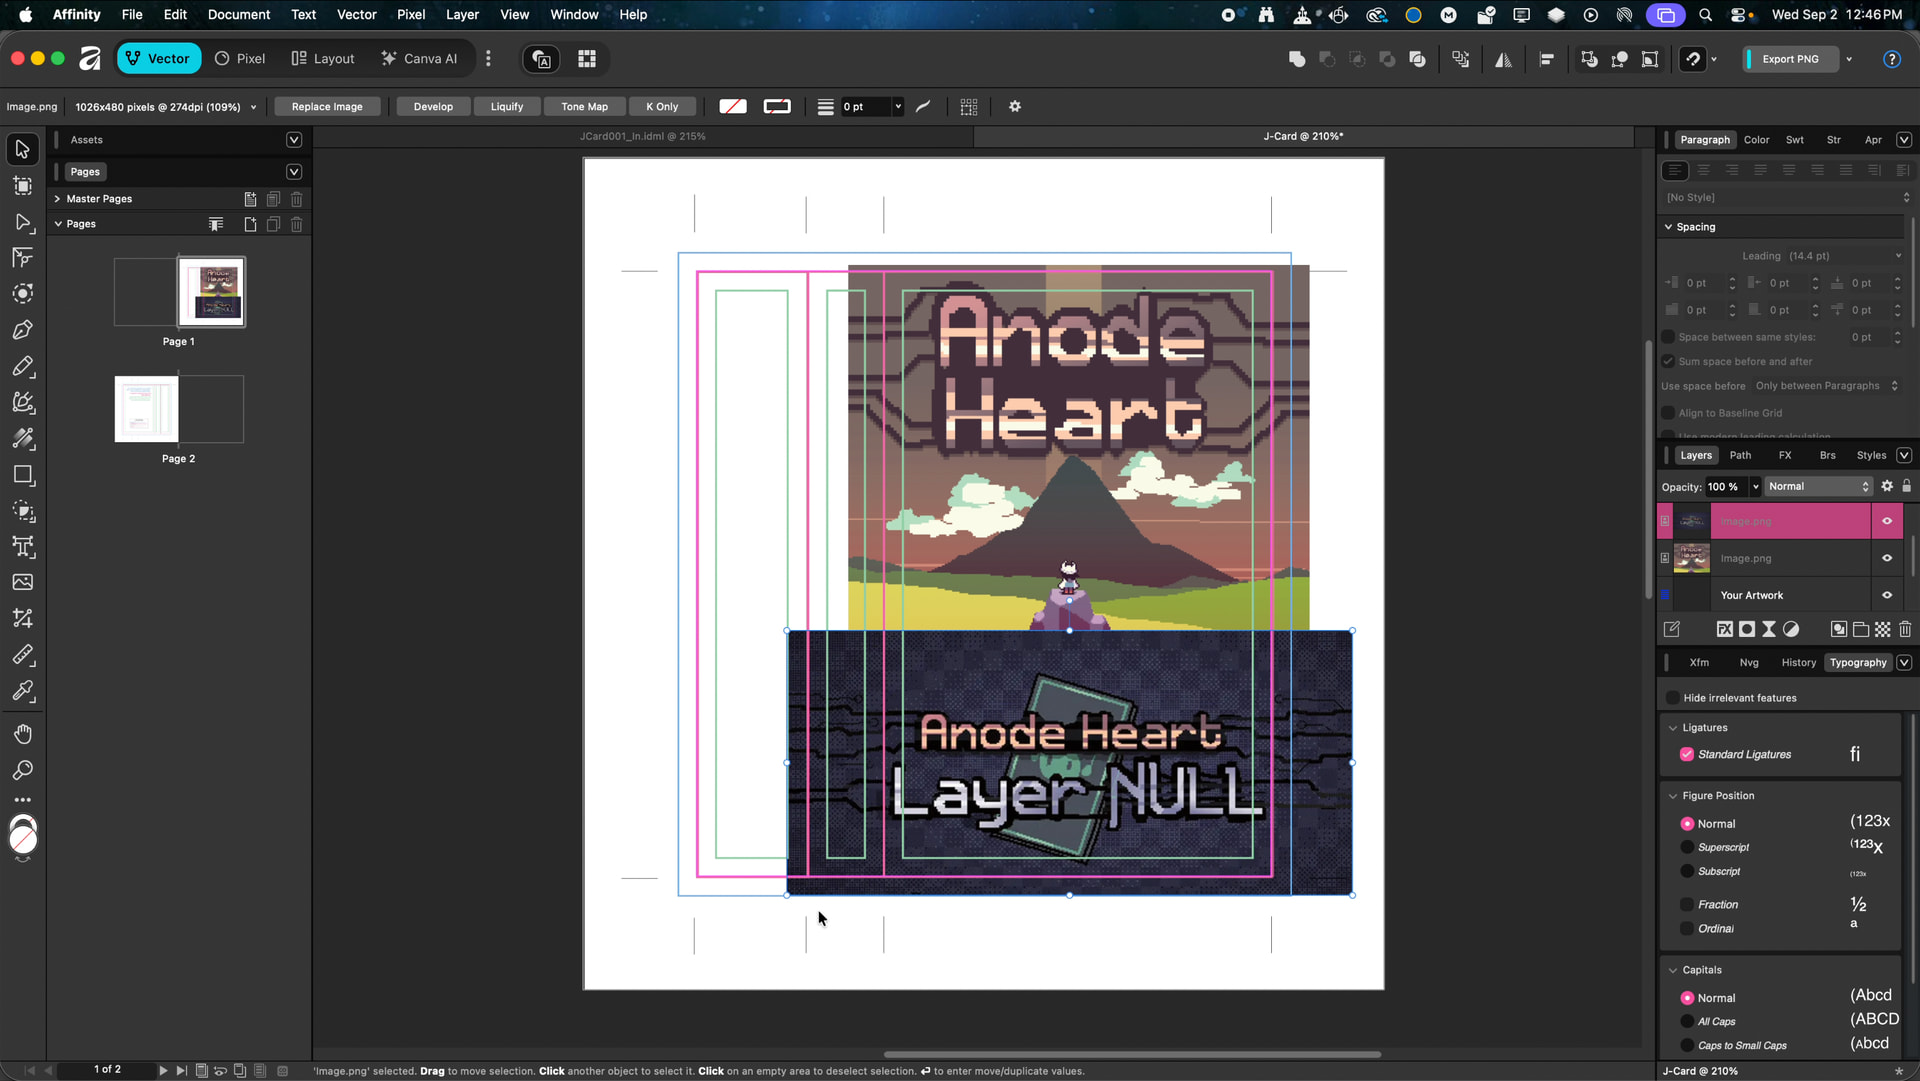
Next it was time to design the insert. For cassette tapes, this is called a “JCard” – because, well, it’s shaped like a J.

Disc Makers comes in clutch again with a JCard insert template – and other templates for USB drive labelling that could be useful to you.

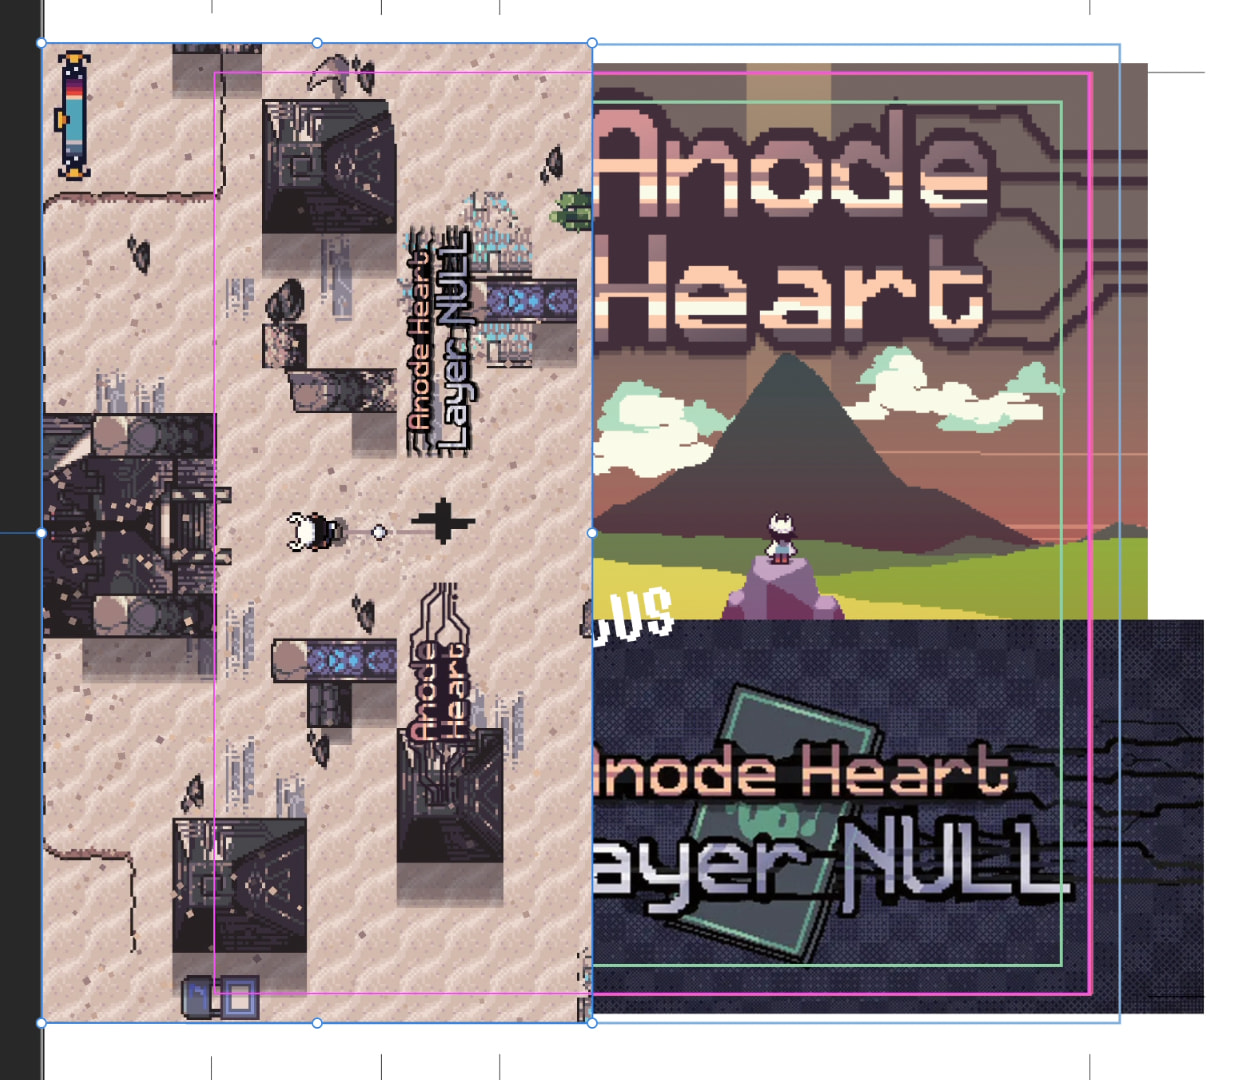
I opened the template in Affinity and built my designs within the safe zones.

These are games that do not have a ton of assets readily available, but I kept it simple: Key art from SteamGridDB for both games with text that says “PLUS” to show that it’s two games in one again (Layer NULL is a spinoff of Anode Heart so it makes sense to bundle them together).

With cassette JCards, the spine and side label are kind of counterintuitive, the logos should actually face with the bottom towards the front cover and top towards the side back cover, opposite of how disc-based sleeves are usually designed. I just put the logos side by side with a cool pixel font plus sign. Easy.

Then I found a screenshot from Anode Heart that I thought was simple enough to serve as both a focused piece and the background, while compositionally letting me position the logos, ProtonDB rating and Steam Deck rating on them.

To print the JCard, I used my big Canon printer and this super fancy art paper called “Photo Rag Metallic” from Hahnemühle. This is designed for photography and fine art – and is quite expensive, mind you – and produces a metallic sheen without compromising on the image quality, akin to Epson’s Luster paper type. I’ve been obsessed with Luster-style paper for a while now, and while it’s expensive, I want so many things printed on it. I used it as the test prints for my personal copies of the Synth Rock USB Cassette JCards and think they work really well for a unique presentation here.

Flash Drive Design

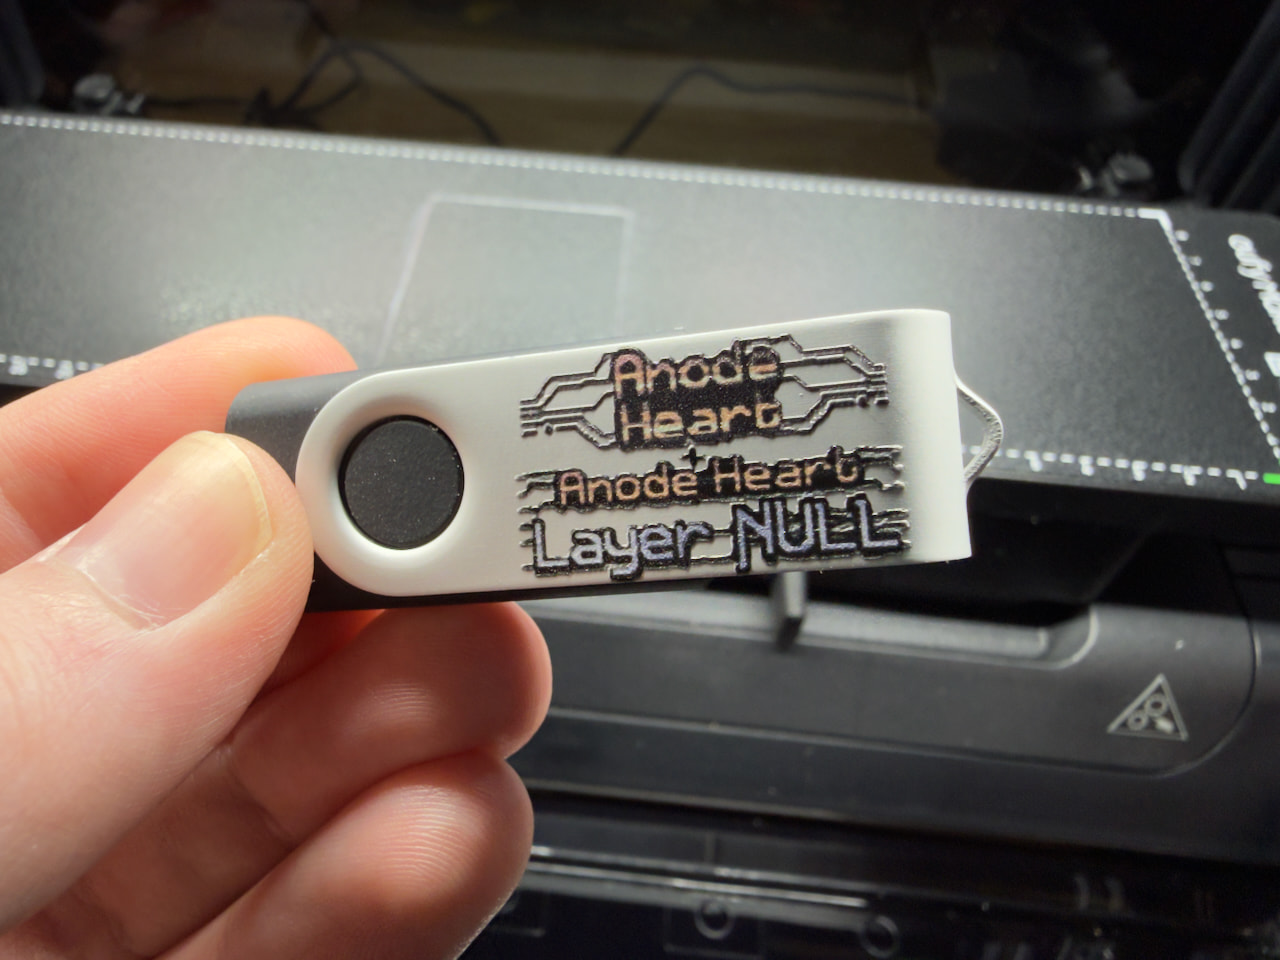
Not content stopping there (and being the source of inspiration for this particular project), I wanted to test my EufyMake E1 UV Printer printing on the flash drive directly.

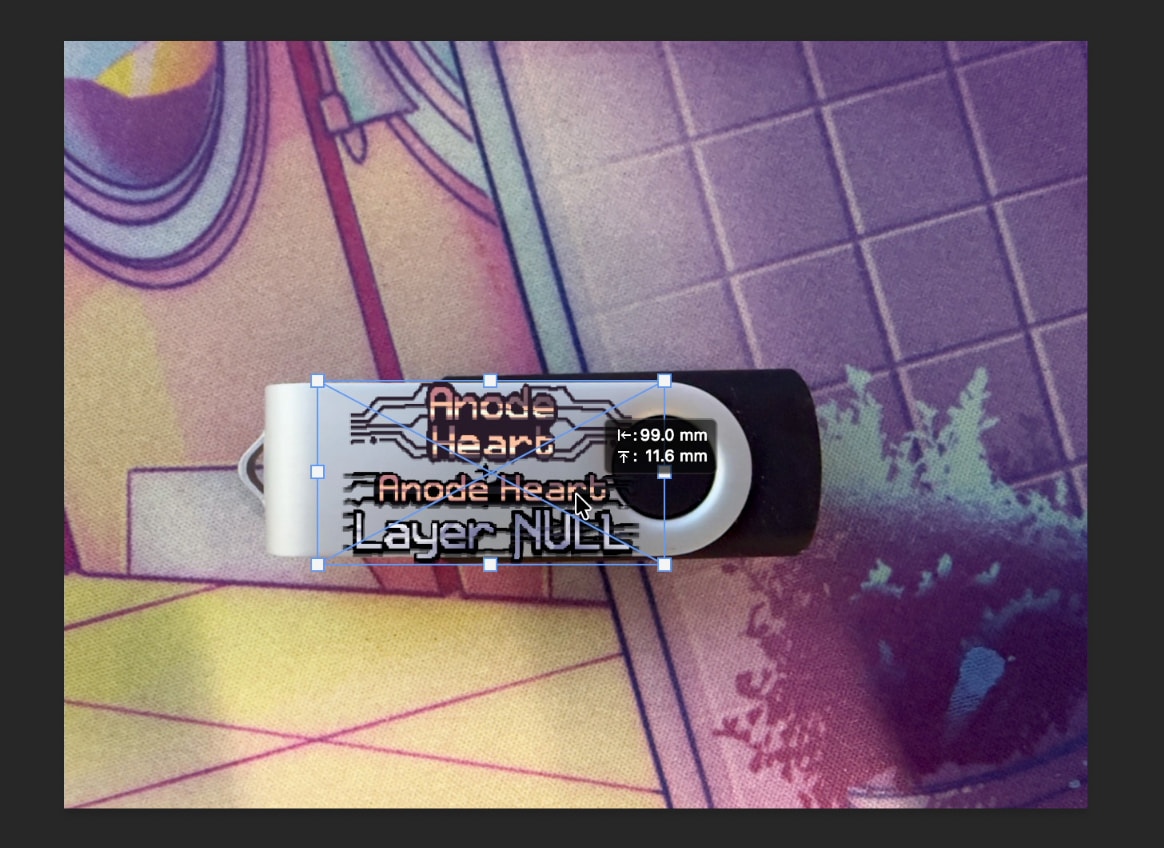
I took some basic measurements of the flat metal area with my calipers and made an art board of that size in Affinity. One side got the two logos, the other side got a screenshot. I just had to remember to go to Document → Setup → Transparent Background to export a transparent PNG since I want there to be no background when printing on the UV printer.

I also scanned in the flash drive so I could preview the image on it before committing.

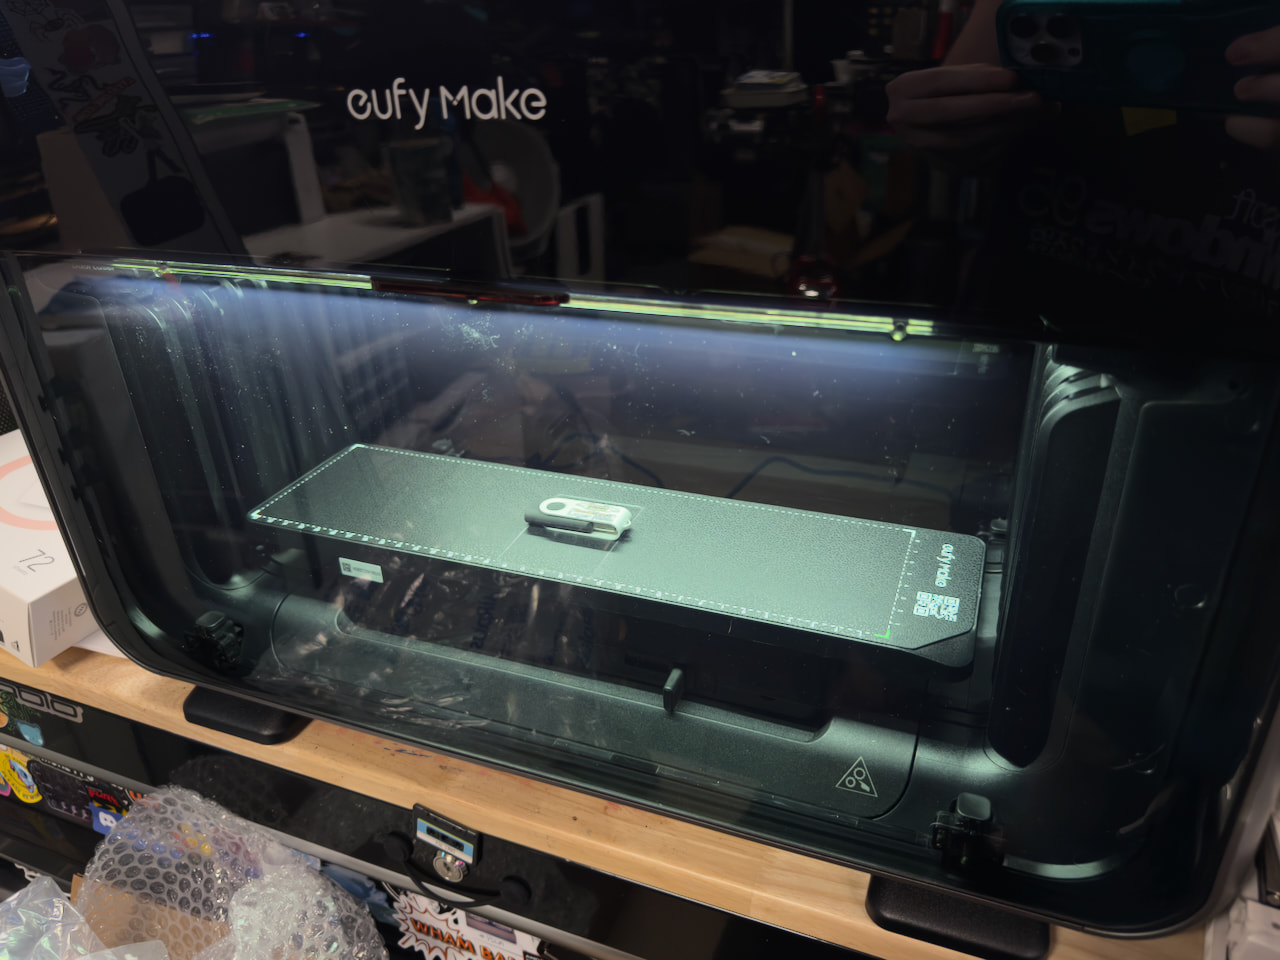
Then I put the flash drive on the print bed in the E1, used the snapshot feature to take a photo of it and line it up, and told it to print. The automatic contour detection sucks on this, but manual alignment on the computer is fine. This was on “Normal” quality, not the “High Quality” mode and while the resolution at this small of a scale isn’t amazing, it honestly looks great and I’m very happy with the result. I went back and added a cutout of the main character to the inner circle on both sides of the drive, too.

Put it all together and you have a really neat complete package for a completely unique physical game experience!

Flash Drive Files

Again, AutoRun can be handled by a .inf file (or omitted entirely) but I wanted to play around with making the menu.

I grabbed the game files for Anode Heart and Anode Heart: Layer NULL from my Steam installation and the soundtrack for Layer NULL . (Sadly it only delivers in low bitrate MP3 instead of FLAC. Very disappointing – but hey, the flash drive is rewriteable should they ever update it!)

Testing the games on another PC and it seems that Layer NULL does not have any DRM, but the base Anode Heart game does. Disappointing, but once again I have no problem acquiring an unlocked and liberated copy of a game I’ve already paid for to use in its place. These are tiny games, so I could include the original and unlocked copy if I wanted, I could do a lot here.

SamLogic also sells a USB AutoRun Creator like their CD-Menu Creator, so I wanted to try that out.

It was… disappointing, to say the least. They built this program to circumvent Windows blocking AutoRun by using their own signed executable that then launches your desired one, but it only supports a single option, no menu, no secondary actions, nothing. You’d be better off using the normal CD-Menu Creator or building your own .inf file. So let’s do that.

BONUS TIP : If you can’t find an icon online for a game, open the .exe file in 7-zip and you can find some in the “.rsrc” folder in there. They may not have file extensions and those may need to be added. I’ve extracted the icons for Anode Heart and Layer NULL and submitted them to SteamGridDB [Anode Heart, Anode Heart: Layer NULL] .

So let’s just build our own INF file, huh?

On our drive, our file structure will be:

Root:\

  • Games
    • Anode Heart (DRM-Free)
    • Anode Heart Layer NULL
  • OST
    • Anode Heart Layer NULL OST
  • Extras
    • Icons
      • Anode Heart
      • Anode Heart Layer NULL

And I want my AutoRun file to give me the option to play both games and play the music. So our file would look like this:

[autorun]

open=Games\Anode Heart (DRM-Free)\AnodeHeart.exe

shellexecute=Games\Anode Heart Layer NULL\LayerNull.exe

icon=Extras\Icons\Anode Heart\icon1.ico

label=Anode Heart & Layer NULL

[content]

Game 1=Games\Anode Heart (DRM-Free)\AnodeHeart.exe

Game 2=Games\Anode Heart Layer NULL\LayerNull.exe

Soundtrack=OST\Anode Heart Layer NULL OST

Copy this and your files to your flash drive, safely remove it, plug it back in and see if it worked! You may need to tweak your Windows AutoRun settings to allow it.

But even then, most of the options will only work on older versions of Windows, but having the custom icon is cool! I wish that worked for Linux and Mac.

3 Likes

Reserving this post in case I think of anything else.
If you see any links missing, let me know!

Holy shit what perfect timing… OMG.
https://www.gog.com/pressroom/gog-preservation-program-brings-the-big-box-nostalgia/
Big Box Collection has partnered with GOG to bring 3D Digital copies of PC game boxes to GOG listings! Really freaking cool.
And better yet they’re providing printable copies to make your own physical copies! They’re encouraging this!!

If no one gives you the choice to own a physical copy, take matters into your own hands — and paired with GOG’s DRM-free installers, no one can ever take the games you paid for away from you.

What incredible news.

This is only available for 5 games at the moment:

  • Myst Masterpiece Edition
  • Armikrog
  • Descent
  • Hitman: Codename 47
  • Star Trek 25th Anniversary

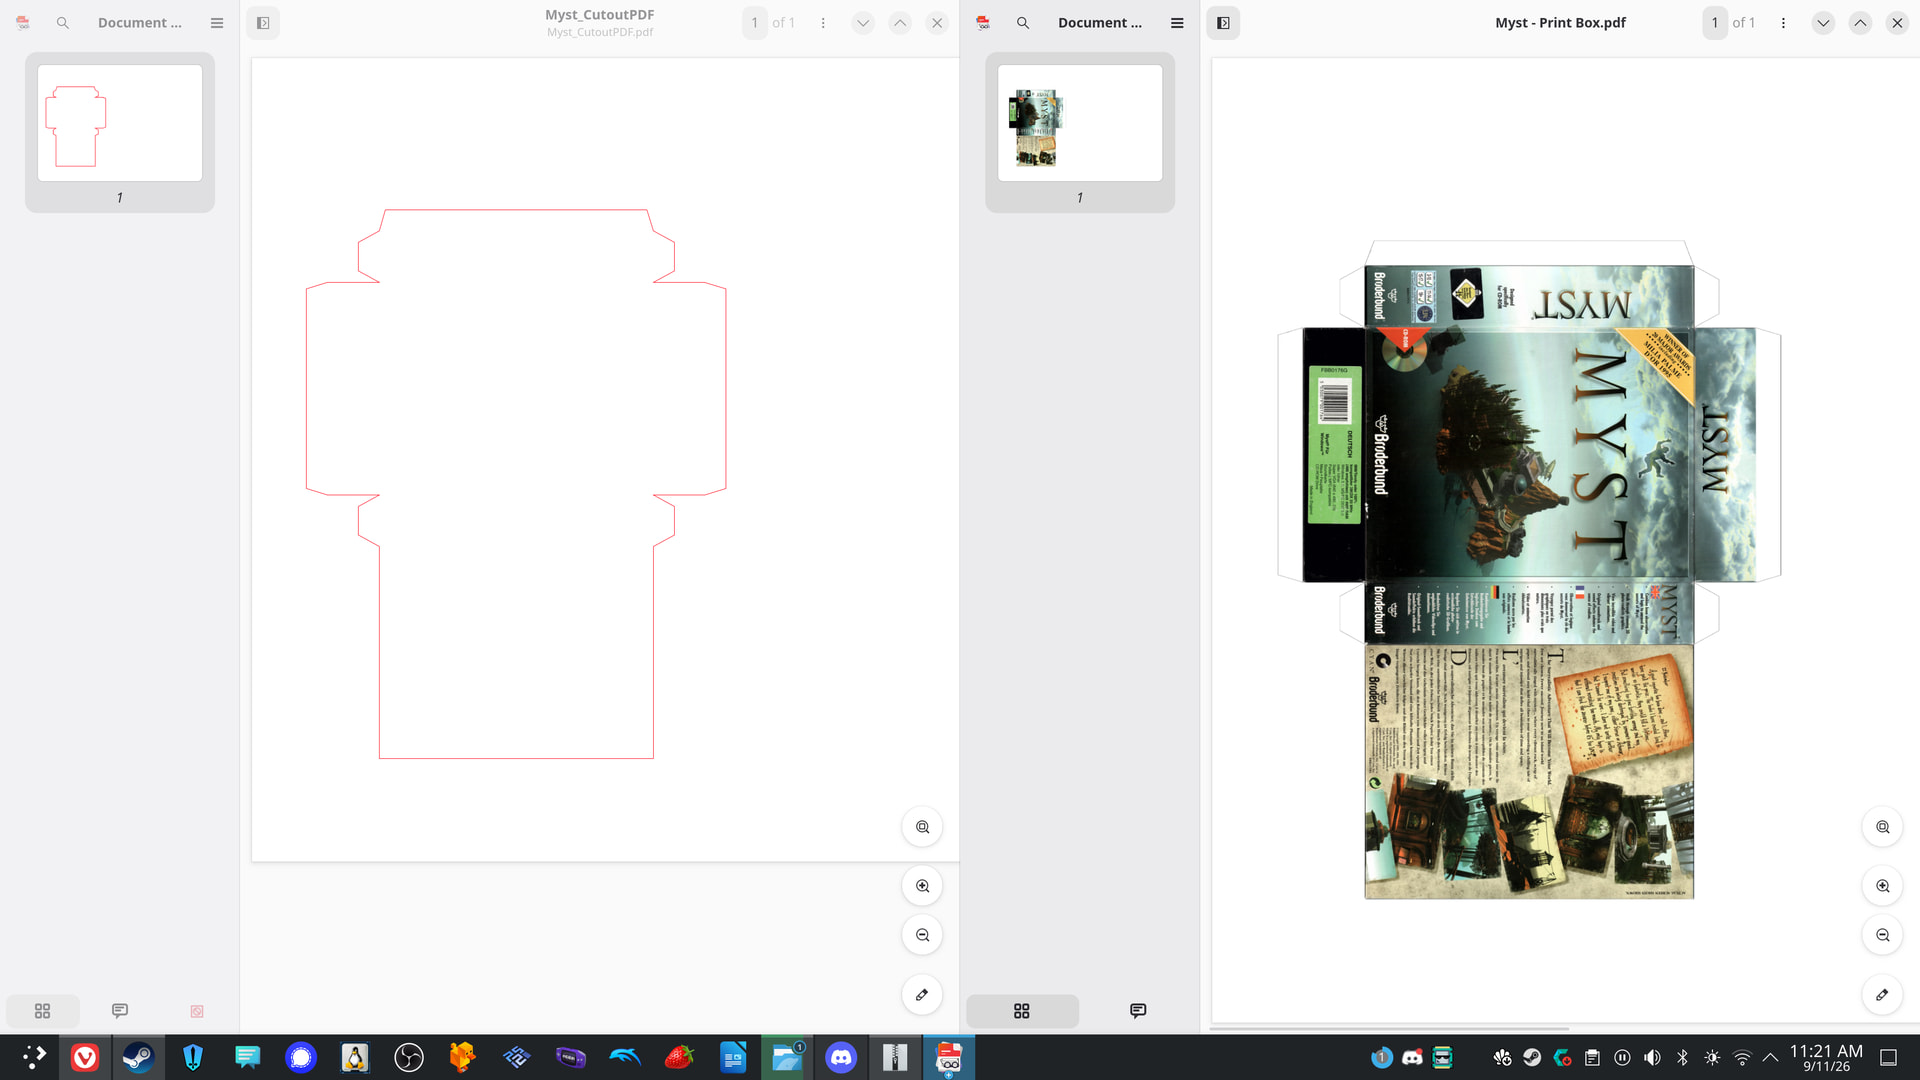
I checked out Myst and it looks like they give you a handful of files for printing and cutting, including separate cut guides. This is really thoughtful and handy. I’m very excited to give this a go and will add it to my guide in a separate post probably next week, when I get time to execute it.

Edit: I don’t have ANYTHING big enough to print these lol

1 Like