I am trying to reduce every ounce of friction I have for playing games and capturing them - and the Ayn Thor has already been an awesome part of that movement. USB C to transfer files and charge it is already a win - but it can be used to capture as well!
The Thor supports DP over USB C already, but that’s for a single screen source (not dual screen) and still requires a capture card setup. (This can even be done wirelessly!!)
What if… there was a better way?
The Less-Than-Ideal Solution
This rabbit hole initially started when I first discovered DualCPY a few months ago.
This leverages the Android ADB protocol and a front-end for the SCRCPY utility for capturing Android screenshots/recordings. This comes with profiles for a variety of handheld systems, with the Ayn Thor being the default. It loads up both screens in either a unified window or two windows, lets you change scaling and so on.
This can then be captured via OBS for recording and streaming.
As the OBS guy, this was my default way to go, and seemed like magic. However, I quickly ran into some frustrations:
- The built-in screenshot button for DualCPY seems busted. Screenshots never appear anywhere, even when searching for the specific file name the program says it saves.
- Capturing this in OBS regularly is kind of annoying - at least in CachyOS w/ Wayland - as I keep having to select which display capture sources I want via the Wayland pipe, at minimum after every reboot. And launching OBS without it open and cancelling the prompt can kind of mess up my sources.
- Audio is VERY glitchy in DualCPY. Drops out, stutters, glitches, it’s not a good time. This isn’t the case via normal scrcpy.
So it was time to pursue something better. Thanks to the encouragement and right-direction-pointing from 22sh (the creator of PKForge) in a Discord chat, I had a functional solution within an hour or so.
The Solution
Requirements
- terminal
- adb
- scrcpy (& dependencies)
- ffmpeg
- v4l2 (Linux)
- homebrew (Mac)
- Enable Developer Settings on Android and enable USB Debugging; connect Ayn Thor to PC and approve the fingerprint so it’s not asked anymore
Thor Capture on MacOS
First, install scrcpy and adb (along with FFMPEG if you don’t have it) via homebrew:
brew install scrcpy android-platform-tools ffmpeg
Now we’re going to edit the .zshrc file that the normal Mac terminal uses. You will need to change this if using bash instead of zsh, or something else. I use NotepadNext for text editing here, so to edit the file, I use:
open -a NotepadNext ~/.zshrc
This already has commands (such as FastFetch/NeoFetch) set up in it, so I’ll go to the bottom to add our commands.
# --- AYN Thor Recording Functions (macOS / ProRes) ---

function thor-top() {
    mkdir -p /Volumes/Mac4TB/scrcpy/
    local timestamp=$(date +'%Y-%m-%d_%H-%M-%S')
    local raw_file="/Volumes/Mac4TB/scrcpy/thor_top_raw_$timestamp.mkv"
    local output_file="/Volumes/Mac4TB/scrcpy/thor_top_$timestamp.mov"

    echo "Recording Top Screen (Display 0) at 120fps headless. Press Ctrl+C to stop and process."

    scrcpy --display-id=0 \
           --max-fps=120 \
           --video-bit-rate=32M \
           --video-codec=h265 \
           --audio-codec=raw \
           --audio-buffer=100 \
           --audio-output-buffer=20 \
           --print-fps \
           --no-window \
           --no-audio-playback \
           --record="$raw_file" &
    local scrcpy_pid=$!

    trap 'echo "\nStopping recording..."; kill $scrcpy_pid 2>/dev/null; break' INT

    while kill -0 $scrcpy_pid 2>/dev/null; do
        sleep 1
    done

    trap - INT

    echo "Recording stopped. Processing to 120 CFR with ProRes 422 & 32-bit float PCM..."

    ffmpeg -y -i "$raw_file" \
           -filter:v "fps=120" \
           -c:v prores_videotoolbox -profile:v standard -r 120 \
           -c:a pcm_f32le \
           "$output_file"

    rm -f "$raw_file"
    echo "Done! Saved to: $output_file"
}

function thor-bot() {
    mkdir -p /Volumes/Mac4TB/scrcpy/
    local timestamp=$(date +'%Y-%m-%d_%H-%M-%S')
    local raw_file="/Volumes/Mac4TB/scrcpy/thor_bot_raw_$timestamp.mkv"
    local output_file="/Volumes/Mac4TB/scrcpy/thor_bot_$timestamp.mov"

    echo "Recording Bottom Screen (Display 4) at 60fps headless. Press Ctrl+C to stop and process."

    scrcpy --display-id=4 \
           --max-fps=60 \
           --video-bit-rate=32M \
           --video-codec=h265 \
           --audio-codec=raw \
           --audio-buffer=100 \
           --audio-output-buffer=20 \
           --print-fps \
           --no-window \
           --no-audio-playback \
           --record="$raw_file" &
    local scrcpy_pid=$!

    trap 'echo "\nStopping recording..."; kill $scrcpy_pid 2>/dev/null; break' INT

    while kill -0 $scrcpy_pid 2>/dev/null; do
        sleep 1
    done

    trap - INT

    echo "Recording stopped. Processing to 60 CFR with ProRes 422 & 32-bit float PCM..."

    ffmpeg -y -i "$raw_file" \
           -filter:v "fps=60" \
           -c:v prores_videotoolbox -profile:v standard -r 60 \
           -c:a pcm_f32le \
           "$output_file"

    rm -f "$raw_file"
    echo "Done! Saved to: $output_file"
}

function thor-rec() {
    mkdir -p /Volumes/Mac4TB/scrcpy/

    local timestamp=$(date +'%Y-%m-%d_%H-%M-%S')
    local raw0="/Volumes/Mac4TB/scrcpy/thor_raw0_$timestamp.mkv"
    local raw4="/Volumes/Mac4TB/scrcpy/thor_raw4_$timestamp.mkv"
    local output_file="/Volumes/Mac4TB/scrcpy/thor_combined_$timestamp.mov"

    echo "Starting direct dual-display scrcpy recording..."

    # 1. Record Display 0 (Main) in background
    scrcpy --display-id=0 \
           --max-fps=60 \
           --video-bit-rate=32M \
           --video-codec=h265 \
           --audio-codec=raw \
           --audio-buffer=100 \
           --audio-output-buffer=20 \
           --no-playback \
           --no-window \
           --no-audio-playback \
           --record="$raw0" &
    local pid1=$!

    # 2. Record Display 4 (Secondary) in background
    scrcpy --display-id=4 \
           --max-fps=60 \
           --video-bit-rate=16M \
           --video-codec=h265 \
           --audio-codec=raw \
           --no-audio \
           --no-playback \
           --no-window \
           --record="$raw4" &
    local pid2=$!

    echo "Recording in progress! Press Ctrl+C to stop and process."

    trap 'echo "\nStopping recordings..."; kill $pid1 $pid2 2>/dev/null; break' INT

    while kill -0 $pid1 2>/dev/null || kill -0 $pid2 2>/dev/null; do
        sleep 1
    done

    trap - INT

    echo "Recording stopped. Post-processing and stacking with ProRes 422 & 32-bit float PCM..."

    # 3. Post-process: Force 60 CFR, hstack side-by-side, ProRes 422, 32-bit float PCM audio
    ffmpeg -y -i "$raw0" -i "$raw4" \
           -filter_complex "[0:v]fps=60[v0]; [1:v]fps=60[v1]; [v0][v1]hstack[v]" \
           -map "[v]" -map 0:a \
           -c:v prores_videotoolbox -profile:v standard \
           -c:a pcm_f32le \
           "$output_file"

    # Clean up raw temp files
    rm -f "$raw0" "$raw4"

    echo "Processing complete! Final master saved to: $output_file"
}
This adds 3 different scripts as command aliases to my terminal.
thor-rec:
- accesses both screens of the Ayn Thor via scrcpy as separate devices (they provide separate feeds over adb)
- tells scrcpy to use maximum-supported bitrate (32M) in H.265 at 60fps (top screen) and 16M 60fps (bottom screen)
- records both the top and bottom screens of my Ayn Thor to separate MKV files with incremental file names and matching timestamps
- captures raw PCM uncompressed audio along with them
- once recording has finished (by me hitting ctrl-c to stop the command), runs FFMPEG to combine the two files into one, lock to a constant frame rate at 60FPS, encoded to ProRes via the Apple hardware encoder (prores_videotoolbox) in 422
- delete the original recordings
thor-top:
- accesses the top screen of the Ayn Thor via scrcpy at the full 120fps the Thor supports
- tells scrcpy to use maximum-supported bitrate (32M) in H.265 at 120fps
- records both the top screen of my Ayn Thor to a MKV file with incremental file naming
- captures raw PCM uncompressed audio along with it
- once recording has finished (by me hitting ctrl-c to stop the command), runs FFMPEG to lock to a constant frame rate at 120FPS, encoded to ProRes via the Apple hardware encoder (prores_videotoolbox) in 422
- delete the original recordings
thor-bot:
- accesses the bottom screen of the Ayn Thor via scrcpy at 60fps
- tells scrcpy to use maximum-supported bitrate (32M) in H.265 at 60fps
- records both the bottom screen of my Ayn Thor to a MKV file with incremental file naming
- captures raw PCM uncompressed audio along with it
- once recording has finished (by me hitting ctrl-c to stop the command), runs FFMPEG to lock to a constant frame rate at 60FPS, encoded to ProRes via the Apple hardware encoder (prores_videotoolbox) in 422
- delete the original recordings
The post-processing step is handy because it combines both files into one (for dual screen recording), but also necessary because the default video feed from scrcpy is variable frame rate, meaning it can cause sync and playback issues in video editors and some media players. You can just dump the video feed straight to disk from scrcpy without re-encoding, but the file is not very useful as it is.
With all 3 of these scripts, you’re welcome to use hevc_videotoolbox or even h264_videotoolbox to save on disk space. I find Apple’s encoder settings for these two to be hellish, so I stick with ProRes.
You will need to change your target recording directories to be appropriate for you.
Save and close your ~/.zshrc file and close your terminal.
Now, to add this to my dock in Mac OS, I used the Mac OS Script Editor program to create a .app to run the command in the terminal. Open Script Editor > New Document.
tell application "Terminal" activate -- If a Terminal window is already open, open a clean tab in it. Otherwise, open a new window. if (count of windows) > 0 then do script "thor-rec && exit" in front window else do script "thor-rec && exit" end if end tell
I saved it to my user home folder as “Thor Capture.app”, changing the file type from script to .app and making sure “Stay open after run handler” is unchecked.
Then right-click the .app file, click “Get Info” and drag the PNG icon (I made it from a press image of the Ayn Thor) onto the tiny icon in the top-left of the Info panel. Close it and the .app’s icon changes.
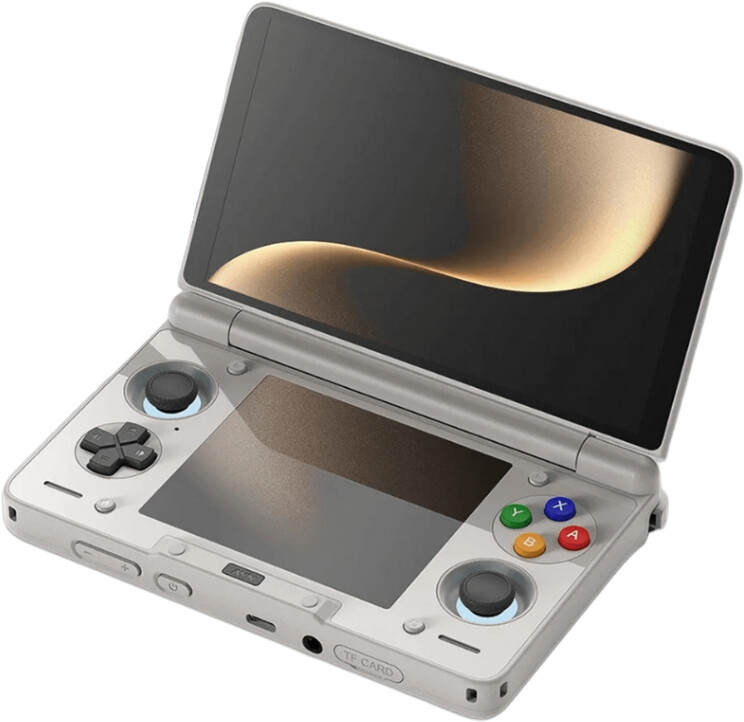
PNG and ICO files available here.
Now you can drag it to your dock, and a single click initiates capture. CTRL + C ends capture and begins the transcode. Then it’s done!
Repeat the previous steps for creating a .app, but replace “thor-rec” with “thor-top” and/or “thor-bot” if you want launchers for those, as well.
The dock icon isn’t necessary; you can just call these commands from the command line if you wish.
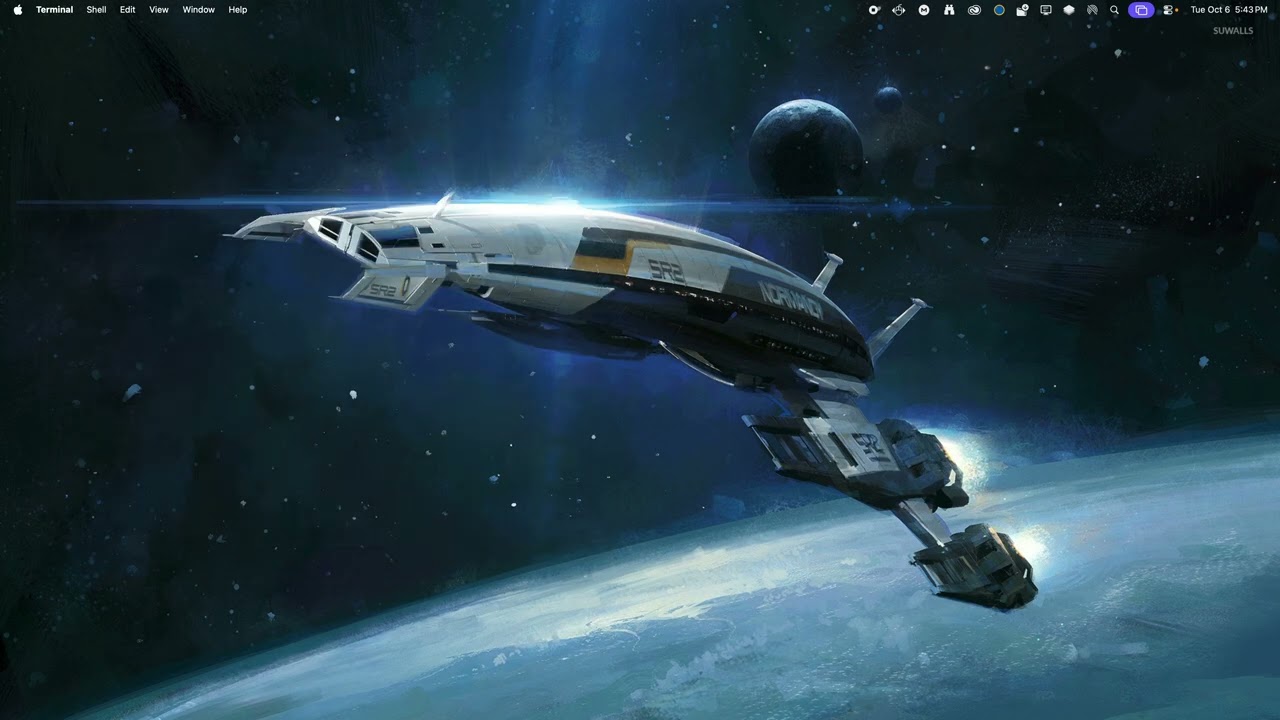
Here’s an example of this in action:
Thor Capture on Linux
First, install scrcpy, v4l2, and adb (along with FFMPEG if you don’t have it) via your package manager. For me in CachyOS, I would use:
sudo pacman -S scrcpy ffmpeg android-tools v4l2loopback-ctl
With this script, we’ll use the Linux virtual device tools (v4l2) to create two virtual “webcam” devices, send the scrcpy feeds to them, then stack them and encode them in FFMPEG all at once.
Next, let’s make the two virtual devices to map our scrcpy feeds to:
sudo modprobe v4l2loopback devices=2 exclusive_caps=1,1 card_label=“Thor Main”,“Thor Secondary”
Verify that these show up via:
v4l2-ctl --list-devices
Now we can start capturing with some scripts.
FOLLOW INSTRUCTIONS IN REPLY TO ADD THIS TO BOOT AND MAP DEVICES TO video10/video11!
I use KATE as my text editor, so I use this to make my first script for the fish terminal (default in CachyOS). This script will differ if you’re using bash or zsh FYI!
nano ~/.config/fish/functions/thor-rec.fish
Now this is the command used for the main, combined recording script:
function thor-rec
    # Ensure the destination directory exists
    mkdir -p /home/addie/Videos/scrcpy/

    # Create a unified timestamp for this recording session
    set -l timestamp (date +'%Y-%m-%d_%H-%M-%S')
    set -l output_file "/home/addie/Videos/scrcpy/thor_combined_$timestamp.mkv"

    echo "Initializing AYN Thor mixed-framerate v4l2 streams..."

    # 1. Stream Display 0 (Main) at 60fps with full 32M bitrate
    scrcpy --display-id=0 \
           --port=27183 \
           --v4l2-sink=/dev/video10 \
           --video-bit-rate=32M \
           --video-codec=h265 \
           --video-encoder=c2.qti.hevc.encoder.cq \
           --max-fps=60 \
           --no-audio \
           --no-playback \
           --no-window &
    set -l scrcpy_pid1 $last_pid
# Short stagger to prevent ADB socket collision
    sleep 1
    # 2. Stream Display 4 (Secondary) capped at lower bitrate
    scrcpy --display-id=4 \
           --port=27184 \
           --v4l2-sink=/dev/video11 \
           --max-fps=30 \
           --video-codec=h265 \
           --video-encoder=c2.qti.hevc.encoder.cq \
           --video-bit-rate=8M \
           --no-audio \
           --no-playback \
           --no-window &
    set -l scrcpy_pid2 $last_pid

    # Give scrcpy a moment to hook into the v4l2 devices
    sleep 2

    echo "Recording synchronized 60FPS output with NVENC & 32-bit float PCM. Press Ctrl+C to stop."

    # 3. FFmpeg: Ingest, normalize bottom to 60fps via filter, hstack, and encode
    ffmpeg -framerate 60 -f v4l2 -i /dev/video10 \
           -framerate 30 -f v4l2 -i /dev/video11 \
           -f pulse -i default \
           -filter_complex "[1:v]fps=60[bottom]; [0:v][bottom]hstack[v]" \
           -map "[v]" -map 2:a \
           -c:v hevc_nvenc -preset p7 -cq 18 -r 60 \
           -c:a pcm_f32le \
           "$output_file"

    echo "Stopping scrcpy background streams..."
    kill $scrcpy_pid1 $scrcpy_pid2 2>/dev/null
    wait $scrcpy_pid1 $scrcpy_pid2 2>/dev/null

    echo "Recording successfully saved to: $output_file"
end
I’m using a lower bitrate and framerate on the bottom screen to try to reduce potential performance impacts.
You will need to change your target recording directory, and if you’re not using a Nvidia GPU you will need to update your FFMPEG encoding settings in section 3 for your GPU vendor.
The scripts for the top screen and bottom screen independent recordings are a little simpler since you don’t have to combine 2 feeds.
To make the top script:
nano ~/.config/fish/functions/thor-top.fish
The script:
function thor-top
mkdir -p /home/addie/Videos/scrcpy/
set -l timestamp (date +‘%Y-%m-%d_%H-%M-%S’)
set -l raw_file “/home/addie/Videos/scrcpy/thor_top_raw_$timestamp.mkv”
set -l output_file “/home/addie/Videos/scrcpy/thor_top_$timestamp.mkv”

echo "Recording Top Screen (Display 0) at 120fps headless. Press Ctrl+C to stop and process."

# Run scrcpy in the foreground so Ctrl+C gracefully stops it and lets the script continue
scrcpy --display-id=0 \
       --max-fps=120 \
       --video-bit-rate=32M \
       --video-codec=h265 \
       --audio-codec=raw \
       --audio-buffer=100 \
       --audio-output-buffer=20 \
       --print-fps \
       --no-window \
       --no-audio-playback \
       --record="$raw_file"

echo "Recording stopped. Processing to 120 CFR with NVENC HEVC & 32-bit float PCM..."

ffmpeg -y -i "$raw_file" \
       -filter:v "fps=120" \
       -c:v hevc_nvenc -preset p7 -cq 18 -r 120 \
       -c:a pcm_f32le \
       "$output_file"

rm -f "$raw_file"
echo "Done! Saved to: $output_file"

end
To make the bottom script:
nano ~/.config/fish/functions/thor-bot.fish
The script:
function thor-bot
mkdir -p /home/addie/Videos/scrcpy/
set -l timestamp (date +‘%Y-%m-%d_%H-%M-%S’)
set -l raw_file “/home/addie/Videos/scrcpy/thor_bot_raw_$timestamp.mkv”
set -l output_file “/home/addie/Videos/scrcpy/thor_bot_$timestamp.mkv”

echo "Recording Bottom Screen (Display 4) at 60fps headless. Press Ctrl+C to stop and process."

# Run scrcpy in the foreground so Ctrl+C gracefully stops it and lets the script continue
scrcpy --display-id=4 \
       --max-fps=60 \
       --video-bit-rate=32M \
       --video-codec=h265 \
       --audio-codec=raw \
       --audio-buffer=100 \
       --audio-output-buffer=20 \
       --print-fps \
       --no-window \
       --no-audio-playback \
       --record="$raw_file"

echo "Recording stopped. Processing to 60 CFR with NVENC HEVC & 32-bit float PCM..."

ffmpeg -y -i "$raw_file" \
       -filter:v "fps=60" \
       -c:v hevc_nvenc -preset p7 -cq 18 -r 60 \
       -c:a pcm_f32le \
       "$output_file"

rm -f "$raw_file"
echo "Done! Saved to: $output_file"

end
Reload your terminal and now you can use the “thor-rec”, “thor-top”, and “thor-bot” commands to record your Thor from the CLI.
If you want to make an icon shortcut for these, we’ll make a .desktop launcher that will run the command. Let’s make a new launcher file (shortcut):
kate ~/.local/share/applications/thor-rec.desktop
This is my .desktop file. You may want to change “konsole” to your terminal of choice, and change the icon location.
[Desktop Entry]
Type=Application
Name=Thor Record Combined
Comment=Headless dual-display scrcpy recording for AYN Thor
Exec=konsole -e fish -c “thor-rec”
Icon=/home/addie/programs/Thor Capture Scripts/thor.ico
Terminal=false
Categories=AudioVideo;Recorder;
Save the file.
PNG and ICO files available here.
Now make the .desktop file executable:
chmod +x ~/.local/share/applications/thor-rec.desktop
Now run the launcher from your application launcher!
There is an annoying issue with how waits are handled with the .desktop method which prevents it from closing properly, so I do recommend using the CLI instead. Will update if I get this fixed.
Ultimately, I think I’m too disappointed in the framerate of scrcpy to fully use this. It’s super handy when I need it, but as I’ve worked on these scripts, I’ve gone from the stance of “kids these days don’t care, it’s fiiiine” to really being bugged by the frame drops. I’ve tried changing codecs, dropping the secondary display’s resolution and frame rate - I just can’t get a smooth 60fps this way, even for single screen capture. I shall update if I find a solution, but despite ending yesterday super stoked that I pulled this low-friction method off, I’m pretty sure I’m just going to rely on it for low-stakes/dual screen captures and use a USB C-HDMI capture setup for top screen 60fps captures.
I’ve also confirmed this framerate issue applies to DualCPY, too. it’s just a scrcpy issue.